22![]()
![]()
![]() EN
EN ![]()
![]()
![]()
![]()
![]()
![]()
![]()
![]()
![]()
![]()
![]()
![]()
![]()
![]()
![]()
![]()
![]()
![]()
![]()
![]()
![]()
![]()
![]()
![]()
![]()
![]()
![]()
![]()
![]()
![]()


 HOW
HOW
 THE
THE
 DE
DE S
S KTOP
KTOP
 WORKS
WORKS
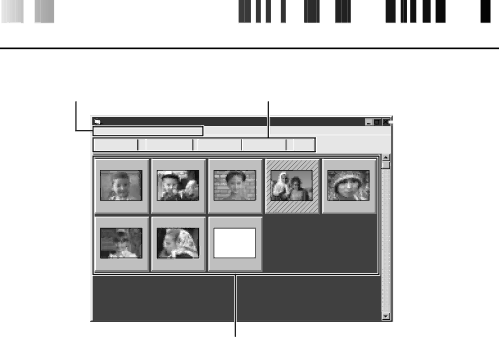
MAIN DESKTOP WINDOW
1 Menu bar | 2 Control buttons | ||||||||||
|
|
| JLIP Video Capture |
|
|
|
|
|
|
| Close button |
|
|
|
|
|
|
|
|
|
|
| |
File Edit |
|
|
|
|
| |
CAPTURE | TRANSFER | MEMORY | INPUT | JLIP |
| |
01 | 02 | 03 |
|
| 04 | 05 |
00:01:23:12 | 00:02:17:21 | 00:07:01:19 | 00:37:05:06 | 00:20:39:18 | ||
06 | 07 | 08 |
|
|
|
|
00:39:03:11 | 00:47:53:03 | - |
|
|
|
|
3 Image display area
1 Menu bar
Displays function menus. See the next page for detailed information.
2 Control buttons
•CAPTURE button (☞ page 27)
Press to CAPTURE a desired image from an image source. When pressed, an index image appears under this button.
•TRANSFER button (☞ pages 29 through 30)
The TRANSFER button is used to start Automatic Transfer. Automatic Transfer is divided into Program Capture and Interval Capture.
•MEMORY/INPUT buttons These buttons do not function.
•JLIP button (☞ pages 43 through 69)
The JLIP Video Capture software and JLIP Video Producer software cannot run simultane- ously. When you want to run the JLIP Video Producer software, press this button to call up a cross bar and run the software. To resume using the JLIP Video Capture software, first select "Close Serial" from