User Manual
For models
iCV-01a / iCV-03a / iCV-08
WebCAM
Chapter 1 Introduction
CONTENTS
Chapter 2 Hardware Installation Chapter 3 Web Interface
Chapter 4 View Images Using PDA / PPC / mobile
2.3.2 Advanced for password and HTTP configuration 2.5 About
Appendix A Router Configuration
Appendix B Methods to Update WebCAM Firmware
Appendix C IP Address, Subnet and Gateway Appendix D Glossary
Section 1. Features
Chapter 1 Introduction
Section 2. WebCAM as a Remote Surveillance System
Section 3. Package Contents
Chapter 1 Introduction
LED Status Indicators on WebCAM
Signal definition
Light indicators on WebCAM LAN Port LED
Step
Chapter 2 Hardware Installation
Step
Step
Section 1. Introduction
Chapter 3 Web Interface
Section 2. Using the Web Interface
2.1 View Video 2.2 Information 2.3 Basic Settings
2.4 Advanced Settings
2.1 To View Video
Using ActiveX Controls
Once installed, the video will stream Show current date & time
To change Video Codec, click Click Save to confirm changes
2 administrator permission or 3 operator permission
Using Sun Java Controls
WebCAM - user manual
This indicates the full pan-tilt range of the USB Camera
This is the area and position the camera is currently showing
Chapter 3 Web Interface
ii. Network Status
2.2 Information
2.2.1 System Status
i. System Information
2.2.3 Event Log
2.2.2 Current Connections
WebCAM - user manual
Fig.12 WebCAM Event Log Administrator privilege
Fig.13 WebCAM Event Log Operator privilege
Chapter 3 Web Interface
2.3.4 Account Settings
2.3 Basic Settings
2.3.1 Camera Settings
2.3.1 Camera Settings 2.3.2 Patrol Settings 2.3.3 Network
Camera Position
2.3.2 Patrol Settings
i. Patrol Setting
Color
Auto Patrolling
HotSpot Settings
Patrol Setting
Boundary
IP Address
2.3.3 Network
Pan speed / Tilt Speed
ii. IP Address
HTTP Port Number
Primary DNS Server IP
Secondary DNS Server IP
iv. Port Number
Use Default Domain Name
5. Registration complete. Account details shown as follows
ii. Other Dynamic DNS
Service Provider
Login Name
Login Password
Login Password
2.3.3 Account Settings
When Connection should be made
Login Name
IP Filter
Password
User Name
Permission
Blocked IP List
ii. Block IP address
2.4.1 Event Notification 2.4.2 Motion Detection 2.4.3 Image Recording
2.4 Advanced Settings
2.4.1 Event Notification
2.4.4 Email / FTP 2.4.5 System Settings 2.4.6 Image Server
Events
Recipients
Chapter 3 Web Interface
Fig.27 Event Selection List
WebCAM - user manual
Fig.28 Event Notification User Login Details Date, Time, Camera & IP
Chapter 3 Web Interface
Fig.29 Event Notification Camera A Motion Detected
a. Always On or
2.4.2 Motion Detection
Enable
i. Camera A or Camera B
Schedule
Detection Sensitivity
Send image every … seconds
Stop sending after … emails or image idle for … seconds
Email Server …
Loop from … to …
Digits …
Send Email
Begin - End hhmm
2.4.3 Image Recording
Enable
i. Camera A or Camera B
2.4.4 E-mail / FTP
Fig.35 Email / FTP settings page
Fig.34 Email of Image Recorded
Email Server Requires Authentication
i. FTP Settings
Password
ii. Email Settings
iii. Sending Test Mail
iv. Email Address Book
2.4.5 System Settings
Time Server
System Time Updates
Fig.45 System Settings page
i. System Time
System Time yyyy/mm/dd hhmmss
iii. LED Settings
iv. SNMP Settings
Time Zone Relative to GMT
System Location
2.4.6 Image Server
System Name
System Contact
Enable
Choose Yes to enable this feature or No to disable
Community
iMage Server
WebCAM - user manual
Chapter 3 Web Interface
Unit added to My List
Click on either opened “eye” icon to view the camera
2.4.7 Language
i. Interface Language
ii. Email Preference
Restore Previous Configuration
2.4.8 About
ii. Save / Restore Settings
Save Current Configuration
Chapter 4 View Images Using PDA / PPC / mobile
Approximately 6KB @ 320x240 vs. 17KB @ 640x480 resolution
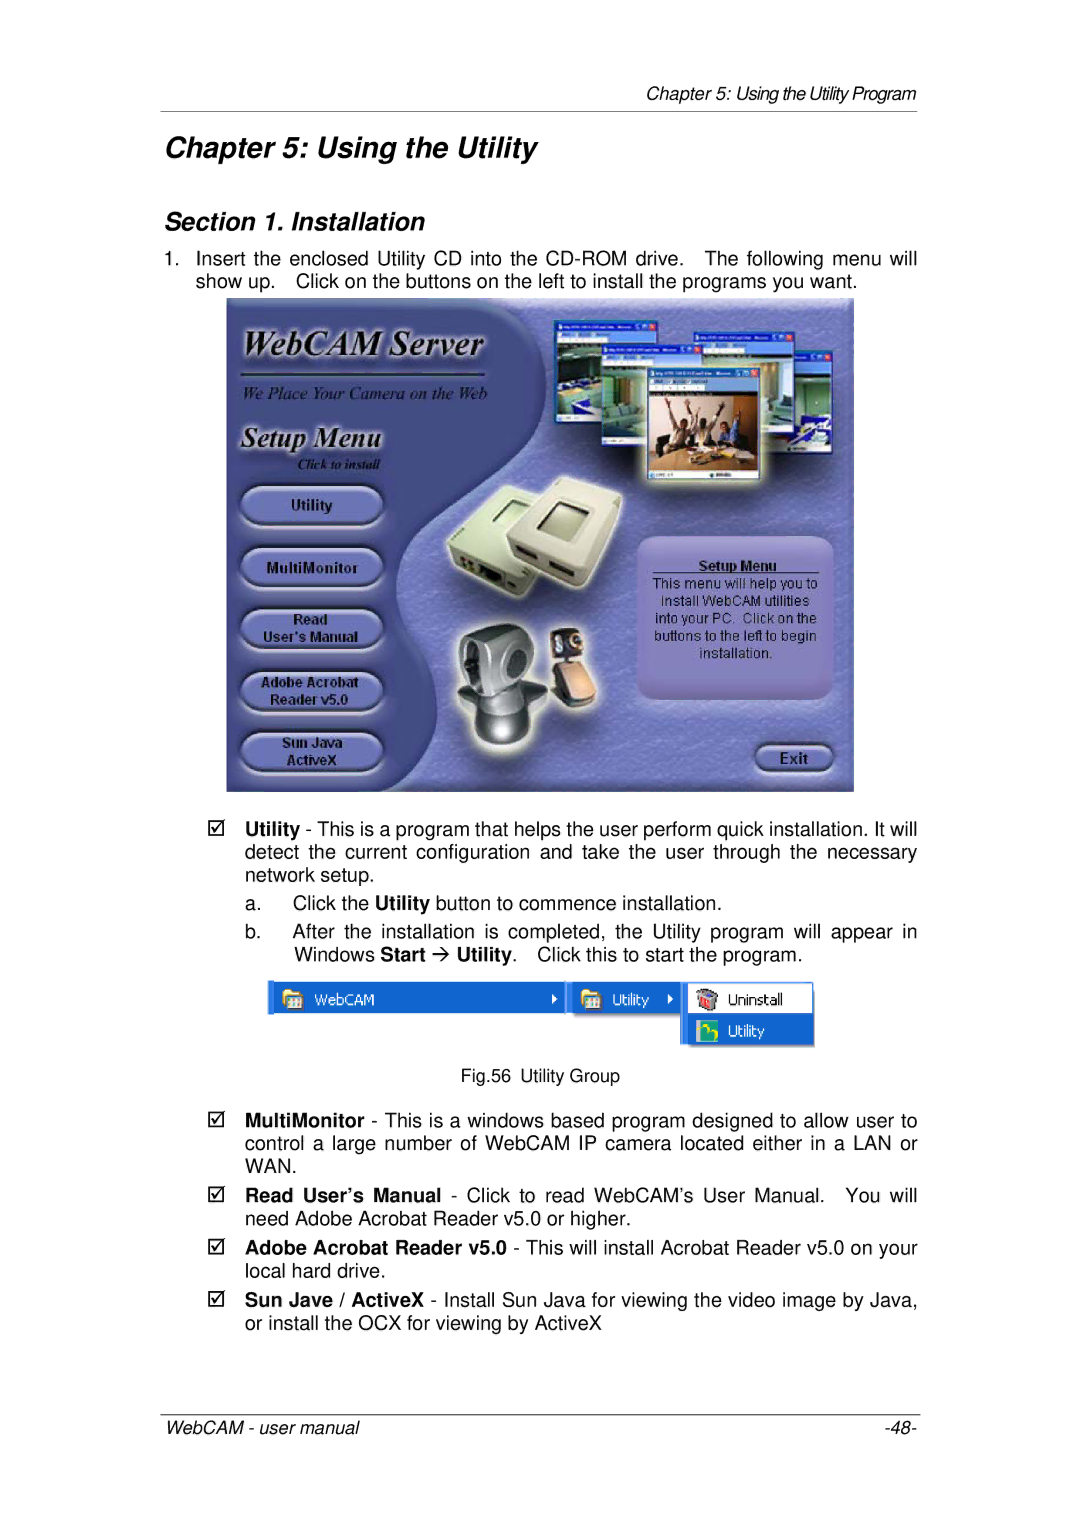
Section 1. Installation
Chapter 5 Using the Utility
Basic Settings Account Settings
Section 2. Using the Utility Program
2.1 Setup Wizard
2. Click on Setup Wizard
Use the following IP Address
Obtain an IP address by DHCP
a. Select Enable PPPoE connection
Obtain an IP address by Bootp
9. Click Next to confirm these configuration
WebCAM - user manual
2.2 Launch WebCAM
Chapter 5 Using the Utility Program
Click either one to Launch WebCAM camera
WebCAM login screen will appear Click Apply
2.3.1 IP Address
2.3 IP Configuration
Obtain an IP address by DHCP
2.3.2 Advanced for password and HTTP configuration
Obtain an IP address by Bootp
i. Device Password when accessing from Utility
ii. Management Protocol
b. Click IP Configuration
2.5 Upgrade Firmware
2.6 About
2.7 Refresh
Chapter 5 Using the Utility Program
The user can do a manual search by clicking the Refresh
WebCAM - user manual
Section 1. Installing MultiMonitor
Section 2. Using MultiMonitor
Chapter 6 MultiMonitor
Fill out the necessary information shown below and click Next
Chapter 6 MultiMonitor
WebCAM - user manual
Click Finish and the MultiMonitor Logon window below will pop up. Just click OK to start using MultiMonitor
This shows that the camera is off-line
2.1 Device
Once detected, the following will show in the main window
This shows that the camera is online and active
Remote Port
a. Access by WebCAM Address Host Address
b. Access by Image Server Image Server Address
User Password
Use this function to change WebCAM IP Address & Port Number
Chapter 6 MultiMonitor
WebCAM - user manual
Account
Display the current Camera settings
Password
Camera Select
Detect
Display the Motion Detection Settings
Enable Motion
when Motion
avifilethree digit numerical sequence
Image
Compression
Path
Notified Email Address
Configure Settings for Email Notification
Server Require Authentication
Click Settings… then enter your Account Name and Account Password
Utility, IP Configuration
SNMP Settings
Using SNMP to update network ports
Web Interface, Basic Settings Network
show the current date and time
Window Marquee tool
Release and the program will zoom to the marquee area. Increase the resolution for a better image quality
2.3 System
2.2 View
Chapter 6 MultiMonitor
2.4 User
Change Password …
Account Management…
Account
2.5 Help
Password
Add User…
Step
2.6 Drag-and-Drop Feature
Step
Step
WebCAM - user manual
Step
Double click on the icon on the desktop, to view the images
Chapter 6 MultiMonitor
Port Forwarding for WebCAM
Appendix A Router Configuration
MN-500
1. Log into your router using your router IP
F5D6230-3 - Wireless Cable/DSL Gateway Router
Private Port
DI-604/DI - 614+/DI-624 1. Log into your router using your router IP
Enabled/Disabled
TrueMobile 2300 Wireless Broadband Router
BEFSR41 - EtherFast Cable/DSL Router
MN-100 - Wired Base Station MN-500 - Wireless Base Station
RP614 - Web Safe Router MR814 - Wireless Router
C. Action ALLOW always
D. Local Server Address Enter the IP address of the camera
ORiNOCO BG-2000 Broadband Gateway
SpeedStream 2602 - 2-Port DSL/Cable Router
7. Under Internal Port No type in 8. Under External Port No type in
1. Log into your router using your router IP
For ID #2
Method 1 Through WebCAM Web Page
Appendix B Methods to Update WebCAM Firmware
Method 2 Using the Utility software
Appendix B Methods to Update WebCAM Firmware
IP Addresses
Appendix C IP Address, Subnet and Gateway
Communities
Gateways
Subnet Mask Routing and Filtering
Subnetting and Subnet Masks
Appendix D Glossary
Term
Definition