Chapter 3: Web Interface
2.3 Basic Settings
The following option allows the user to customize their unit.
2.3.1Camera Settings
2.3.2Patrol Settings
2.3.3Network
2.3.4Account Settings
2.3.1 Camera Settings
Use this section to set up the USB camera.
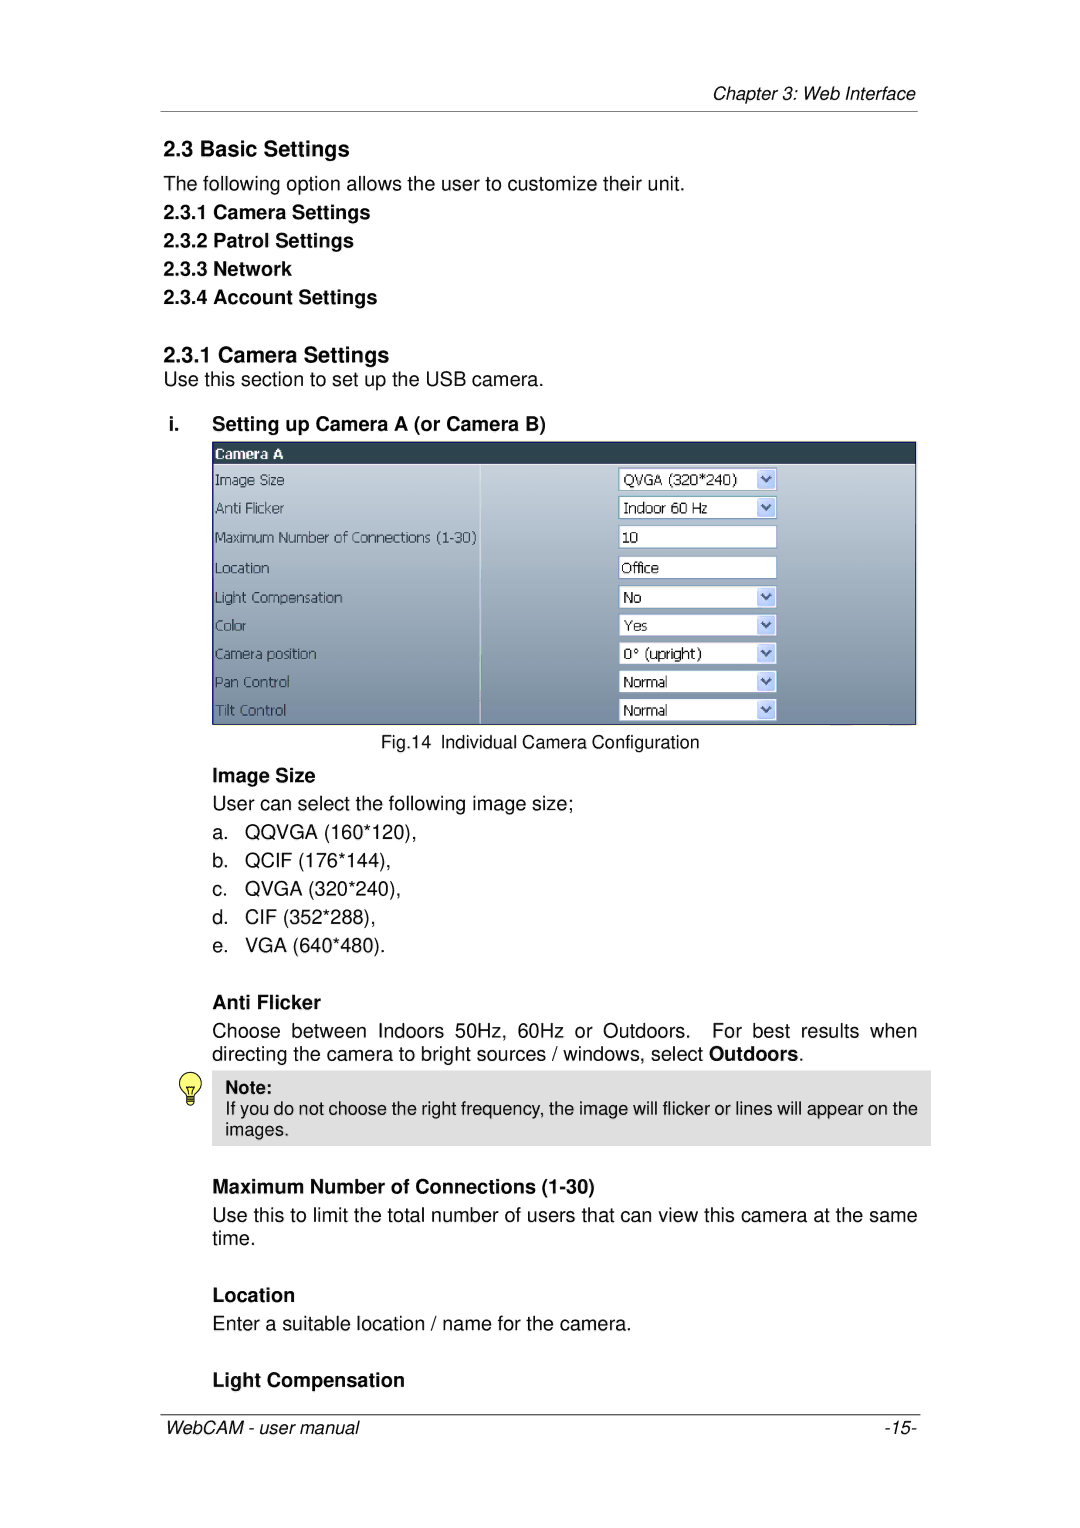
i.Setting up Camera A (or Camera B)
Fig.14 Individual Camera Configuration
Image Size
User can select the following image size;
a.QQVGA (160*120),
b.QCIF (176*144),
c.QVGA (320*240),
d.CIF (352*288),
e.VGA (640*480).
Anti Flicker
Choose between Indoors 50Hz, 60Hz or Outdoors. For best results when directing the camera to bright sources / windows, select Outdoors.
Note:
If you do not choose the right frequency, the image will flicker or lines will appear on the images.
Maximum Number of Connections
Use this to limit the total number of users that can view this camera at the same time.
Location
Enter a suitable location / name for the camera.
Light Compensation
WebCAM - user manual |