Note: Several sets of screws are provided with the system. These screws are designed for racks with prethreaded holes. Check the documentation for your rack and use the appropriate set of screws; most racks use one of the sizes. If screws are provided with your rack, you can use those as well.
mTo measure and mark the position of the system in the rack, you can use the metal mounting template that came with the system. You can also use a pen or pencil and some masking tape or similar tape to mark the position on the rack.
mClear a table, cart, or other flat surface near the rack. You’ll need to put the system on it temporarily during installation, and you can use it to lay out the brackets and screws you’ll use to attach the system to the rack.
Determine the Position for the System in the Rack
Review the guidelines for positioning the system in the rack (see “Choosing the System’s Location in the Rack” on page 20). Then follow these steps to measure and mark a specific location.
1Determine the exact position where you want to attach the bottom edge of the system and mark it on one side of the rack. To be sure there is room for the system at this position in the rack, the space available must be at least 5.25 inches from bottom to top.
The distance between holes may vary somewhat on racks made by different manufacturers.
2Use the template included with the system to mark the same spot on the other side of the rack.
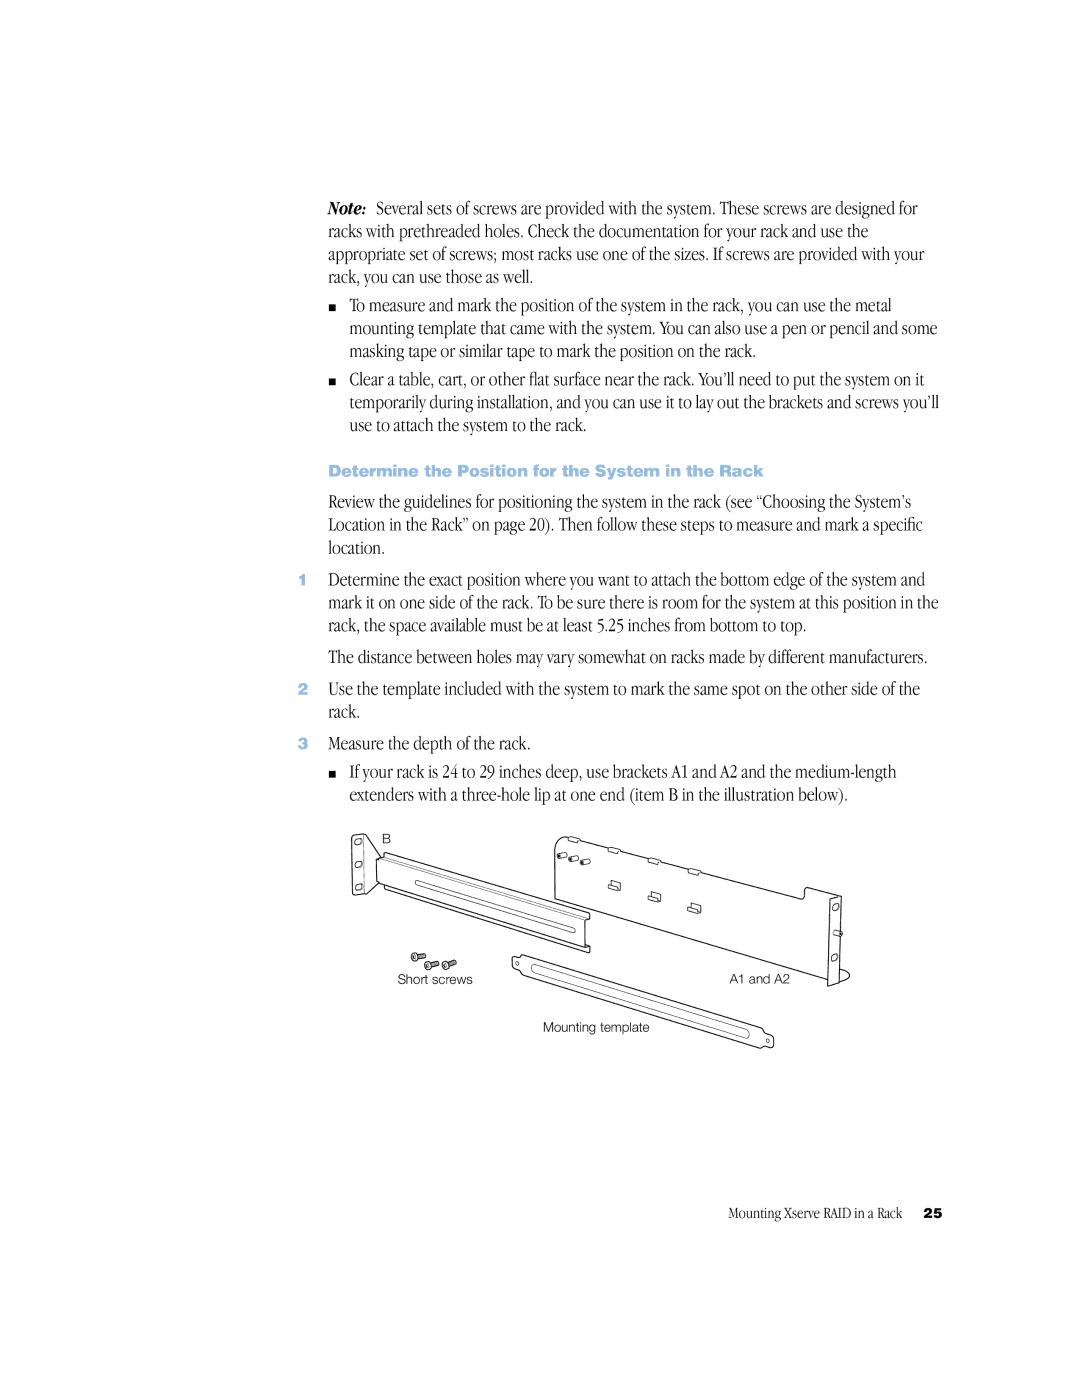
3Measure the depth of the rack.
m If your rack is 24 to 29 inches deep, use brackets A1 and A2 and the
B
Short screws | A1 and A2 |
Mounting template
Mounting Xserve RAID in a Rack | 25 |