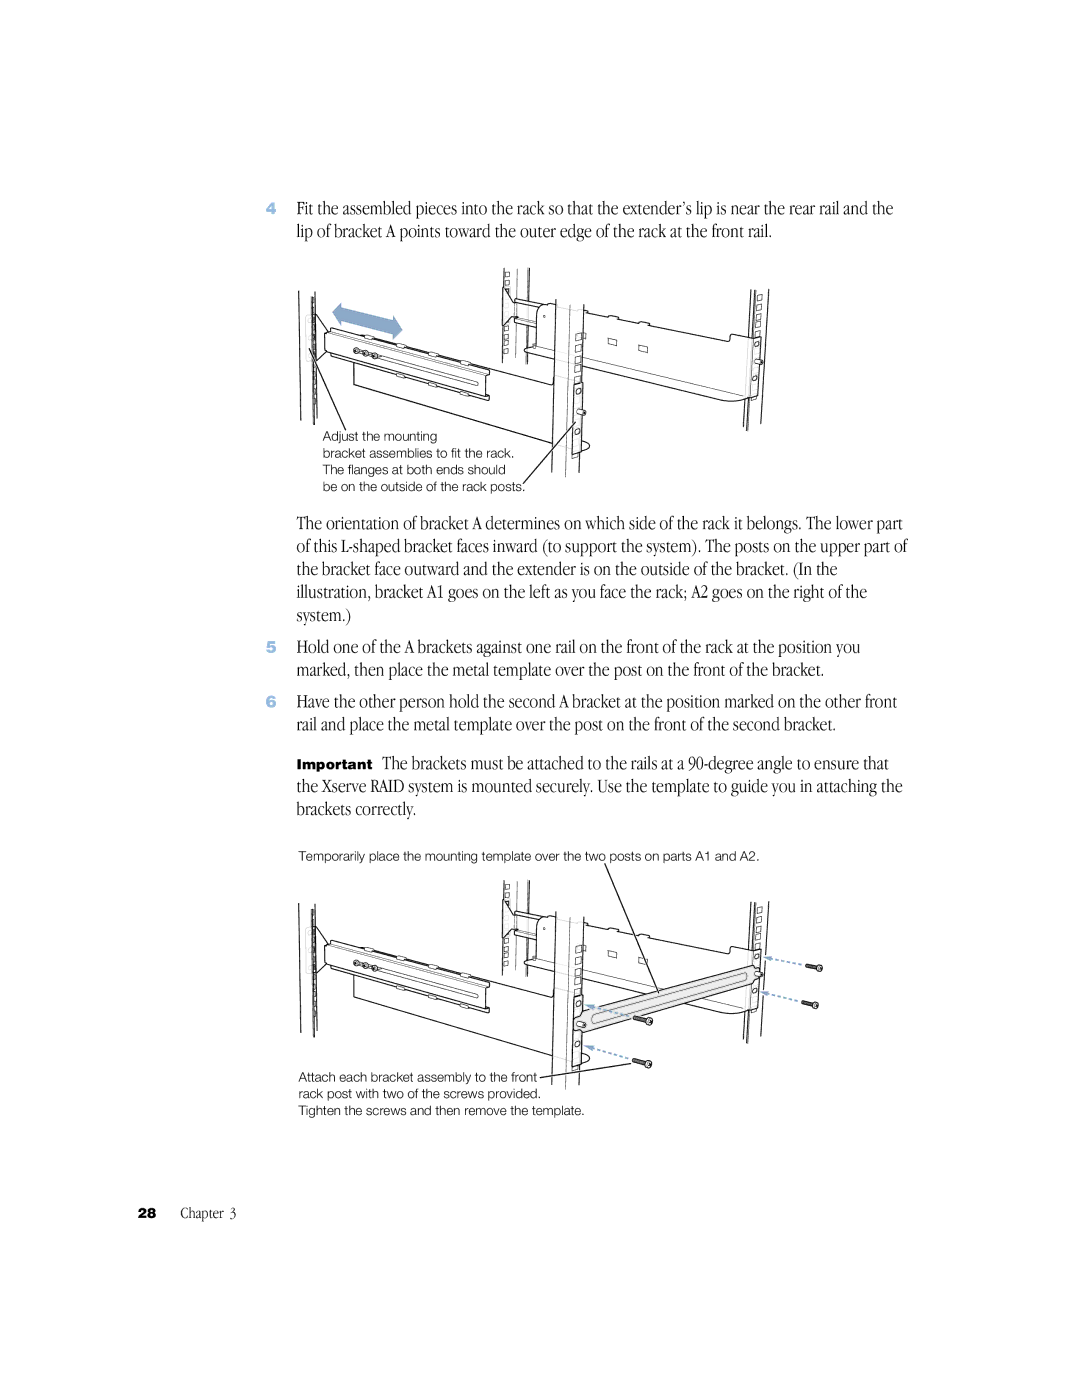
4Fit the assembled pieces into the rack so that the extender’s lip is near the rear rail and the lip of bracket A points toward the outer edge of the rack at the front rail.
Adjust the mounting
bracket assemblies to fit the rack. The flanges at both ends should be on the outside of the rack posts.
The orientation of bracket A determines on which side of the rack it belongs. The lower part of this
5Hold one of the A brackets against one rail on the front of the rack at the position you marked, then place the metal template over the post on the front of the bracket.
6Have the other person hold the second A bracket at the position marked on the other front rail and place the metal template over the post on the front of the second bracket.
Important The brackets must be attached to the rails at a
Temporarily place the mounting template over the two posts on parts A1 and A2.
Attach each bracket assembly to the front ![]() rack post with two of the screws provided.
rack post with two of the screws provided.
Tighten the screws and then remove the template.
28 Chapter 3