Connecting Power to the System
The final step in preparing the system is connecting a power cord to each power supply on the back panel of Xserve RAID.
Follow these steps to connect the two power cords.
1Lift the small support clip on the system’s back panel, then connect one of the power cords to the socket at the lower right of one power supply.
Note: Be sure to use the power cords supplied with the system to ensure that the clip holds them securely and avoids accidental removal of a cord. If you received more than two power cords, use the ones with plugs compatible with the electrical supply for your location.
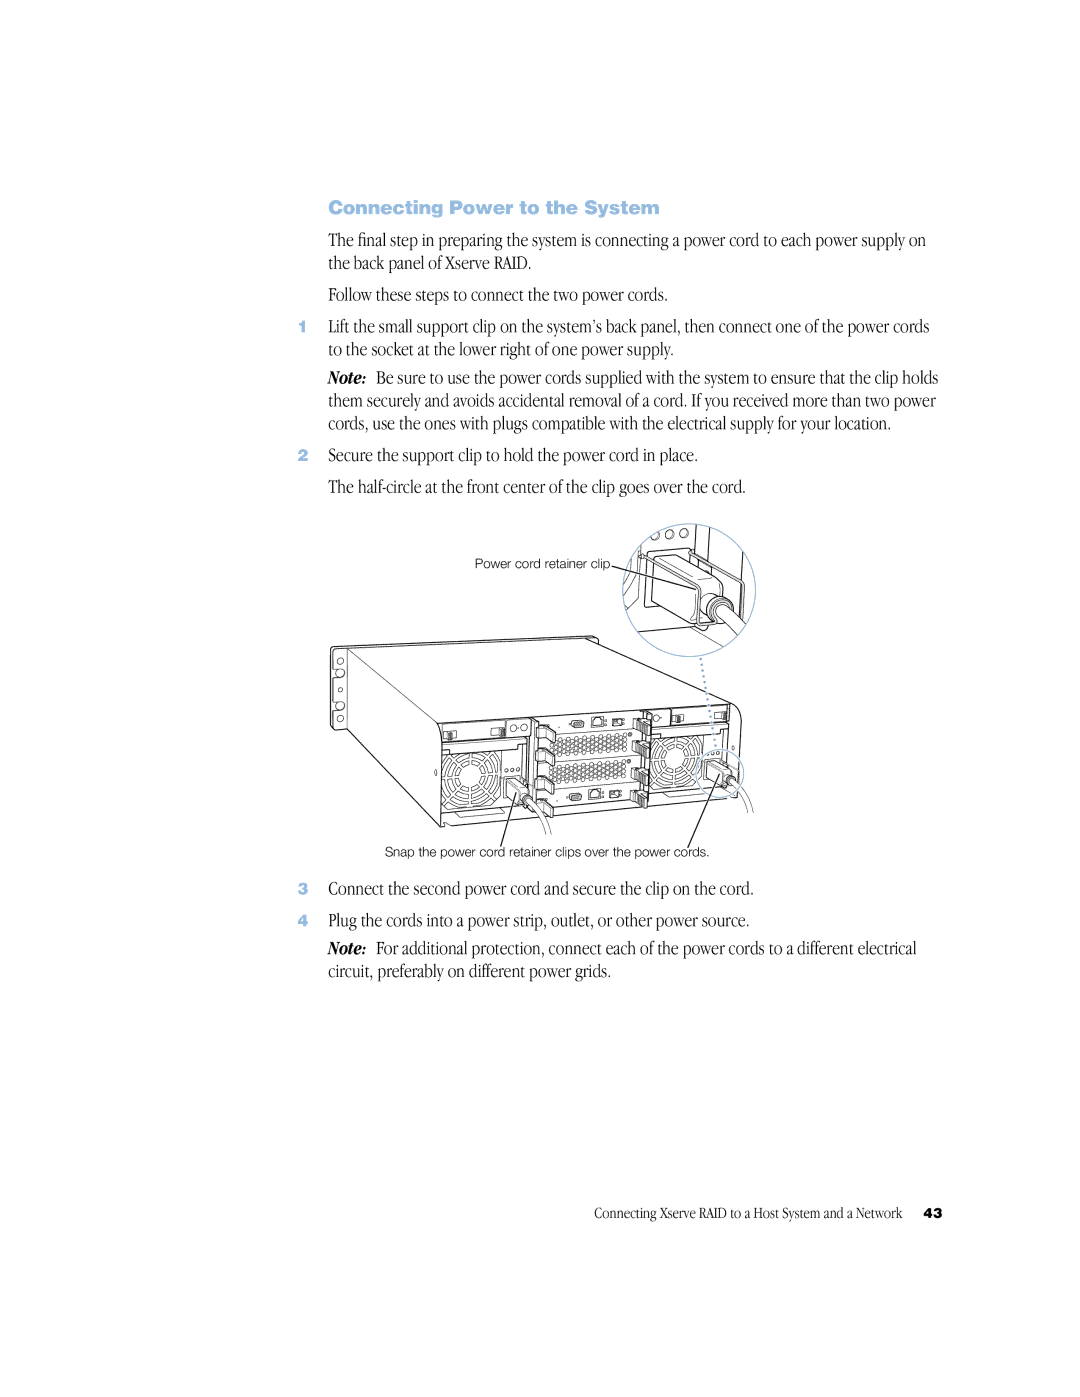
2Secure the support clip to hold the power cord in place.
The
Power cord retainer clip
Snap the power cord retainer clips over the power cords.
3Connect the second power cord and secure the clip on the cord.
4Plug the cords into a power strip, outlet, or other power source.
Note: For additional protection, connect each of the power cords to a different electrical circuit, preferably on different power grids.
Connecting Xserve RAID to a Host System and a Network | 43 |