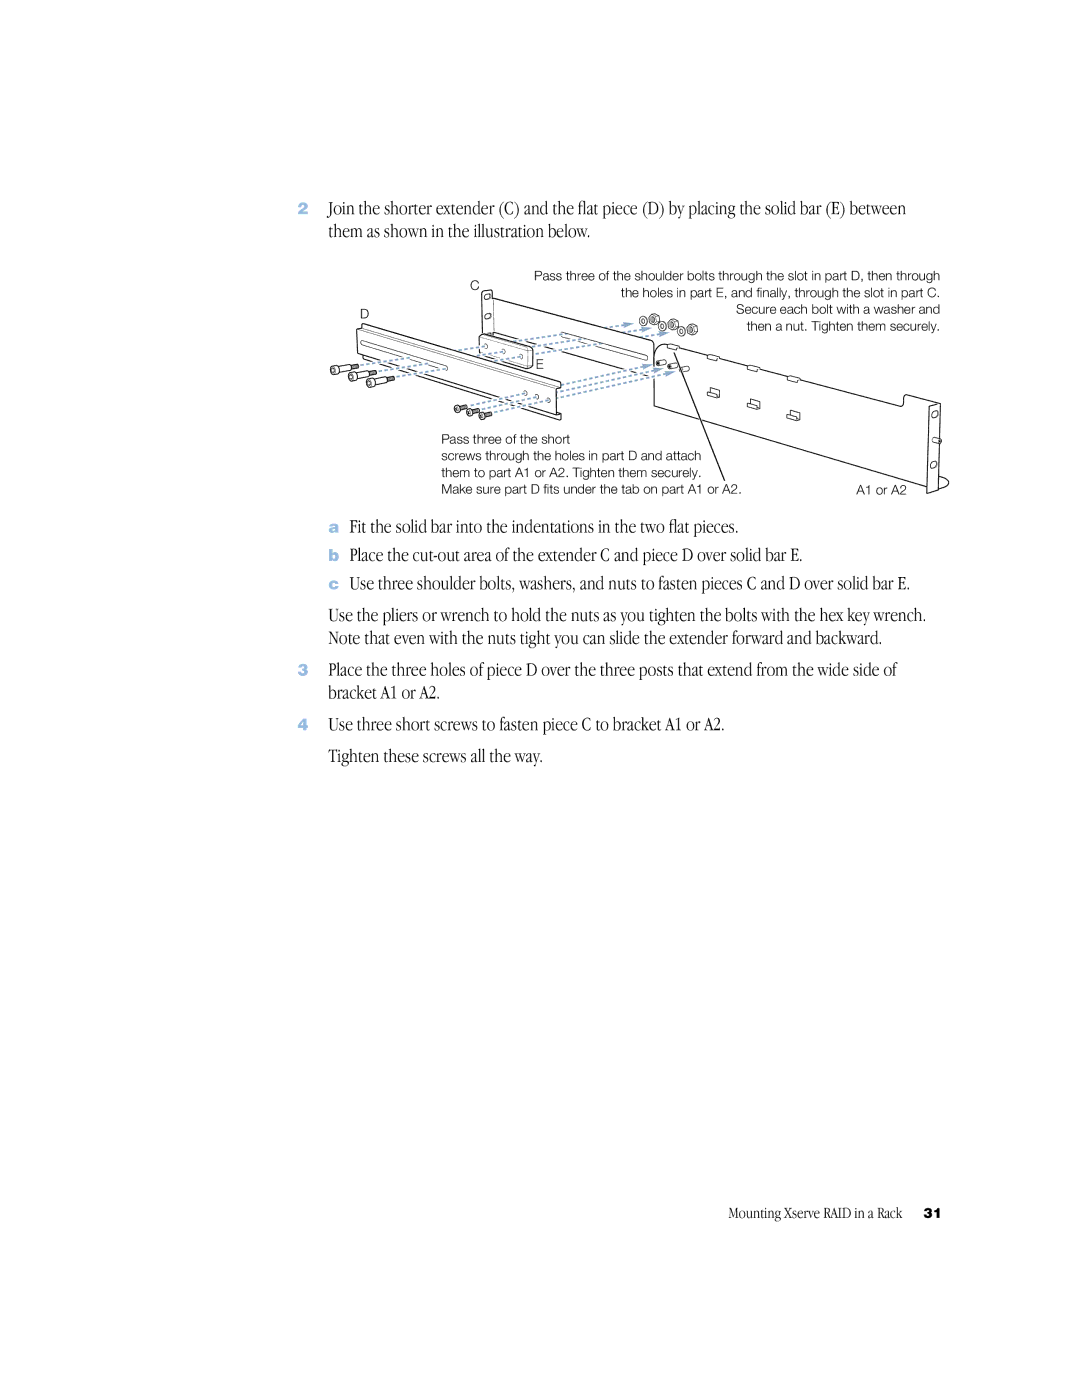
2Join the shorter extender (C) and the flat piece (D) by placing the solid bar (E) between them as shown in the illustration below.
Pass three of the shoulder bolts through the slot in part D, then through
| C | the holes in part E, and finally, through the slot in part C. | |
|
| ||
D |
| Secure each bolt with a washer and | |
|
| then a nut. Tighten them securely. | |
|
|
| |
| E |
|
|
| Pass three of the short |
|
|
| screws through the holes in part D and attach |
| |
| them to part A1 or A2. Tighten them securely. |
| |
| Make sure part D fits under the tab on part A1 or A2. | A1 or A2 | |
aFit the solid bar into the indentations in the two flat pieces.
bPlace the
cUse three shoulder bolts, washers, and nuts to fasten pieces C and D over solid bar E.
Use the pliers or wrench to hold the nuts as you tighten the bolts with the hex key wrench. Note that even with the nuts tight you can slide the extender forward and backward.
3Place the three holes of piece D over the three posts that extend from the wide side of bracket A1 or A2.
4Use three short screws to fasten piece C to bracket A1 or A2. Tighten these screws all the way.
Mounting Xserve RAID in a Rack | 31 |
