3Push the two latches together to fully seat the module in the system. If the latches have small tabs on the inside, slide the tabs away from you and then close the tabs.
Note: Keep the packaging and the old controller module. You will need to return the failed component to Apple when you receive a replacement.
Installing or Replacing a Battery Module
You can obtain optional battery modules to protect data in the Xserve RAID controllers’ cache in the event of a power interruption.
The system’s power supplies charge the battery modules when they are installed in the system. You can check a battery’s charge when the module is out of the system by pressing the button on the underside of the module. All four green LEDs light up when the battery module is fully charged. Do not remove a battery module to check its charge; use the RAID Admin software for that purpose. (See the document “Using RAID Admin and Disk Utility” on the CD that came with your system for details.)
If no battery modules are installed in the system, the module compartments have covers that you must remove to install the battery modules.
Follow these steps to install or replace a battery module.
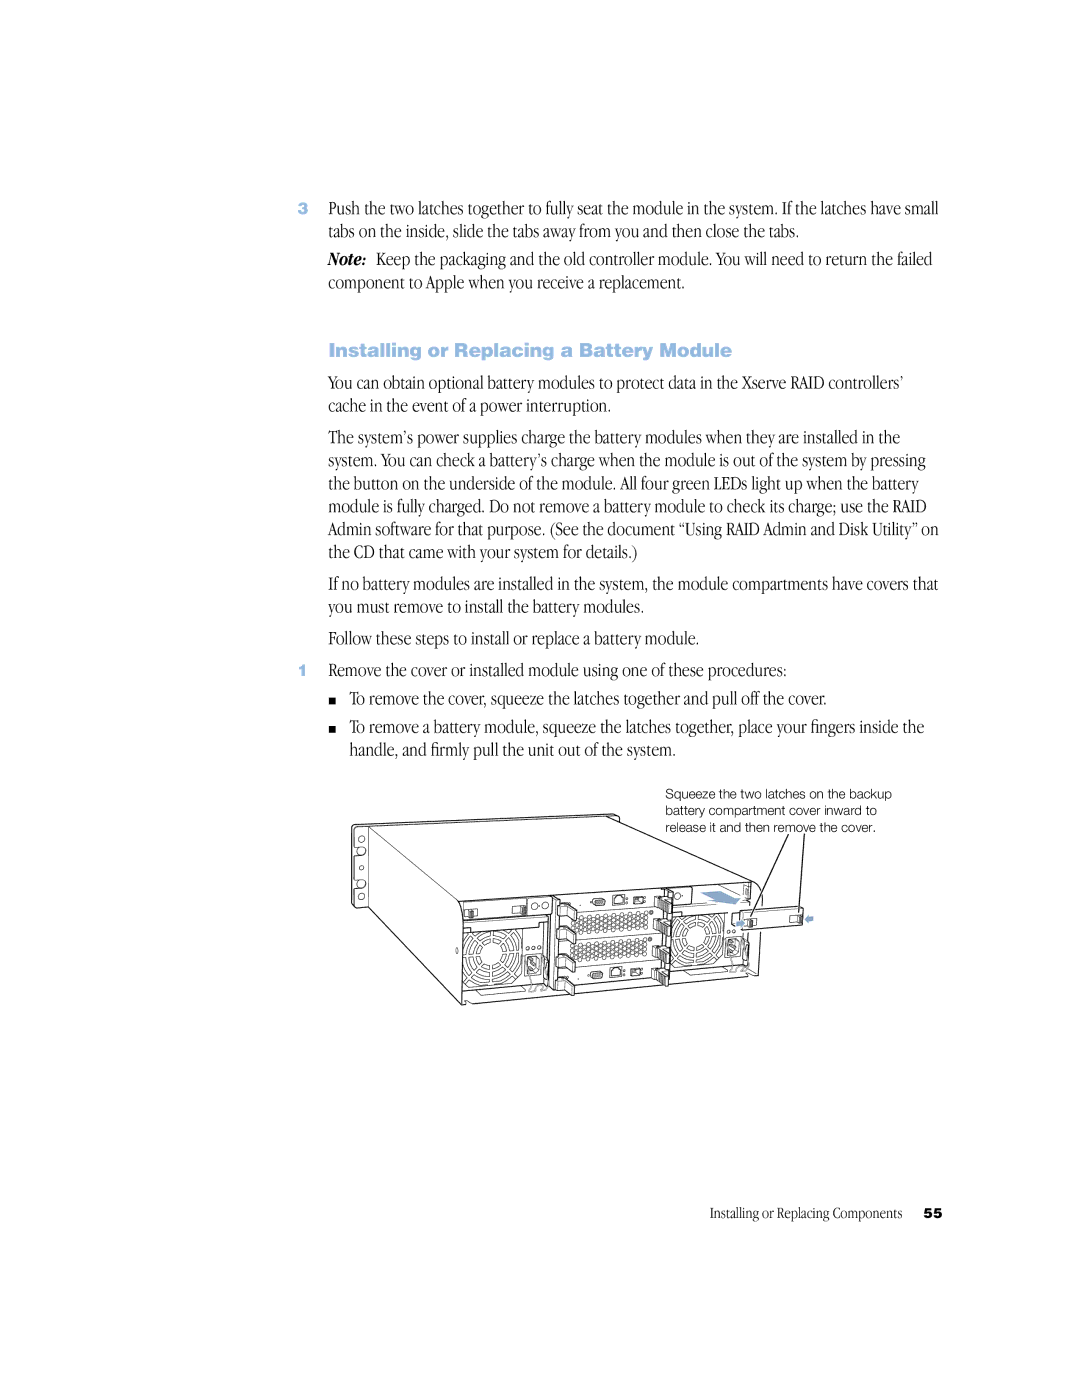
1Remove the cover or installed module using one of these procedures:
m To remove the cover, squeeze the latches together and pull off the cover.
m To remove a battery module, squeeze the latches together, place your fingers inside the handle, and firmly pull the unit out of the system.
Squeeze the two latches on the backup battery compartment cover inward to release it and then remove the cover.
Installing or Replacing Components | 55 |