2.9 IP Assignment
To change the IP address of the switch from the default setting:
1.Access the System IP Configuration menu by typing i in the Configuration menu.
2.Type the command letter of the option you want to change.
3.Type the new address at the prompt.
To cancel a change, type
4.Press Enter. The IP setting change for the switch takes effect.
5.Type q to quit and return to the Configuration menu.
When the reset is complete the switch should be seen on your network. If not, check the IP information again to ensure that all the data is correct.
2.10 SNMP Management
The SNMP Configuration Menu allows you to configure the unit’s read and write community strings, and to enable or disable authentication traps. This menu also allows you to specify which of your network management stations will receive traps from the switch.
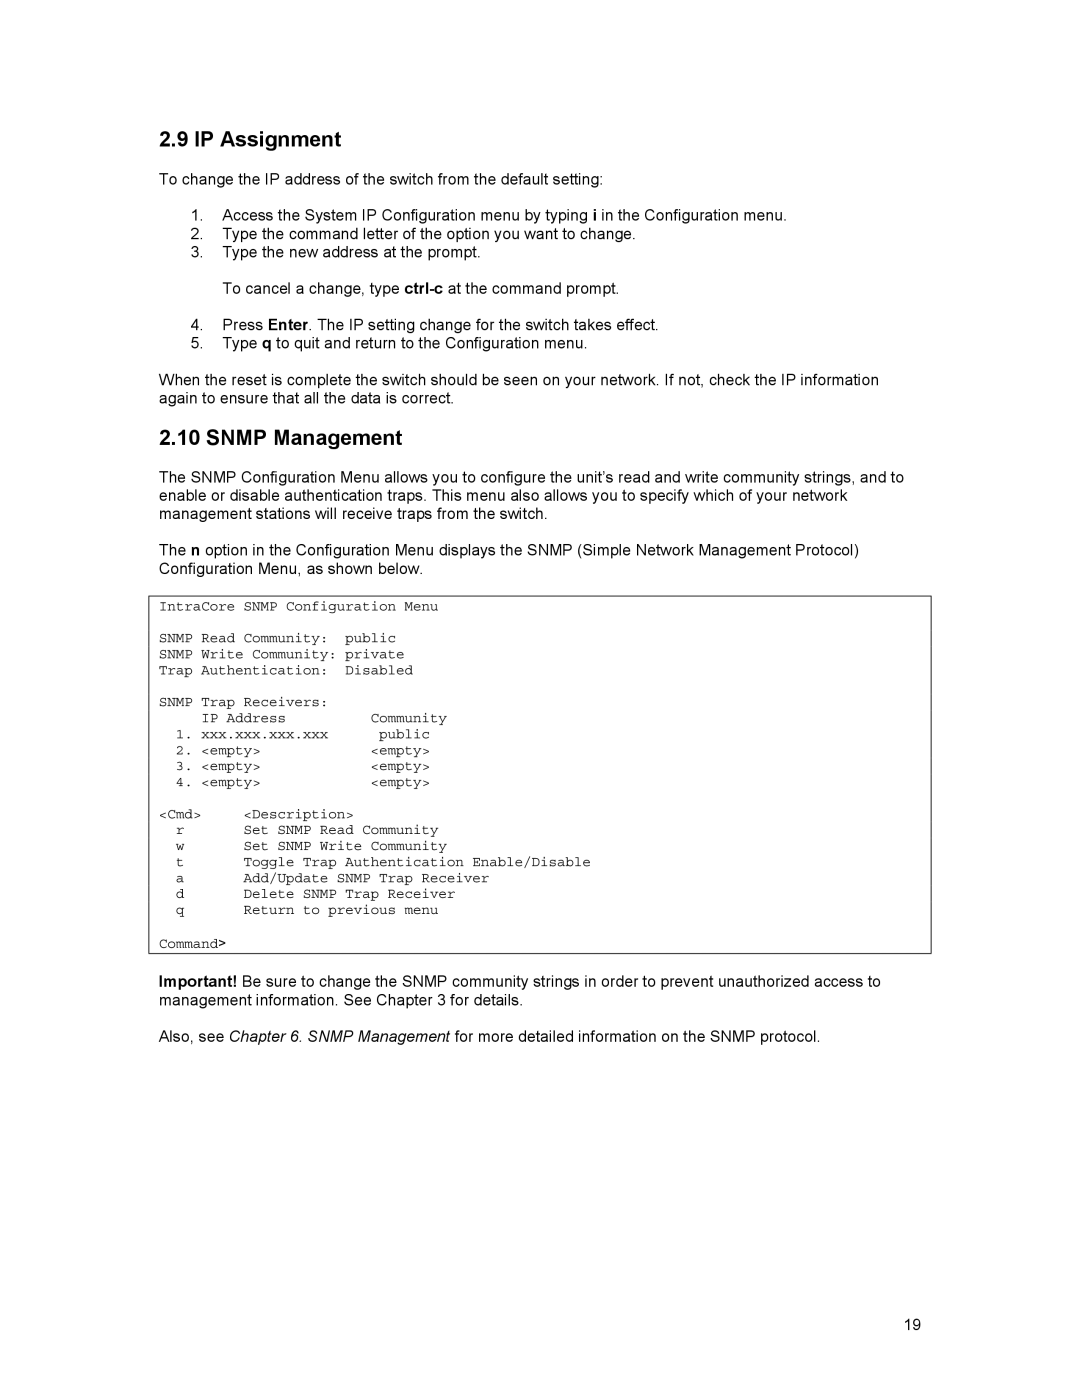
The n option in the Configuration Menu displays the SNMP (Simple Network Management Protocol) Configuration Menu, as shown below.
IntraCore | SNMP Configuration Menu | |
SNMP Read | Community: | public |
SNMP Write Community: private | ||
Trap Authentication: | Disabled | |
SNMP Trap Receivers: |
| |
IP Address | Community | |
1. xxx.xxx.xxx.xxx | public | |
2. <empty> | <empty> | |
3. <empty> | <empty> | |
4. <empty> | <empty> | |
<Cmd> | <Description> | |
r | Set SNMP Read Community | |
w | Set SNMP Write Community | |
t | Toggle Trap Authentication Enable/Disable | |
a | Add/Update SNMP Trap Receiver | |
d | Delete SNMP Trap Receiver | |
q | Return to previous menu | |
Command>
Important! Be sure to change the SNMP community strings in order to prevent unauthorized access to management information. See Chapter 3 for details.
Also, see Chapter 6. SNMP Management for more detailed information on the SNMP protocol.
19