Wall Installation
For best results, follow the directions in “Battery Installation” on page 9 before installing the phone.
1If the wedge is still attached to the underside of the base unit, follow Step 1 in “Battery Installation” on page 9 to remove the wedge.
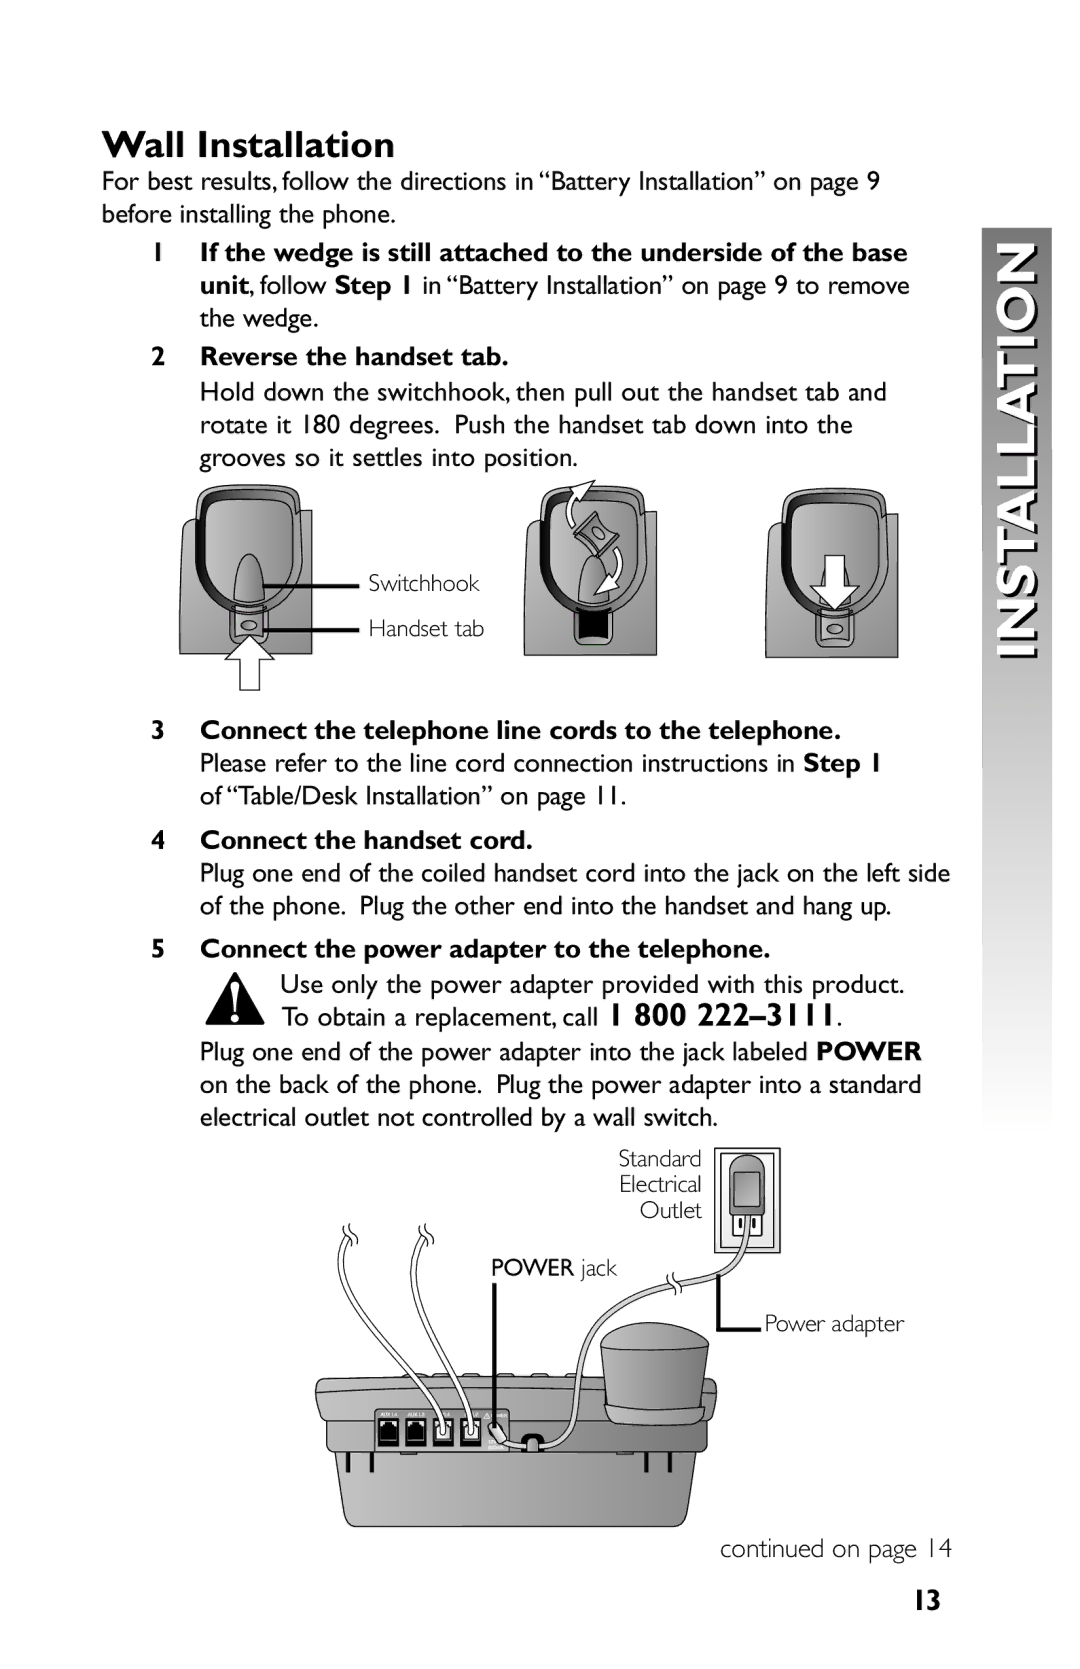
2Reverse the handset tab.
Hold down the switchhook, then pull out the handset tab and rotate it 180 degrees. Push the handset tab down into the grooves so it settles into position.
![]() Switchhook
Switchhook
![]() Handset tab
Handset tab
3Connect the telephone line cords to the telephone. Please refer to the line cord connection instructions in Step 1 of “Table/Desk Installation” on page 11.
4Connect the handset cord.
Plug one end of the coiled handset cord into the jack on the left side of the phone. Plug the other end into the handset and hang up.
5Connect the power adapter to the telephone.
Use only the power adapter provided with this product. To obtain a replacement, call 1 800
Plug one end of the power adapter into the jack labeled POWER on the back of the phone. Plug the power adapter into a standard electrical outlet not controlled by a wall switch.
Standard
Electrical
Outlet
POWER jack
Power adapter
continued on page 14
INSTALLATION |
13