Security and Configuration
Administering Multiple Avaya CT
Servers to Ensure Unique Links
The typical Avaya CT installation involves only one Avaya CT server. If your configuration relies on more than one Avaya CT server, follow the steps described in ‘‘Sample Scenario’’ to ensure that link assignments are unique. Figure
Sample Scenario
This scenario depicts a configuration that uses two Avaya CT servers, AVAYACT1 and AVAYACT2. Both Avaya CT servers communicate with the same MultiVantage system (indicated the Advertised Switch Name and IP Address or Hostname). In this example, AVAYACT1 uses the default DEFINITY G3 PBX Driver IP address (192.168.25.20) and AVAYACT2 uses an assigned DEFINITY G3PBX Driver IP Address (192.168.25.30).
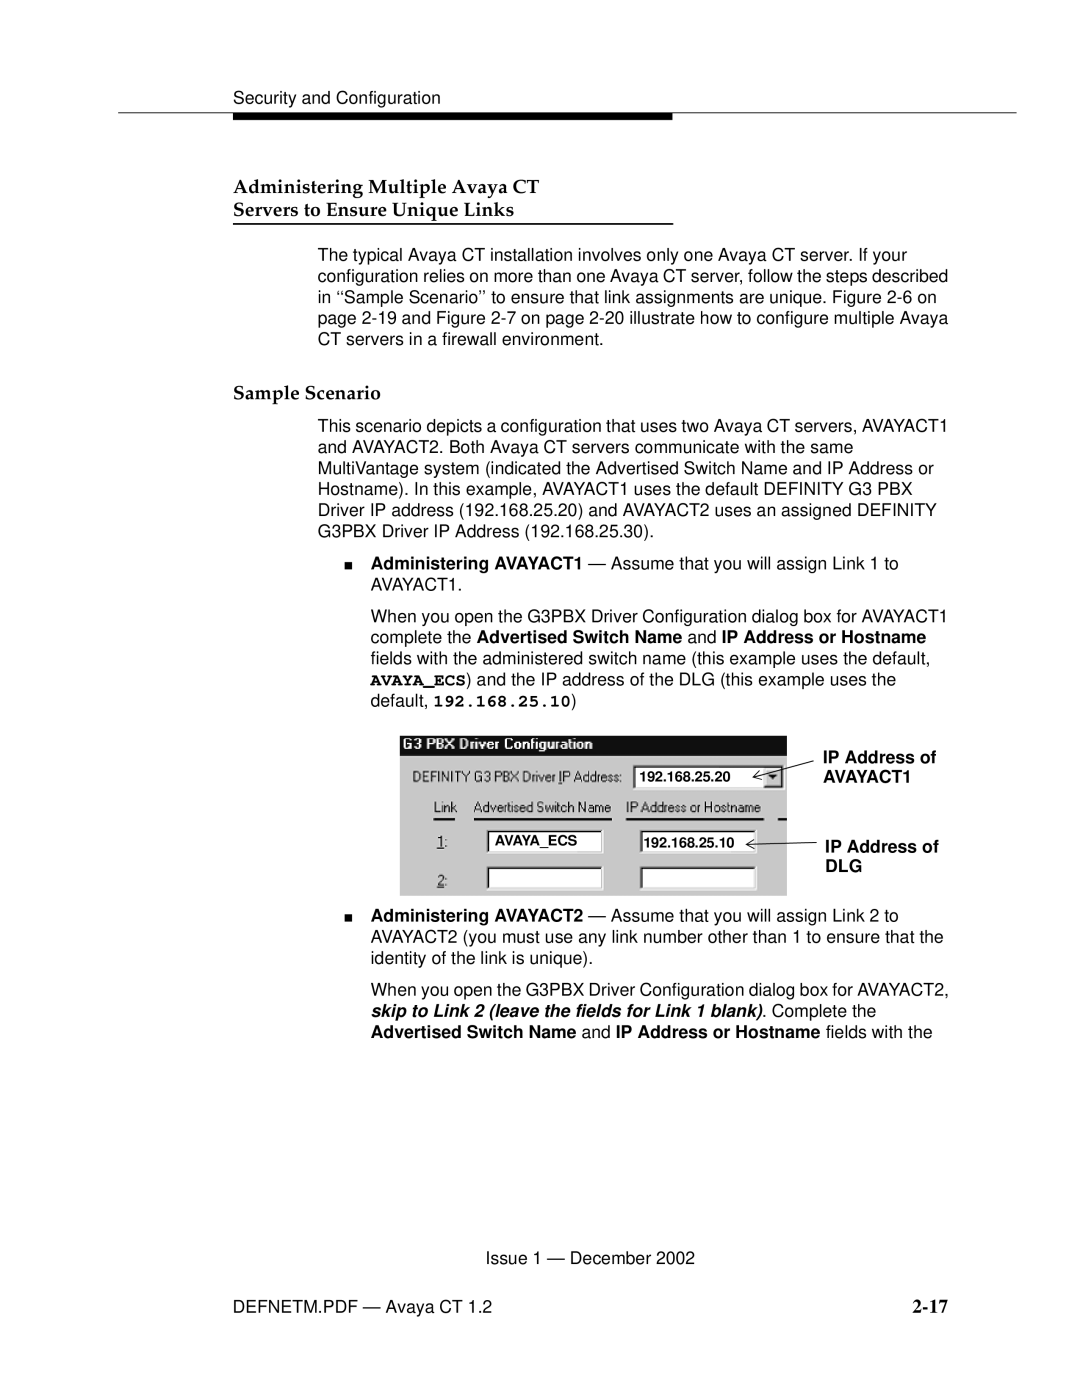
■Administering AVAYACT1 — Assume that you will assign Link 1 to AVAYACT1.
When you open the G3PBX Driver Configuration dialog box for AVAYACT1 complete the Advertised Switch Name and IP Address or Hostname fields with the administered switch name (this example uses the default, AVAYA_ECS) and the IP address of the DLG (this example uses the default, 192.168.25.10)
|
| IP Address of |
| 192.168.25.20 | AVAYACT1 |
AVAYA_ECS | 192.168.25.10 | IP Address of |
|
| DLG |
■Administering AVAYACT2 — Assume that you will assign Link 2 to AVAYACT2 (you must use any link number other than 1 to ensure that the identity of the link is unique).
When you open the G3PBX Driver Configuration dialog box for AVAYACT2, skip to Link 2 (leave the fields for Link 1 blank). Complete the Advertised Switch Name and IP Address or Hostname fields with the
Issue 1 — December 2002
DEFNETM.PDF — Avaya CT 1.2 |