THE ART OF TEXTURING MILK
USING THE HOT WATER FUNCTION
There are two phases to texture milk: Stretching the milk to aerate it and swirling the milk to make it silky smooth and the right temperature.
In practice these two operations should blend into one.
NOTE:
The espresso machine features
a swivel steam wand assembly so the position of the steam wand can be changed to a comfortable angle.
26
BES830XL_IB_Issue1,09.indd
STEP 1 - STRETCHING THE MILK
Hold the jug so the tip of the steam wand is just below the surface of the milk and with your free hand engage the steam. Every so often lower the jug so the steam wand just breaks the surface of the milk and makes a ‘hissing’ sound.
Stretching the milk will increase the volume, so lower the jug as the milk rises to ensure the tip remains just above the surface of the milk.
STEP 2 - SWIRLING THE MILK
After a short while you will have aerated suffi ciently. At this point, adjust the jug so the steam wand is
Continue swirling until milk is at desired temperature (between
When you get the balance right the milk should end up forming a
Lastly, run the Steam function briefl y to remove any residual milk in the steam wand tip. Then give the steam wand a good wipe with a damp cloth.
NOTE:
After 5 minutes of continuous
steaming, the machine will automatically disable the steam function. The steam and hot water lights will flash. When this occurs return the selector control to the ‘Standby’ position.
NOTE:
Always ensure that the frothing attachment has been firmly pushed onto the steam wand and connects with the rubber surround. For best results use cold fresh milk (low fat milk will froth easier). Always clean the steam wand and frothing attachment after every use. Refer to ‘Care and Cleaning’, page 33.
NOTE:
For extracting more espresso immediately after using the steam function, this machine features an
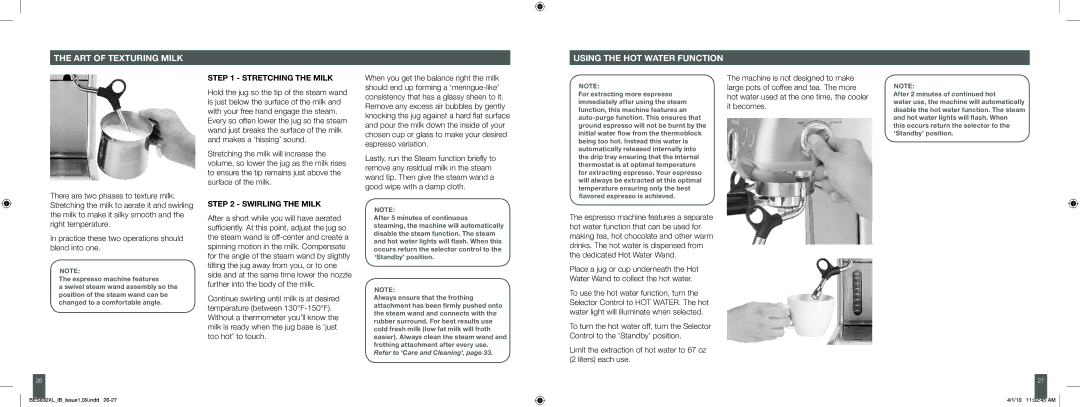
The espresso machine features a separate hot water function that can be used for making tea, hot chocolate and other warm drinks. The hot water is dispensed from the dedicated Hot Water Wand.
Place a jug or cup underneath the Hot Water Wand to collect the hot water.
To use the hot water function, turn the Selector Control to HOT WATER. The hot water light will illuminate when selected.
To turn the hot water off, turn the Selector Control to the ‘Standby’ position.
Limit the extraction of hot water to 67 oz (2 liters) each use.
The machine is not designed to make large pots of coffee and tea. The more hot water used at the one time, the cooler it becomes.
NOTE:
After 2 minutes of continued hot
water use, the machine will automatically disable the hot water function. The steam and hot water lights will flash. When this occurs return the selector to the ‘Standby’ position.
27
4/1/10 11:02:45 AM