E
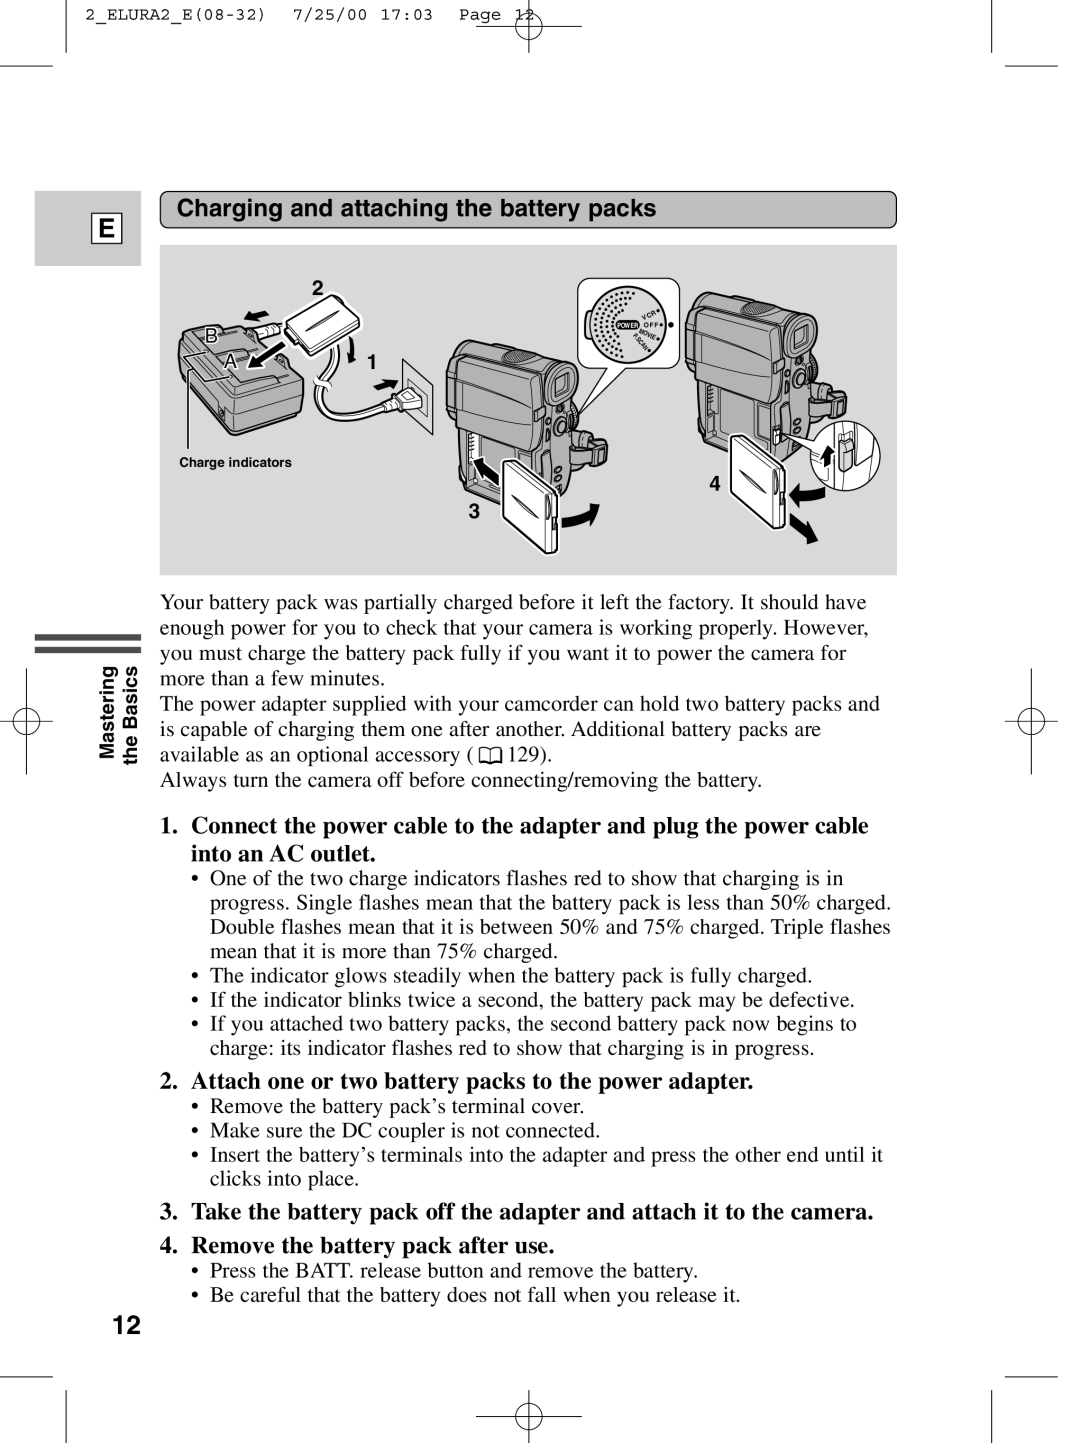
Charging and attaching the battery packs
2
|
|
|
| R |
|
| VC | ||
B | POWER |
| O F F | |
M |
|
|
| |
P | N |
| ||
| O |
| ||
| . |
| V | IE |
| S |
|
| |
| C |
|
| |
| A |
| ||
A | 1 |
|
|
|
Charge indicators
4
3
Mastering the Basics
Your battery pack was partially charged before it left the factory. It should have enough power for you to check that your camera is working properly. However, you must charge the battery pack fully if you want it to power the camera for more than a few minutes.
The power adapter supplied with your camcorder can hold two battery packs and is capable of charging them one after another. Additional battery packs are available as an optional accessory ( ![]() 129).
129).
Always turn the camera off before connecting/removing the battery.
1.Connect the power cable to the adapter and plug the power cable into an AC outlet.
•One of the two charge indicators flashes red to show that charging is in progress. Single flashes mean that the battery pack is less than 50% charged. Double flashes mean that it is between 50% and 75% charged. Triple flashes mean that it is more than 75% charged.
•The indicator glows steadily when the battery pack is fully charged.
•If the indicator blinks twice a second, the battery pack may be defective.
•If you attached two battery packs, the second battery pack now begins to charge: its indicator flashes red to show that charging is in progress.
2.Attach one or two battery packs to the power adapter.
•Remove the battery pack’s terminal cover.
•Make sure the DC coupler is not connected.
•Insert the battery’s terminals into the adapter and press the other end until it clicks into place.
3.Take the battery pack off the adapter and attach it to the camera.
4.Remove the battery pack after use.
•Press the BATT. release button and remove the battery.
•Be careful that the battery does not fall when you release it.
12
