E
Basic Recording
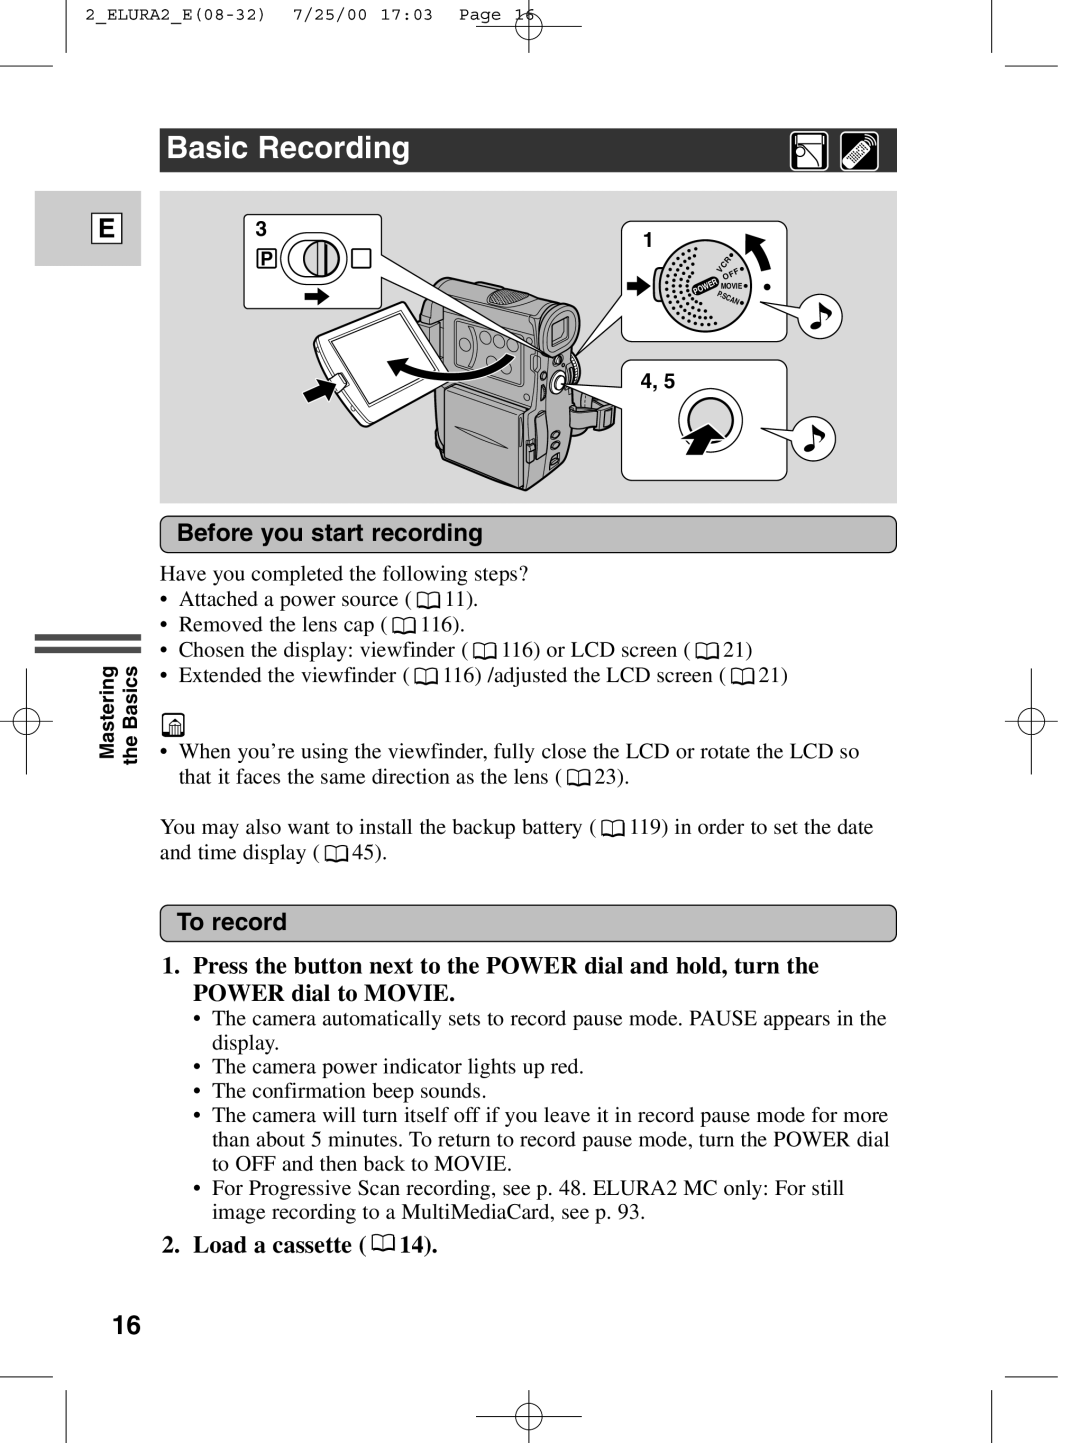
3 | 1 |
| |
P |
| ||
VCRFF | |||
| |||
| O | ||
| POWERP. |
| |
| MOVIE | ||
| SC | ||
|
| AN | |
| 4, 5 |
| |
Mastering the Basics
Before you start recording
Have you completed the following steps?
•Attached a power source ( ![]() 11).
11).
•Removed the lens cap ( ![]() 116).
116).
•Chosen the display: viewfinder ( ![]() 116) or LCD screen (
116) or LCD screen ( ![]() 21)
21)
•Extended the viewfinder ( ![]() 116) /adjusted the LCD screen (
116) /adjusted the LCD screen ( ![]() 21)
21)
•When you’re using the viewfinder, fully close the LCD or rotate the LCD so that it faces the same direction as the lens ( ![]() 23).
23).
You may also want to install the backup battery ( ![]() 119) in order to set the date and time display (
119) in order to set the date and time display ( ![]() 45).
45).
To record
1.Press the button next to the POWER dial and hold, turn the POWER dial to MOVIE.
•The camera automatically sets to record pause mode. PAUSE appears in the display.
•The camera power indicator lights up red.
•The confirmation beep sounds.
•The camera will turn itself off if you leave it in record pause mode for more than about 5 minutes. To return to record pause mode, turn the POWER dial to OFF and then back to MOVIE.
•For Progressive Scan recording, see p. 48. ELURA2 MC only: For still image recording to a MultiMediaCard, see p. 93.
2.Load a cassette (  14).
14).
16