Press the < > button until the setting returns to .
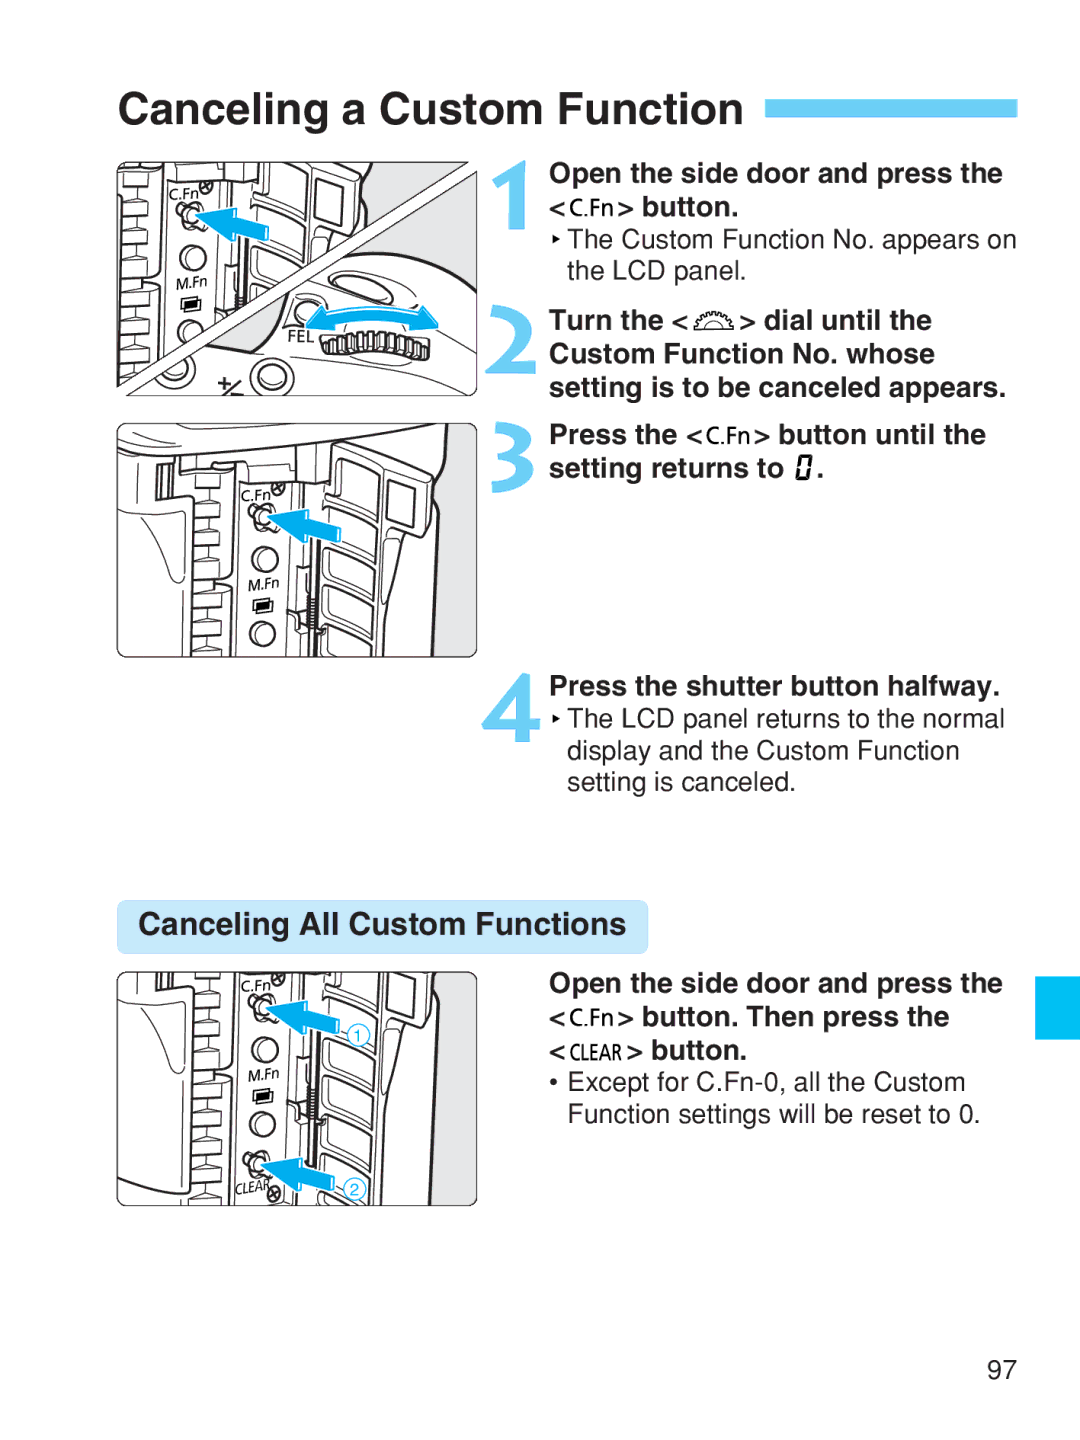
Canceling a Custom Function 
1 Open the side door and press the < 

 > button.
 The Custom Function No. appears on the LCD panel.
2Turn the < ![]() > dial until the Custom Function No. whose setting is to be canceled appears.
> dial until the Custom Function No. whose setting is to be canceled appears.

 3
3
4Press the shutter button halfway.
![]() The LCD panel returns to the normal display and the Custom Function setting is canceled.
The LCD panel returns to the normal display and the Custom Function setting is canceled.
Canceling All Custom Functions
1
2
Open the side door and press the < 

 > button. Then press the
< 


 > button.
• Except for
97