Dioptric Adjustment 
By adjusting the diopter to suit your vision (with or without eyeglasses), the viewfinder image will look clearer. The camera’s adjustable dioptric range is
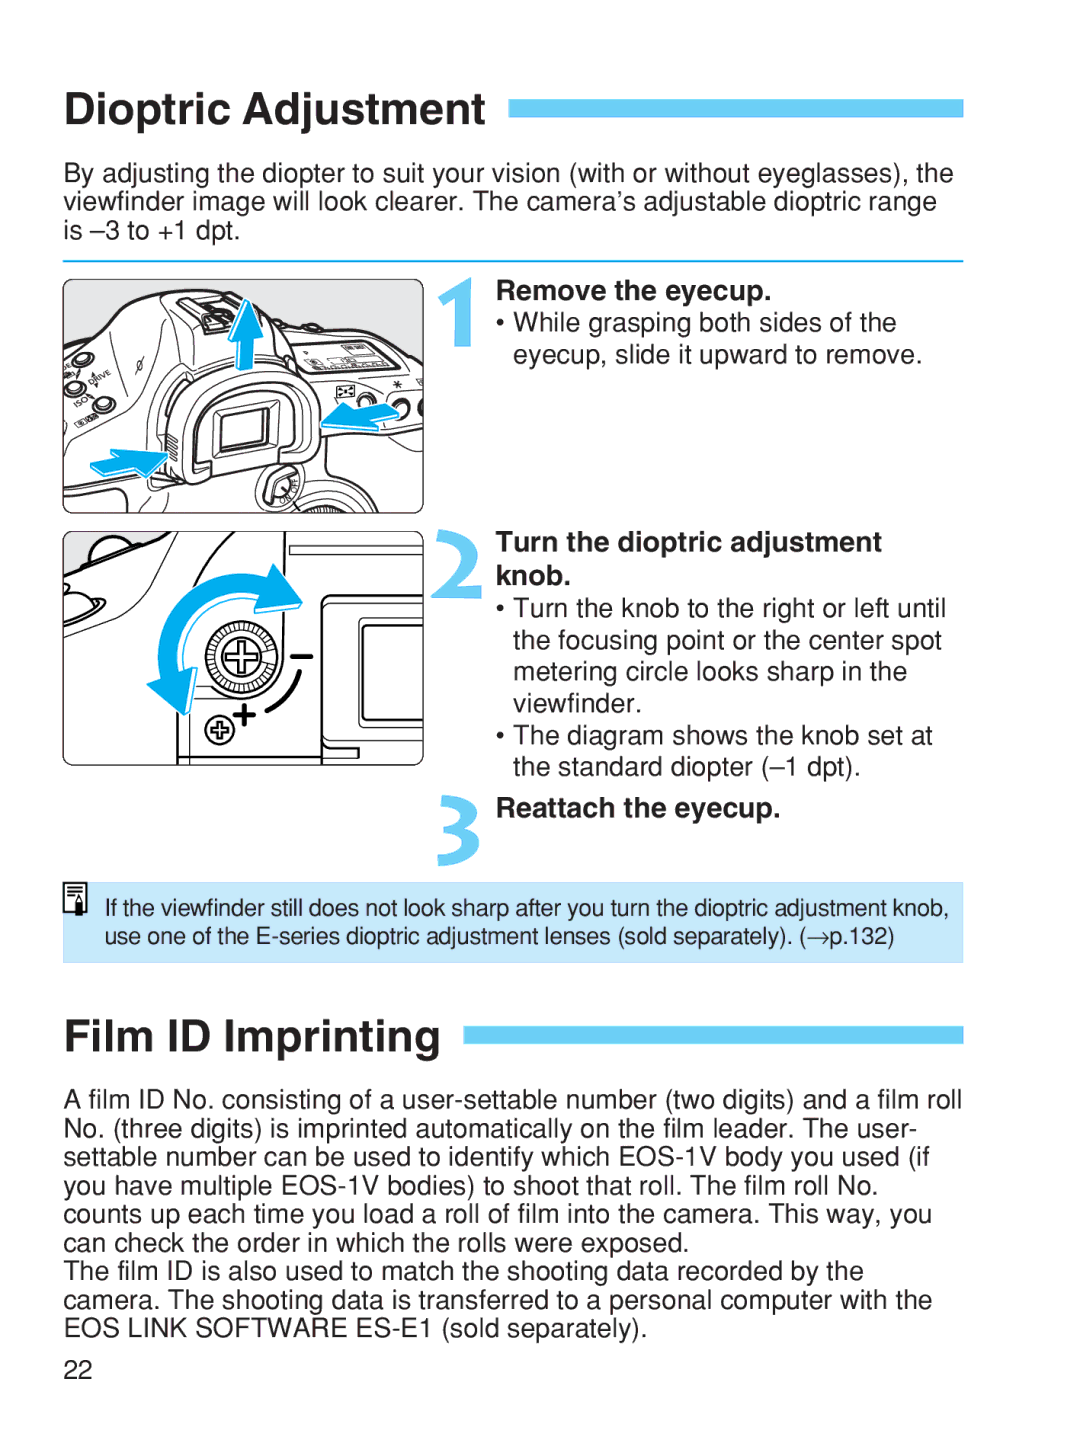
1 Remove the eyecup.
• While grasping both sides of the eyecup, slide it upward to remove.
 2Turn the dioptric adjustment knob.
• Turn the knob to the right or left until the focusing point or the center spot metering circle looks sharp in the viewfinder.
• The diagram shows the knob set at the standard diopter
3 Reattach the eyecup.
If the viewfinder still does not look sharp after you turn the dioptric adjustment knob, use one of the
Film ID Imprinting 
A film ID No. consisting of a
The film ID is also used to match the shooting data recorded by the camera. The shooting data is transferred to a personal computer with the EOS LINK SOFTWARE
22
