CHAPTER 3. REPAIR INSTRUCTION
Insert tweezers | NOTE2 (Assembling) | Remove the claws | ||
DIABOND | ||||
or the like. | ||||
BARREL1 CAP | ||||
| (1633G) |
| ||
|
|
|
BARRIER PLATE |
|
| ||
|
|
|
| |
|
| NOTE3 (Assembling) |
| |
BARRIER PLATE |
|
|
| |
|
|
| HANARL | HANARL |
|
| (OIL) | ||
| BARRIER BASE |
| (OIL) | |
|
|
| ||
BARRIER DRIVE |
|
|
| |
PLATE |
| NOTE1 (Assembling) |
| |
|
| |||
BARRIER OPEN |
| |||
|
|
| ||
SPRING | BARRIER | |
CLOSE SPRING | ||
| ||
| ||
BARRIER DRIVE | DC2.5V | |
RING | ||
|
DC2.5V ![]()
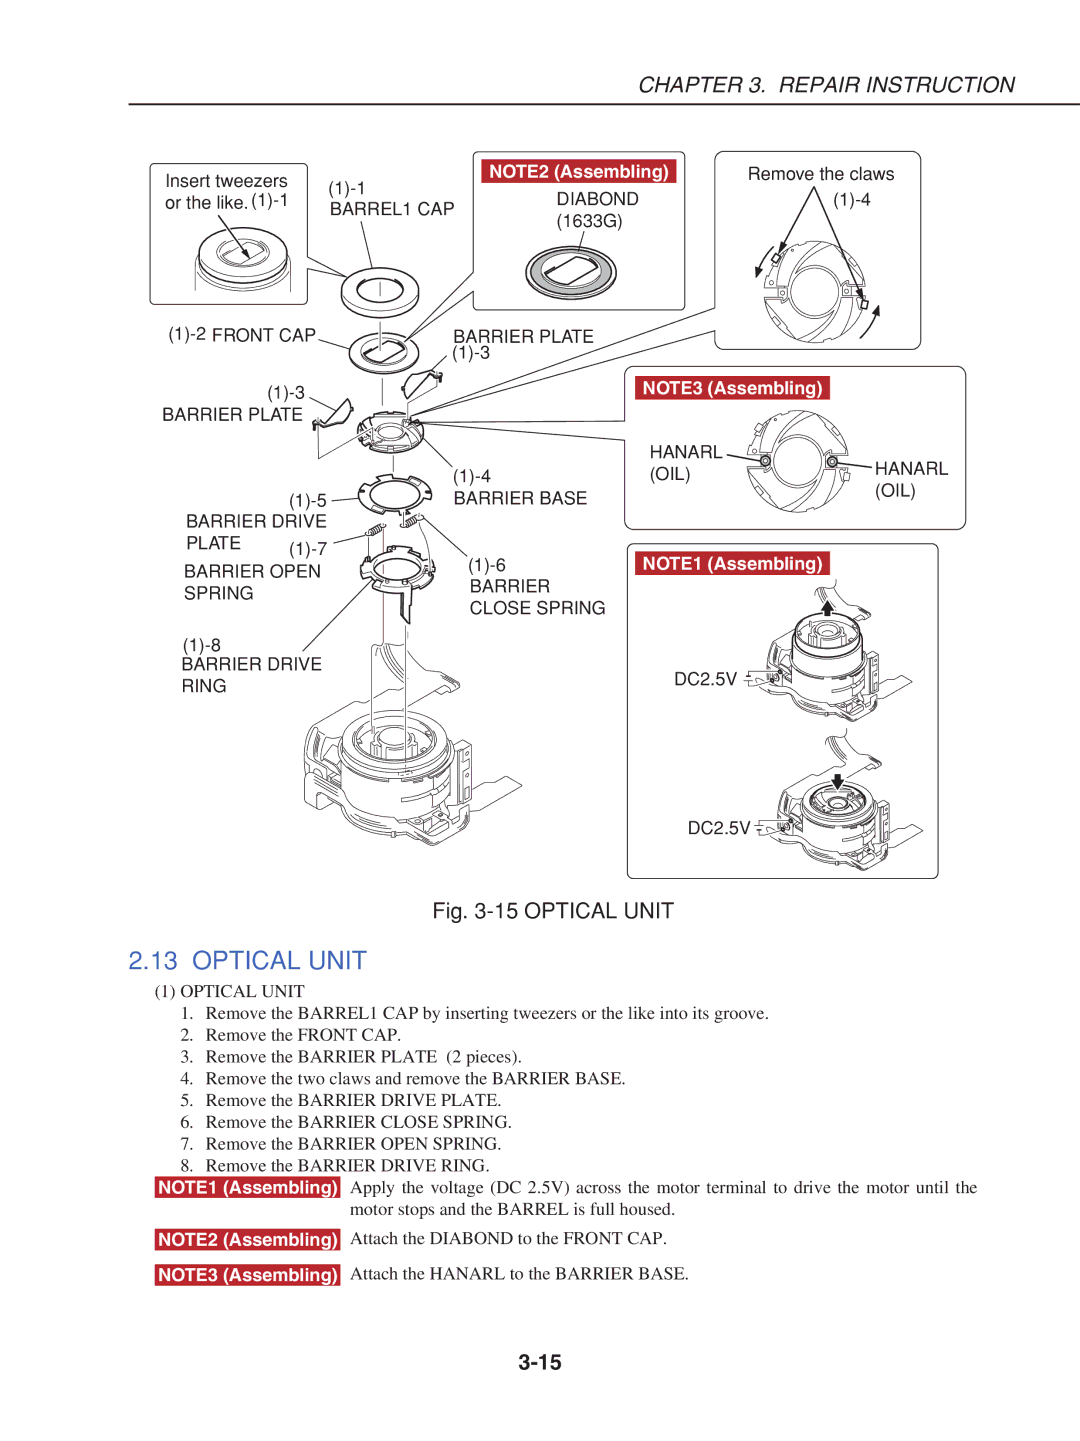
Fig. 3-15 OPTICAL UNIT
2.13 OPTICAL UNIT
(1)OPTICAL UNIT
1.Remove the BARREL1 CAP by inserting tweezers or the like into its groove.
2.Remove the FRONT CAP.
3.Remove the BARRIER PLATE (2 pieces).
4.Remove the two claws and remove the BARRIER BASE.
5.Remove the BARRIER DRIVE PLATE.
6.Remove the BARRIER CLOSE SPRING.
7.Remove the BARRIER OPEN SPRING.
8.Remove the BARRIER DRIVE RING.
NOTE1 (Assembling) Apply the voltage (DC 2.5V) across the motor terminal to drive the motor until the motor stops and the BARREL is full housed.
NOTE2 (Assembling) Attach the DIABOND to the FRONT CAP.
NOTE3 (Assembling) Attach the HANARL to the BARRIER BASE.
