| CHAPTER 3. REPAIR INSTRUCTION | |
3.5.2 Optical Unit Adjustment |
|
|
■ Tools Used |
|
|
• Personal Computer | • DC Coupler | |
• Adjustment Software | • INTERFACE CABLE | |
• Compact Power Adapter | • Zoom/AF Chart | |
• AC Cable | • Tripod | |
|
|
|
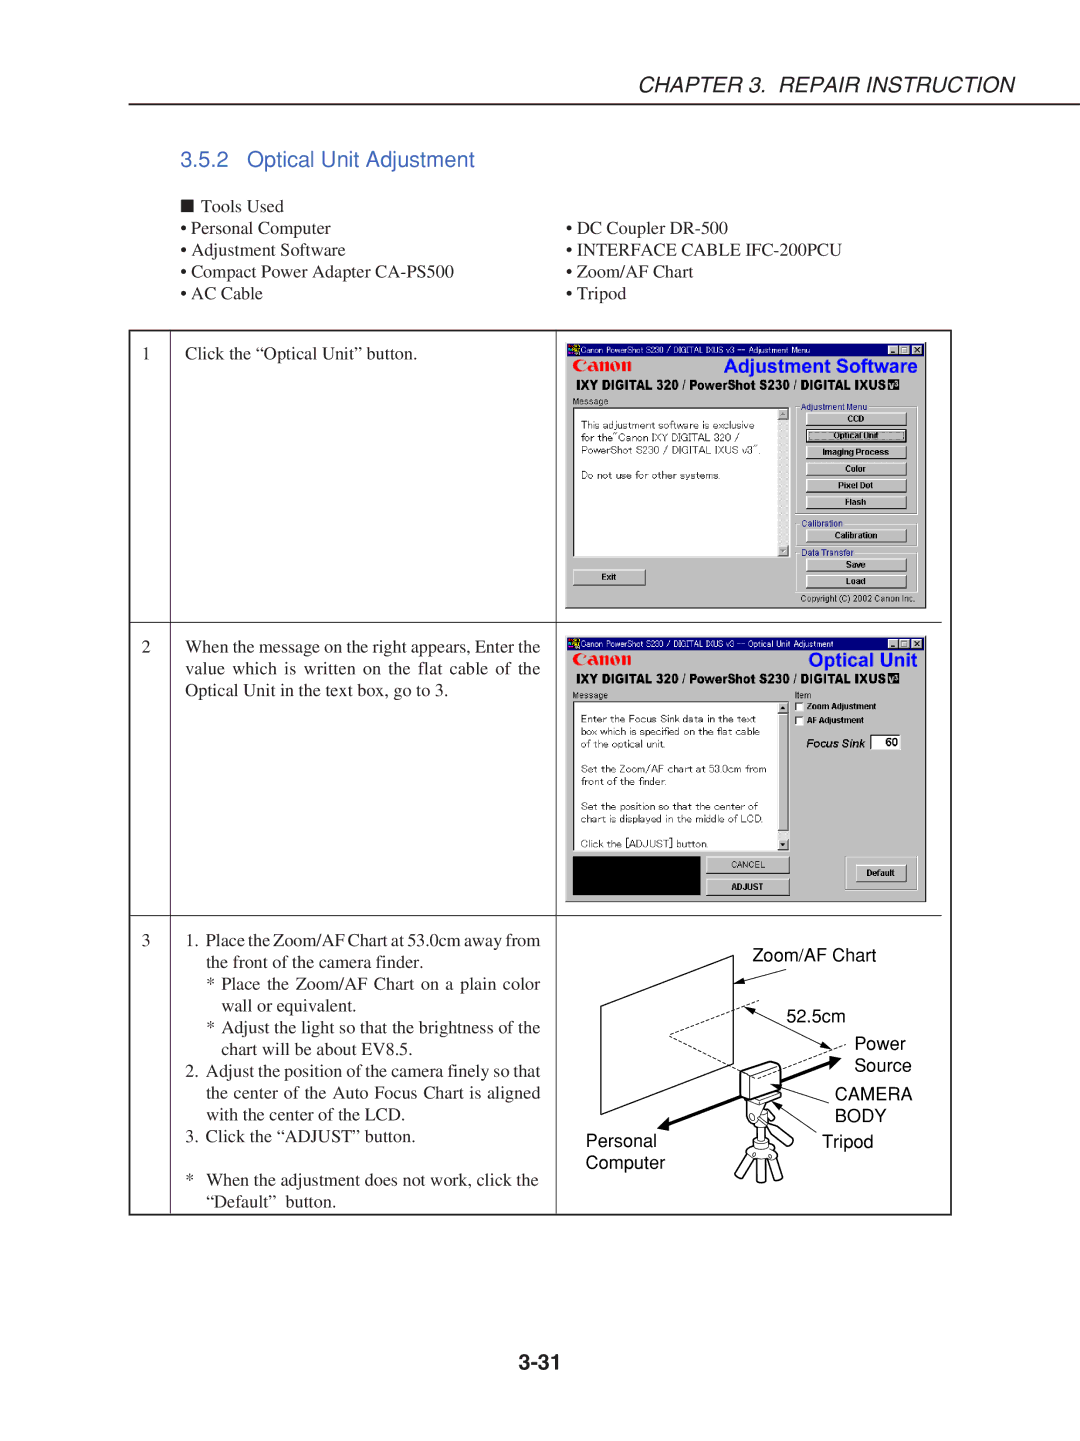
1 Click the “Optical Unit” button. |
|
|
2When the message on the right appears, Enter the value which is written on the flat cable of the Optical Unit in the text box, go to 3.
3 | 1. | Place the Zoom/AF Chart at 53.0cm away from |
| Zoom/AF Chart |
|
| the front of the camera finder. |
| |
|
|
|
| |
|
| * Place the Zoom/AF Chart on a plain color |
|
|
|
| wall or equivalent. |
| 52.5cm |
|
| * Adjust the light so that the brightness of the |
| |
|
|
| Power | |
|
| chart will be about EV8.5. |
| |
| 2. | Adjust the position of the camera finely so that |
| Source |
|
| the center of the Auto Focus Chart is aligned |
| CAMERA |
|
| with the center of the LCD. |
| BODY |
| 3. | Click the “ADJUST” button. | Personal | Tripod |
|
|
| Computer |
|
*When the adjustment does not work, click the “Default” button.
