Chapter 1 Overview
Planning for Your Installation
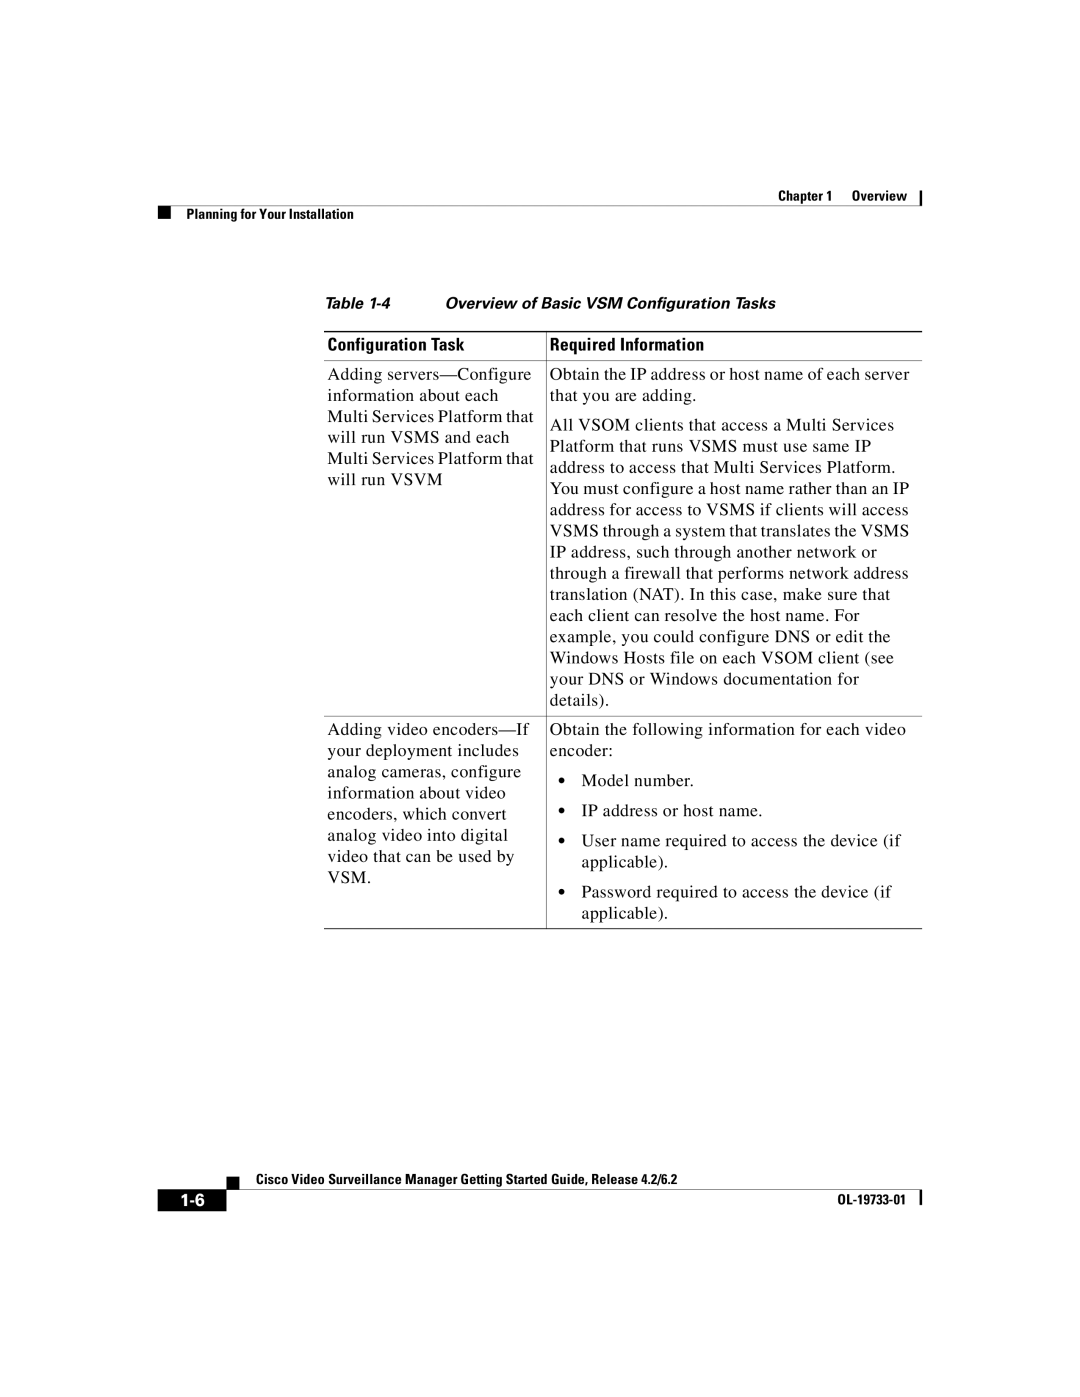
Table
Configuration Task | Required Information | |
|
| |
Adding | Obtain the IP address or host name of each server | |
information about each | that you are adding. | |
Multi Services Platform that | All VSOM clients that access a Multi Services | |
will run VSMS and each | Platform that runs VSMS must use same IP | |
Multi Services Platform that | ||
address to access that Multi Services Platform. | ||
will run VSVM | You must configure a host name rather than an IP | |
| ||
| address for access to VSMS if clients will access | |
| VSMS through a system that translates the VSMS | |
| IP address, such through another network or | |
| through a firewall that performs network address | |
| translation (NAT). In this case, make sure that | |
| each client can resolve the host name. For | |
| example, you could configure DNS or edit the | |
| Windows Hosts file on each VSOM client (see | |
| your DNS or Windows documentation for | |
| details). | |
|
| |
Adding video | Obtain the following information for each video | |
your deployment includes | encoder: | |
analog cameras, configure | • Model number. | |
information about video | ||
• IP address or host name. | ||
encoders, which convert | ||
analog video into digital | • User name required to access the device (if | |
video that can be used by | ||
applicable). | ||
VSM. | ||
• Password required to access the device (if | ||
| ||
| applicable). | |
|
|
| Cisco Video Surveillance Manager Getting Started Guide, Release 4.2/6.2 |