Chapter 3 Configuring VSM
Configuring VSM
Procedure
Step 1 Access the VSOM Operations Manager as described in the “Accessing Video Surveillance Operations Manager” section on page
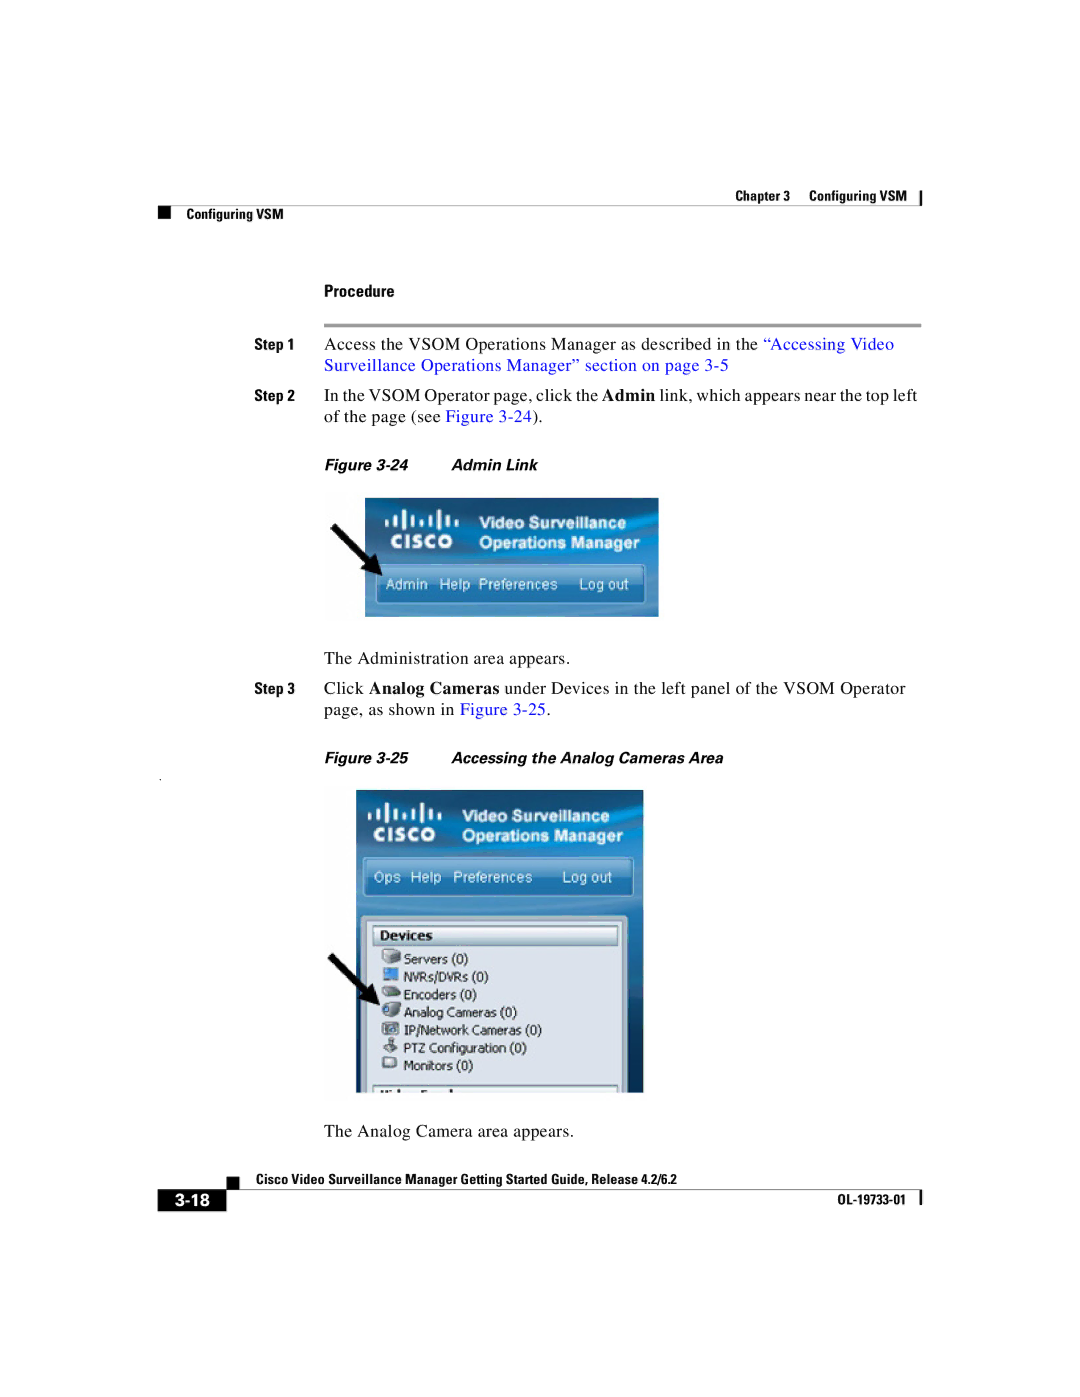
Step 2 In the VSOM Operator page, click the Admin link, which appears near the top left of the page (see Figure
Figure | Admin Link |
The Administration area appears.
Step 3 Click Analog Cameras under Devices in the left panel of the VSOM Operator page, as shown in Figure
Figure 3-25 Accessing the Analog Cameras Area
.
The Analog Camera area appears.
| Cisco Video Surveillance Manager Getting Started Guide, Release 4.2/6.2 |
|