Chapter 2 Switch Installation
Installing Devices in the
Step 8 If the module has a
Step 9 Remove the SFP dust plugs and save. Install the SFP cables.
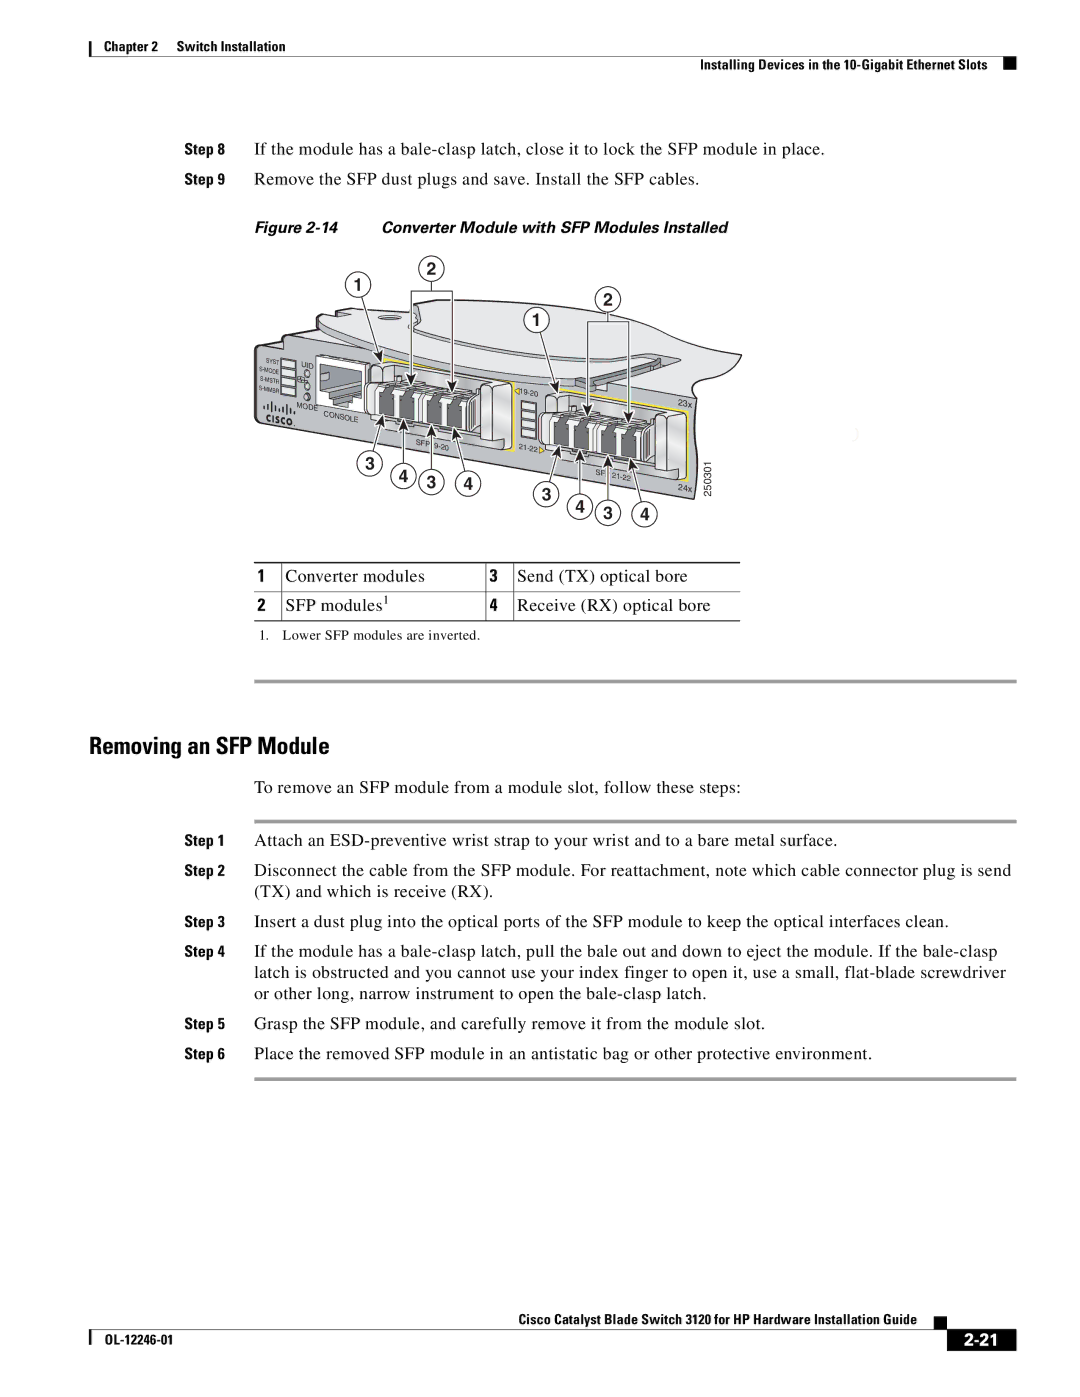
Figure 2-14 Converter Module with SFP Modules Installed
SYST ![]()
2
1
UID
MODE
CONSOLE
1
![]() 19-20
19-20
2
23x
SFP |
|
|
19- | ||
| 20 | |
3 |
|
|
| SFP |
|
|
4 | 3 | 4 |
| 24x | ||
|
| |||||
|
|
| 3 |
|
|
|
|
|
| 4 | 3 | 4 | |
250301
1 | Converter modules | 3 | Send (TX) optical bore |
|
|
|
|
2 | SFP modules1 | 4 | Receive (RX) optical bore |
1. Lower SFP modules are inverted.
Removing an SFP Module
To remove an SFP module from a module slot, follow these steps:
Step 1 Attach an
Step 2 Disconnect the cable from the SFP module. For reattachment, note which cable connector plug is send (TX) and which is receive (RX).
Step 3 Insert a dust plug into the optical ports of the SFP module to keep the optical interfaces clean.
Step 4 If the module has a
Step 5 Grasp the SFP module, and carefully remove it from the module slot.
Step 6 Place the removed SFP module in an antistatic bag or other protective environment.
|
| Cisco Catalyst Blade Switch 3120 for HP Hardware Installation Guide |
|
| |
|
|
| |||
|
|
|
| ||
|
|
|
| ||