Chapter 4 Maintenance and Upgrade Procedures for the ASA
Installing an I/O Card
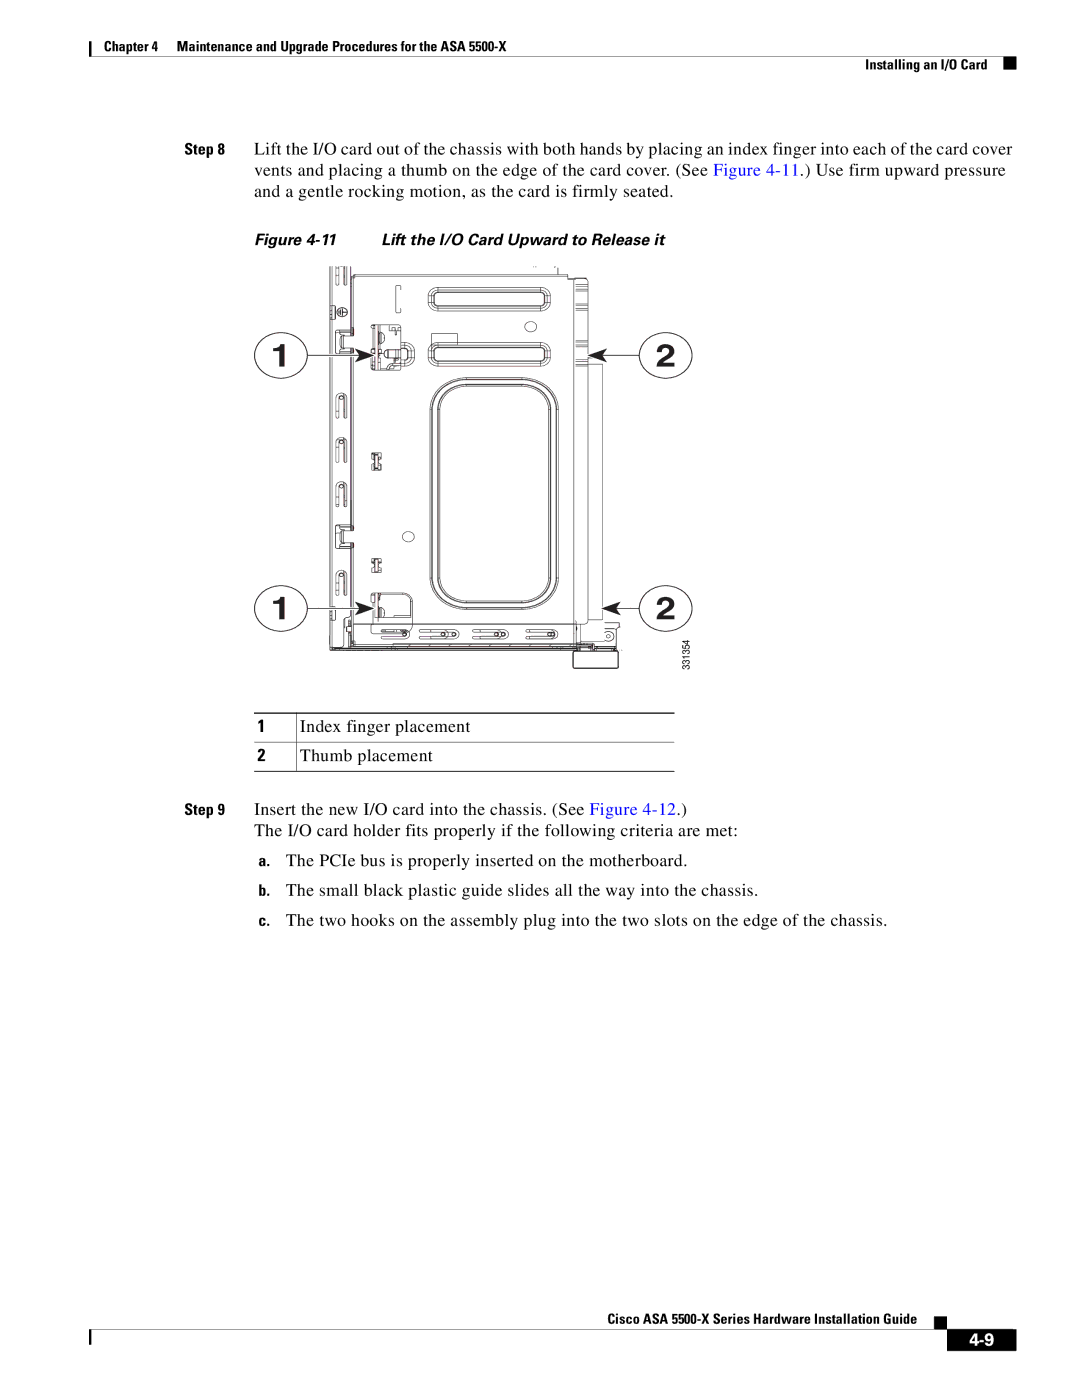
Step 8 Lift the I/O card out of the chassis with both hands by placing an index finger into each of the card cover vents and placing a thumb on the edge of the card cover. (See Figure
Figure 4-11 Lift the I/O Card Upward to Release it
1
1
2
2
331354
1
2
Index finger placement
Thumb placement
Step 9 Insert the new I/O card into the chassis. (See Figure
The I/O card holder fits properly if the following criteria are met:
a.The PCIe bus is properly inserted on the motherboard.
b.The small black plastic guide slides all the way into the chassis.
c.The two hooks on the assembly plug into the two slots on the edge of the chassis.