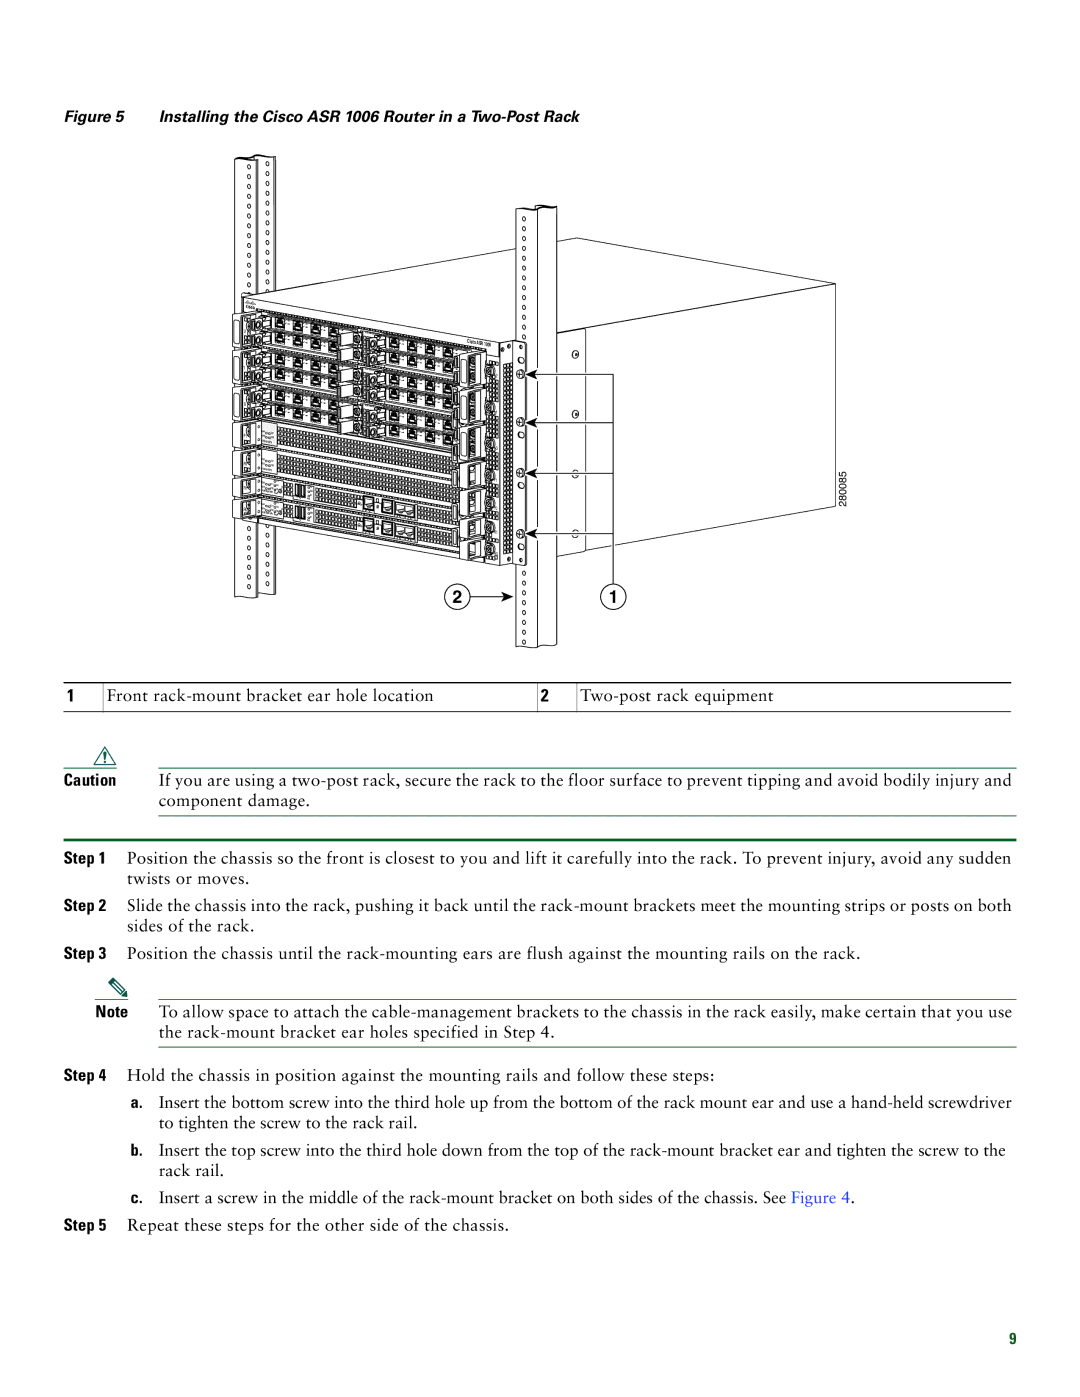
Figure 5 Installing the Cisco ASR 1006 Router in a Two-Post Rack
2 | 0 |
1 | |
| 0 |
| 1 |
1 |
|
| 0 |
|
|
|
| 1 | |
|
|
| 0 |
|
|
|
|
| 1 |
0 |
|
| 0 |
|
|
|
| 1 | |
|
|
| 0 |
|
|
|
|
| 1 |
F1 | PWR | ACTV |
|
|
STAT | STBY |
|
| |
|
|
| ||
F0 | PWR | ACTV |
|
|
STAT | STBY |
|
| |
|
|
| ||
| PWR |
| CRIT |
|
R1 | STAT | ACTV | MAJ |
|
| STBY | MIN | ACO | |
|
|
| ||
|
|
|
| 0 |
2 |
|
| ||
| 3 |
|
| |
|
|
|
| |
|
|
|
| 0 |
2 |
|
|
|
|
| 3 |
|
| |
|
|
|
| |
|
| PWR | STATUS |
|
|
|
| 0 | |
2 |
|
| ||
| 3 |
|
| |
|
|
|
| |
|
|
|
| 0 |
2 |
|
|
|
|
| 3 |
|
| |
|
|
|
| |
|
| PWR | STATUS |
|
|
|
| 0 | |
2 |
| |
| 3 | |
|
|
|
|
| 0 |
2 |
|
|
|
3 |
|
| |
|
|
| |
| PWR | STATUS |
|
|
| 0 |
HD |
USB |
BF |
1![]()
![]()
![]()
![]()
![]()
![]() 2
2![]()
1![]()
![]() 2
2
1![]()
![]()
![]()
![]()
![]()
![]() 2
2![]()
1![]()
![]() 2
2
1 ![]()
![]()
![]()
![]()
![]()
![]() 2
2![]()
1![]()
![]()
![]()
![]() 2
2
|
| Cisco |
|
| ASR 1006 |
3 |
| |
|
| |
3 | SPA- | 2 |
|
3 |
| |
|
| |
3 | SPA- | 1 |
|
3 |
| |
|
| |
3 | SPA- | 0 |
| ||
|
| F1 |
280085
|
|
|
|
| 1 |
| PWR |
| CRIT |
|
|
R0 | STAT | ACTV | MAJ | O |
|
| STBY | MIN | AC |
| |
|
|
|
| ||
|
|
|
| 0 | 1 |
DISK |
|
| CARRIER |
HD | LINK |
USB | BITS |
MGMT ETHERNET | |
BF | CON |
DISK |
|
| CARRIER |
| LINK |
| BITS |
| MGMT ETHERNET |
| CON |
![]()
![]()
![]()
![]()
![]()
![]()
![]()
![]()
![]()
![]() F0
F0
AUX
![]()
![]()
![]()
![]()
![]()
![]()
![]()
![]()
![]()
![]()
![]()
![]()
![]() R1
R1
AUX
![]()
![]() R0
R0
21
1
Front
2
Caution If you are using a
Step 1 Position the chassis so the front is closest to you and lift it carefully into the rack. To prevent injury, avoid any sudden twists or moves.
Step 2 Slide the chassis into the rack, pushing it back until the
Step 3 Position the chassis until the
Note To allow space to attach the
Step 4 Hold the chassis in position against the mounting rails and follow these steps:
a.Insert the bottom screw into the third hole up from the bottom of the rack mount ear and use a
b.Insert the top screw into the third hole down from the top of the
c.Insert a screw in the middle of the
Step 5 Repeat these steps for the other side of the chassis.
9