Prepare for Rack-Mount Installation
Before you begin the
•Decide whether or not you want to front
•Decide whether or not you want to attach
Note If you install
•Decide if a
3Rack-Mount the Router
This section provides information for
Attach the Rack-Mount Brackets—Chassis Front-Mounted
To install the
Step 1 Locate the threaded holes in the front sides of the chassis. Make certain that you hold the front
Step 2 Align the
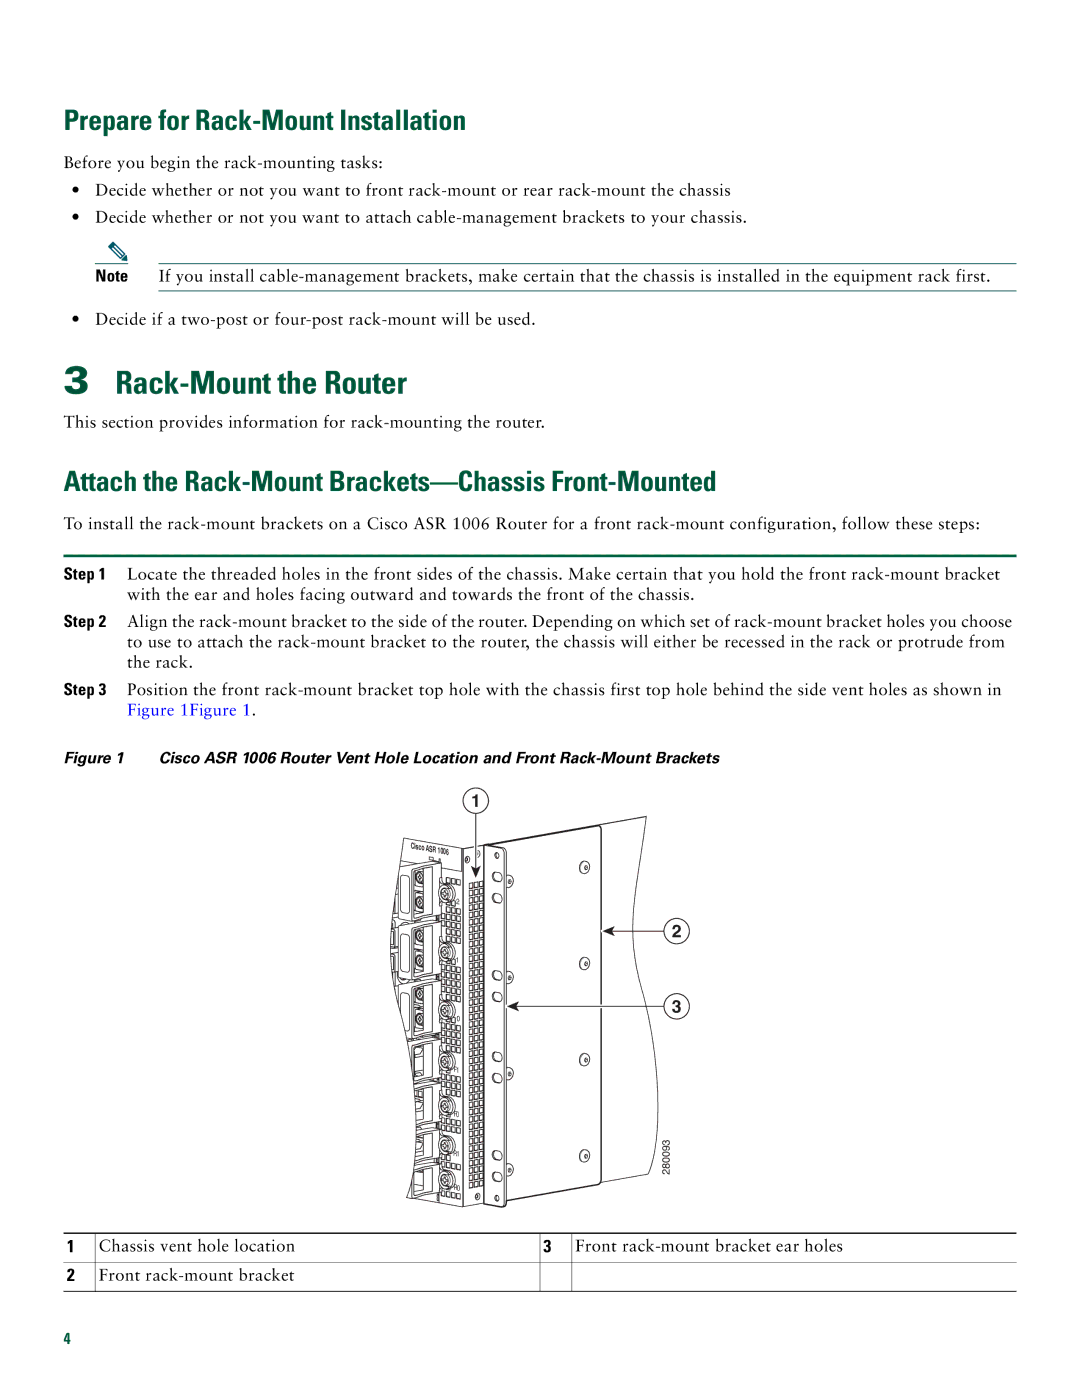
Step 3 Position the front
Figure 1 Cisco ASR 1006 Router Vent Hole Location and Front Rack-Mount Brackets
1
Cisco ASR 1006
![]()
![]() 2
2
![]()
![]()
![]() 1
1
![]()
![]() 0
0
![]()
![]()
![]()
![]() F1
F1
![]()
![]()
![]()
![]() F0
F0
![]()
![]()
![]() R1
R1
![]()
![]() R0
R0
2
3
280093
1
2
Chassis vent hole location | 3 Front |
Front
4
