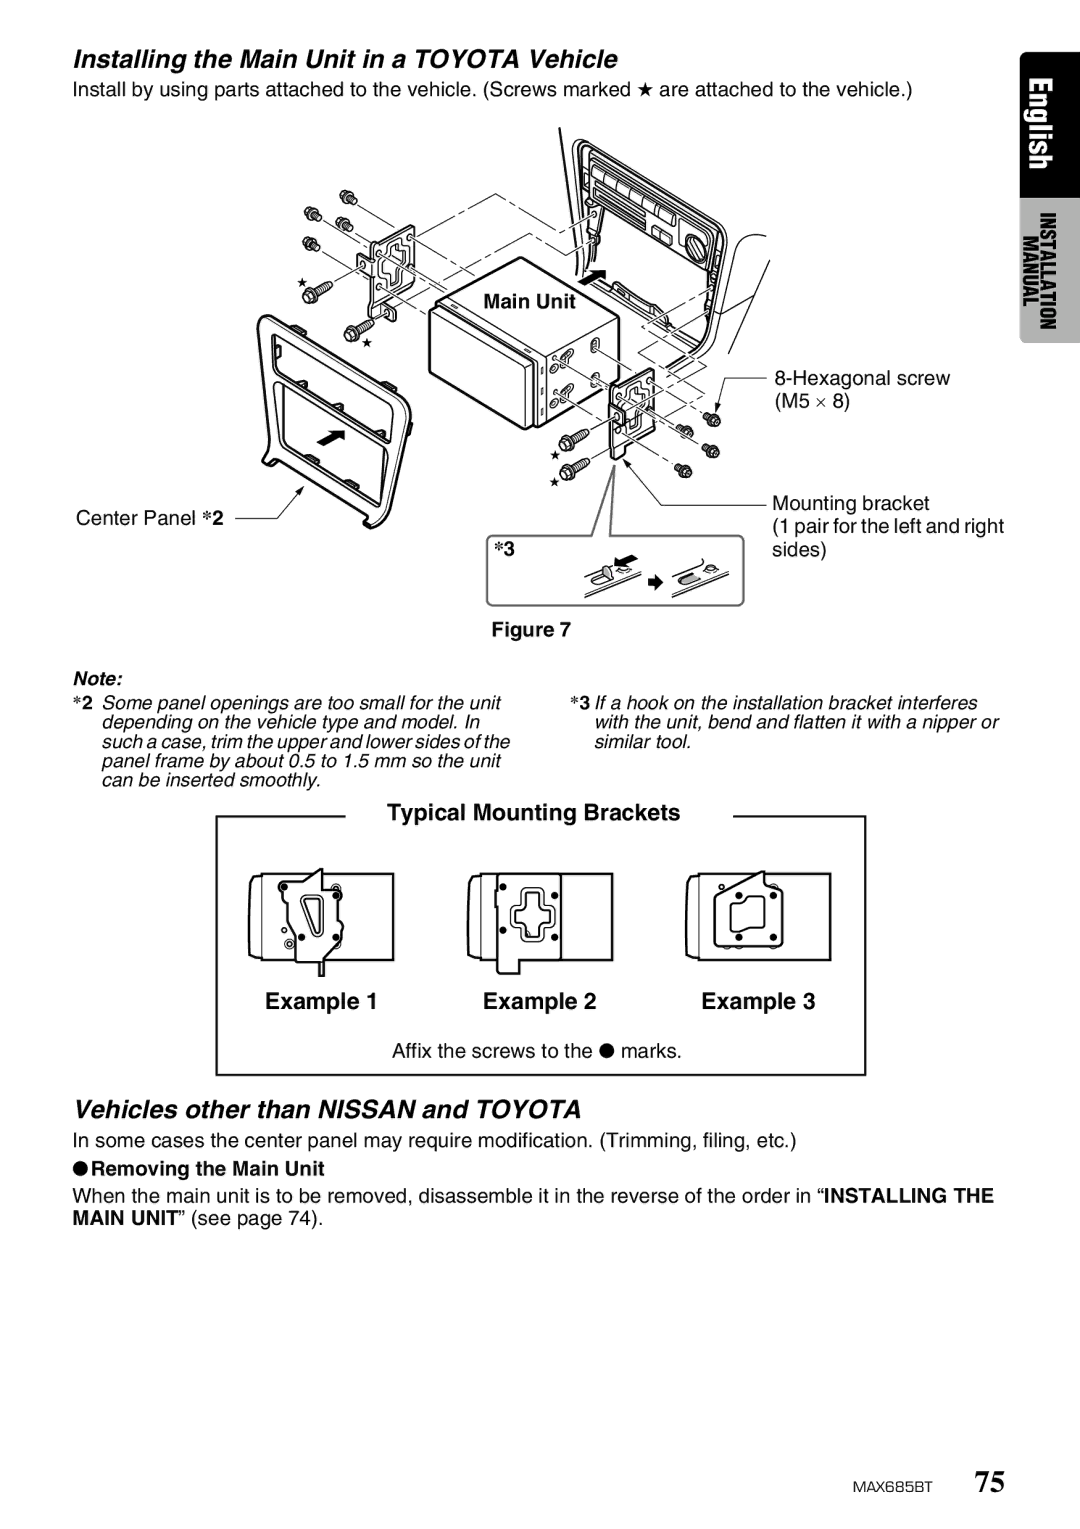
Installing the Main Unit in a TOYOTA Vehicle
Install by using parts attached to the vehicle. (Screws marked ★ are attached to the vehicle.)
English
Main Unit
| ||
| (M5 υ 8) | |
Center Panel *2 | Mounting bracket | |
(1 pair for the left and right | ||
*3 | ||
sides) | ||
Figure 7 | ||
Note: |
| |
*2 Some panel openings are too small for the unit | *3 If a hook on the installation bracket interferes | |
depending on the vehicle type and model. In | with the unit, bend and flatten it with a nipper or | |
such a case, trim the upper and lower sides of the | similar tool. | |
panel frame by about 0.5 to 1.5 mm so the unit |
| |
can be inserted smoothly. |
| |
Typical Mounting Brackets
Example 1 | Example 2 | Example 3 |
Affix the screws to the ● marks.
INSTALLATION MANUAL
Vehicles other than NISSAN and TOYOTA
In some cases the center panel may require modification. (Trimming, filing, etc.)
●Removing the Main Unit
When the main unit is to be removed, disassemble it in the reverse of the order in “INSTALLING THE MAIN UNIT” (see page 74).
