
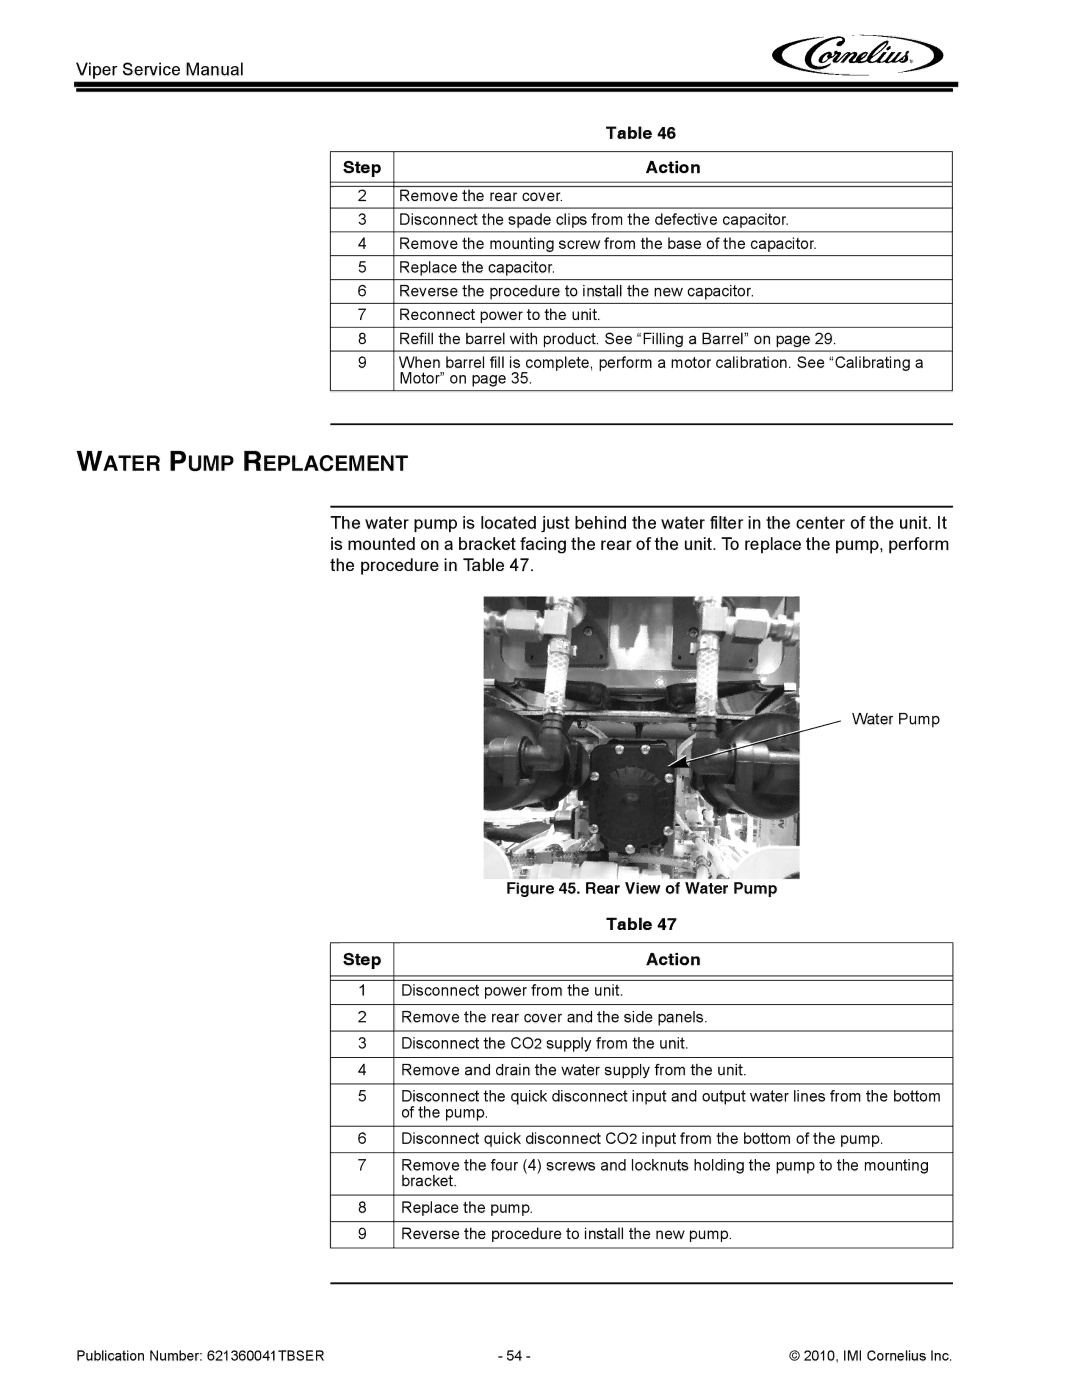
3 specifications
Cornelius 3 is a cutting-edge platform designed to enhance communication and collaboration in the ever-evolving landscape of digital interaction. With an impressive range of features, technologies, and characteristics, it stands out as a vital tool for organizations looking to streamline their operations and enhance productivity.One of the most notable features of Cornelius 3 is its intuitive user interface. Designed with user experience in mind, it provides a seamless navigation experience, enabling users to access various functionalities with ease. This ensures that both technical and non-technical users can quickly adapt to the platform without extensive training.
Cornelius 3 incorporates advanced artificial intelligence (AI) capabilities, enhancing the platform's effectiveness in facilitating communication. Its AI-driven algorithms analyze user interactions, providing tailored recommendations and insights that improve decision-making processes. This intelligent system is designed to learn from user behaviors, continually optimizing its responses and functionalities to suit individual and organizational needs.
The platform also boasts robust integration capabilities, allowing organizations to connect with a wide range of third-party applications. This flexibility is crucial in today’s interconnected environment, as businesses often utilize multiple tools to manage their operations. With Cornelius 3, users can consolidate their workflows and eliminate the need to switch between various applications, thus saving time and reducing operational friction.
Collaboration is further enhanced through Cornelius 3’s real-time communication tools. These include chat features, video conferencing, and collaborative document editing, empowering teams to work together seamlessly regardless of their geographical locations. This real-time functionality promotes quicker feedback loops and fosters a culture of collaboration that is essential in a work-from-anywhere world.
Security and data privacy are paramount in today’s digital age, and Cornelius 3 addresses these concerns with robust security features. Advanced encryption methods protect user data, and strict access controls ensure that sensitive information is only accessible to authorized personnel. This commitment to security builds trust among users and compliance with relevant regulations.
In conclusion, Cornelius 3 is a powerful platform that combines a user-friendly interface, advanced AI capabilities, seamless integration, real-time collaboration tools, and top-notch security features. These characteristics make it an invaluable asset for organizations looking to enhance their communication and operational efficiency in a digital-first landscape. With Cornelius 3, businesses can empower their teams, drive innovation, and achieve their goals more effectively.