Stackable NWay Ethernet Switch User’s Guide
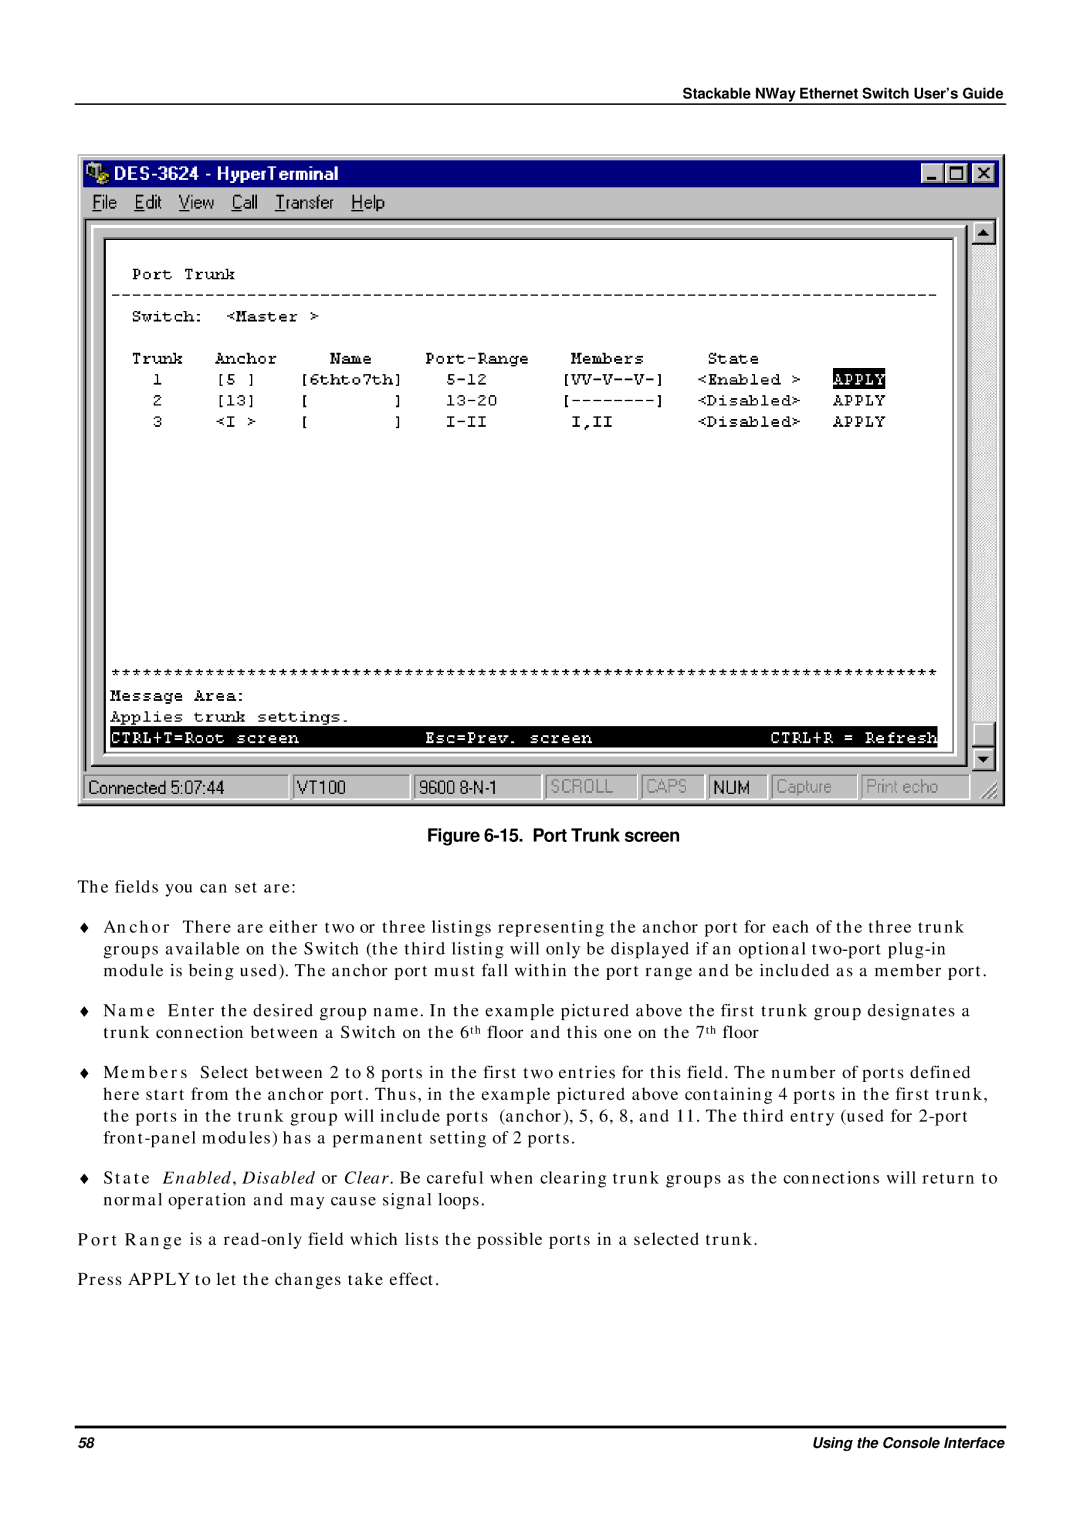
Figure 6-15. Port Trunk screen
The fields you can set are:
♦Anchor There are either two or three listings representing the anchor port for each of the three trunk groups available on the Switch (the third listing will only be displayed if an optional
♦Name Enter the desired group name. In the example pictured above the first trunk group designates a trunk connection between a Switch on the 6th floor and this one on the 7th floor
♦Members Select between 2 to 8 ports in the first two entries for this field. The number of ports defined here start from the anchor port. Thus, in the example pictured above containing 4 ports in the first trunk, the ports in the trunk group will include ports (anchor), 5, 6, 8, and 11. The third entry (used for
♦State Enabled, Disabled or Clear. Be careful when clearing trunk groups as the connections will return to normal operation and may cause signal loops.
Port Range is a
Press APPLY to let the changes take effect.
58 | Using the Console Interface |