1 2
![]() 3
3
4
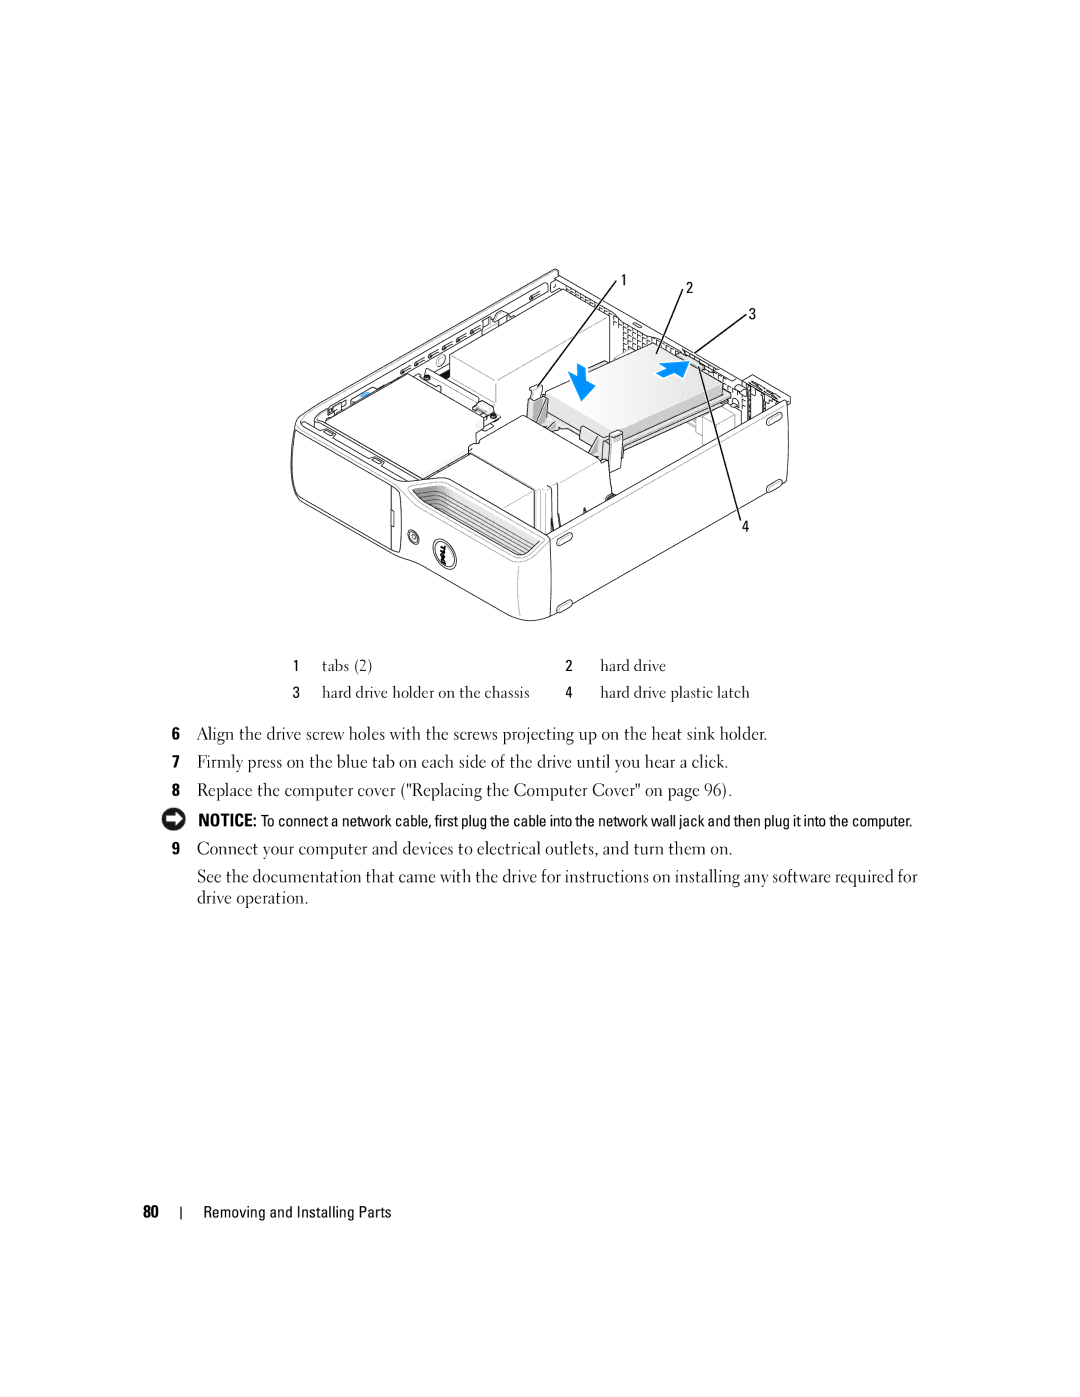
1 | tabs (2) | 2 | hard drive |
3 | hard drive holder on the chassis | 4 | hard drive plastic latch |
6Align the drive screw holes with the screws projecting up on the heat sink holder.
7Firmly press on the blue tab on each side of the drive until you hear a click.
8Replace the computer cover ("Replacing the Computer Cover" on page 96).
NOTICE: To connect a network cable, first plug the cable into the network wall jack and then plug it into the computer.
9Connect your computer and devices to electrical outlets, and turn them on.
See the documentation that came with the drive for instructions on installing any software required for drive operation.
80