54 Removing the Power-Button Assembly
WARNING: Before working inside your computer, read the safety information that shipped with your computer and follow the steps in "Before You Begin" on page 11. After working inside your computer, follow the instructions in "After Working Inside Your Computer" on page 13. For additional safety best practices information, see the Regulatory Compliance Homepage at dell.com/ regulatory_compliance.
Prerequisites
1Remove the back cover. See "Removing the Back Cover" on page 19.
2Remove the
3Remove the trim cover. See "Removing the Trim Cover" on page 87.
4Remove the inner frame. See "Removing the Inner Frame" on page 95
Procedure
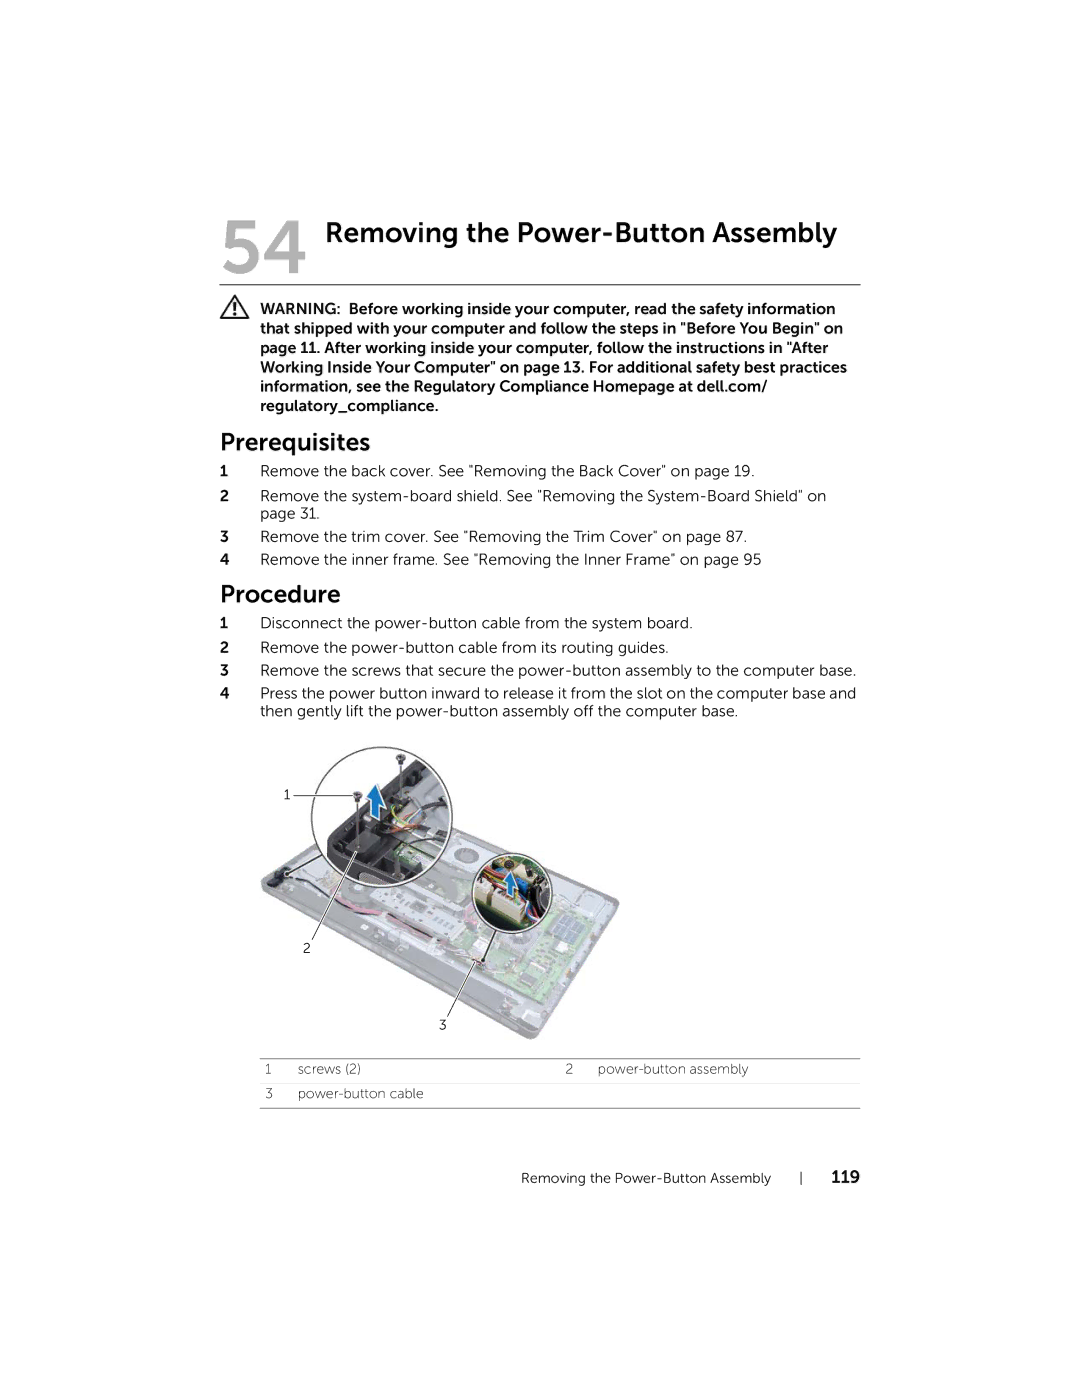
1Disconnect the
2Remove the
3Remove the screws that secure the
4 Press the power button inward to release it from the slot on the computer base and then gently lift the
1 ![]()
![]()
2
3
1 | screws (2) | 2 |
3
Removing the | 119 |
