w w w . d e l l . c o m s u p p o r t . d e l l . c o m
6Slide the new drive into the bay until the drive is fully seated.
7Replace the screw that you removed in step 3.
8Replace the memory module cover and screw.
Keyboard
1Complete the instructions in "Before You Begin" on page 77.
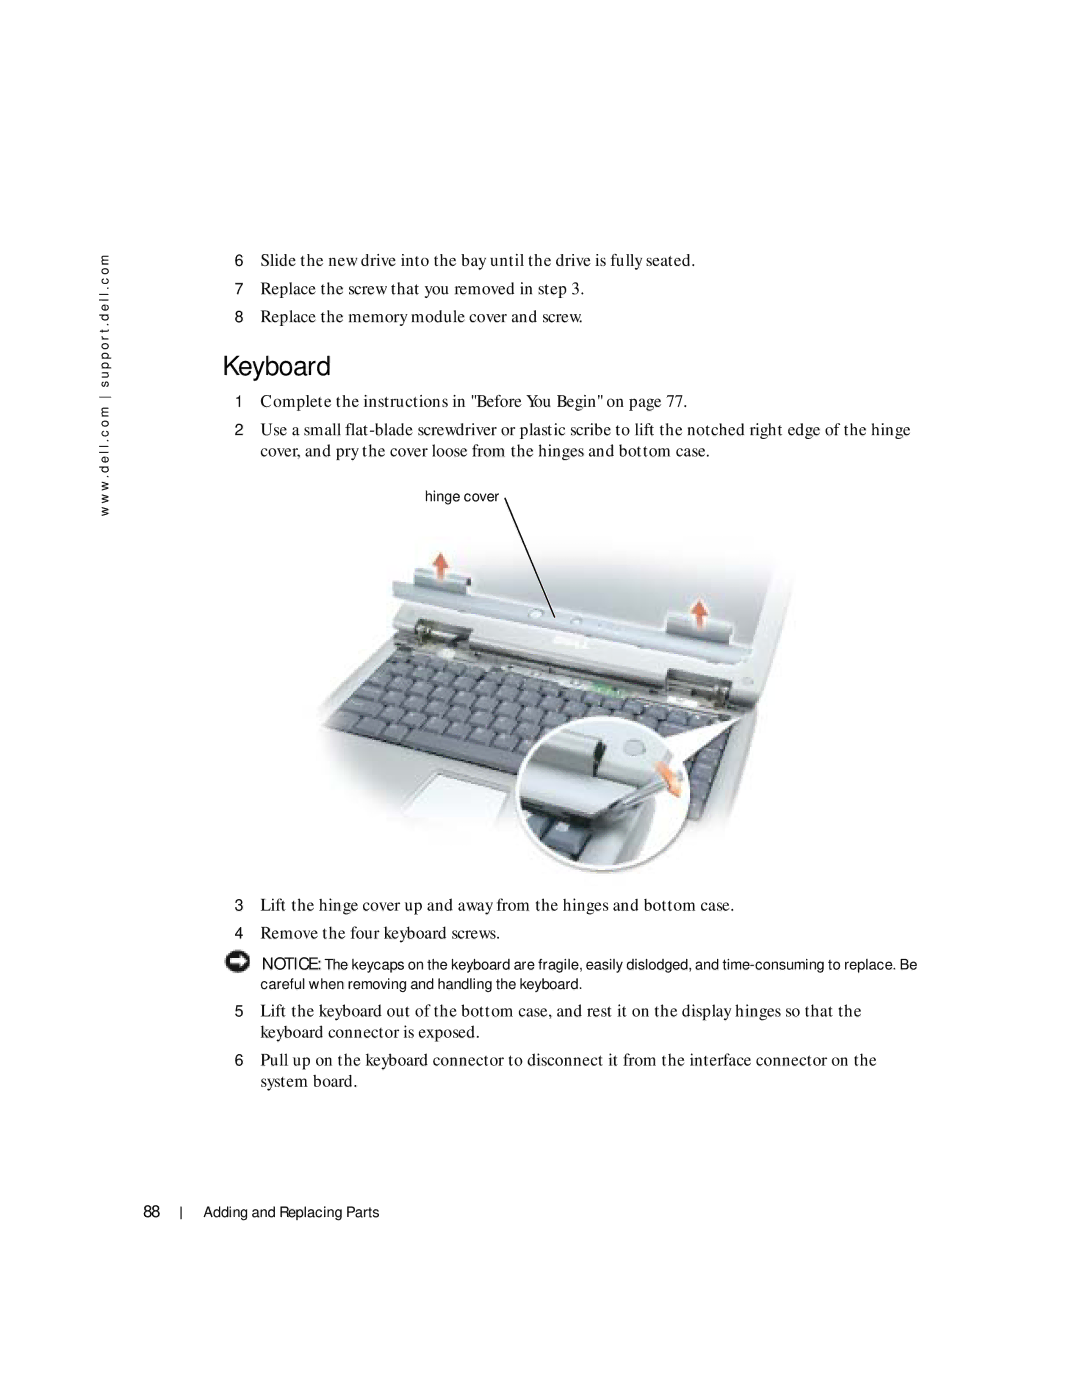
2Use a small
hinge cover
3Lift the hinge cover up and away from the hinges and bottom case.
4Remove the four keyboard screws.
NOTICE: The keycaps on the keyboard are fragile, easily dislodged, and
5Lift the keyboard out of the bottom case, and rest it on the display hinges so that the keyboard connector is exposed.
6Pull up on the keyboard connector to disconnect it from the interface connector on the system board.
88