Memory Locations and Replacement Procedures
DIMM Replacement Procedure
If the DIMM is defective and must be replaced, the following sections explain how to remove and install the DIMM. If you have questions concerning the replacement of the DIMM, contact Enterasys Networks.
Removing the DIMM
To remove the existing DIMM, proceed as follows:
1.Follow steps 1 through 3 as instructed on (page B‐7).
2.Locate the DIMM connector on the motherboard as shown in Figure B‐2.
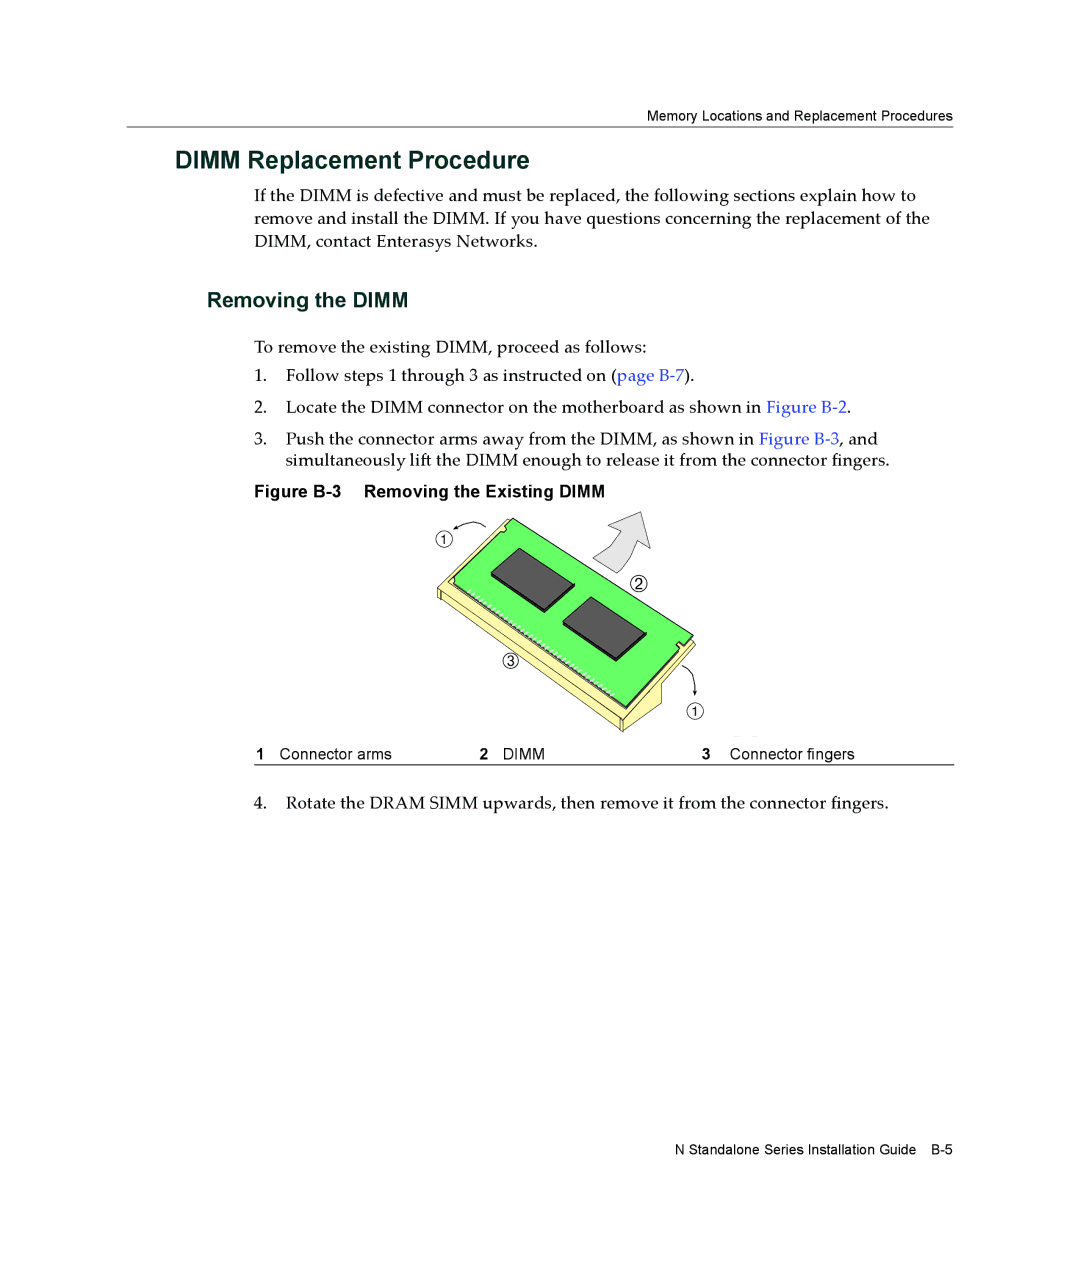
3.Push the connector arms away from the DIMM, as shown in Figure B‐3, and simultaneously lift the DIMM enough to release it from the connector fingers.
Figure B-3 Removing the Existing DIMM
1
Á
Â
1
1 Connector arms | 2 DIMM | 3 Connector fingers |
4.Rotate the DRAM SIMM upwards, then remove it from the connector fingers.
N Standalone Series Installation Guide