3 If you press the | Mode 2 | at Sccreen 9, | <Screen 10> |
you return to screen 8. |
|
| |
The setting is stored to EEPROM. |
| ||
If you press the | Mode 2 | at screen 10, |
|
you go to screen 11. (Screen 12 in case of M3099GH/GX)
I P C - 2 S E T
X
4 If you press the Mode 1 at screen 11/12,
Stop .
<Screen 11>
P a n e l / H o s t S e t I g n o r e
N o - M o d e 1 | Y e s - M o d e 2 |
<Screen 12>
H o s t S e t I g n o r e
N o - M o d e 1 | Y e s - M o d e 2 |
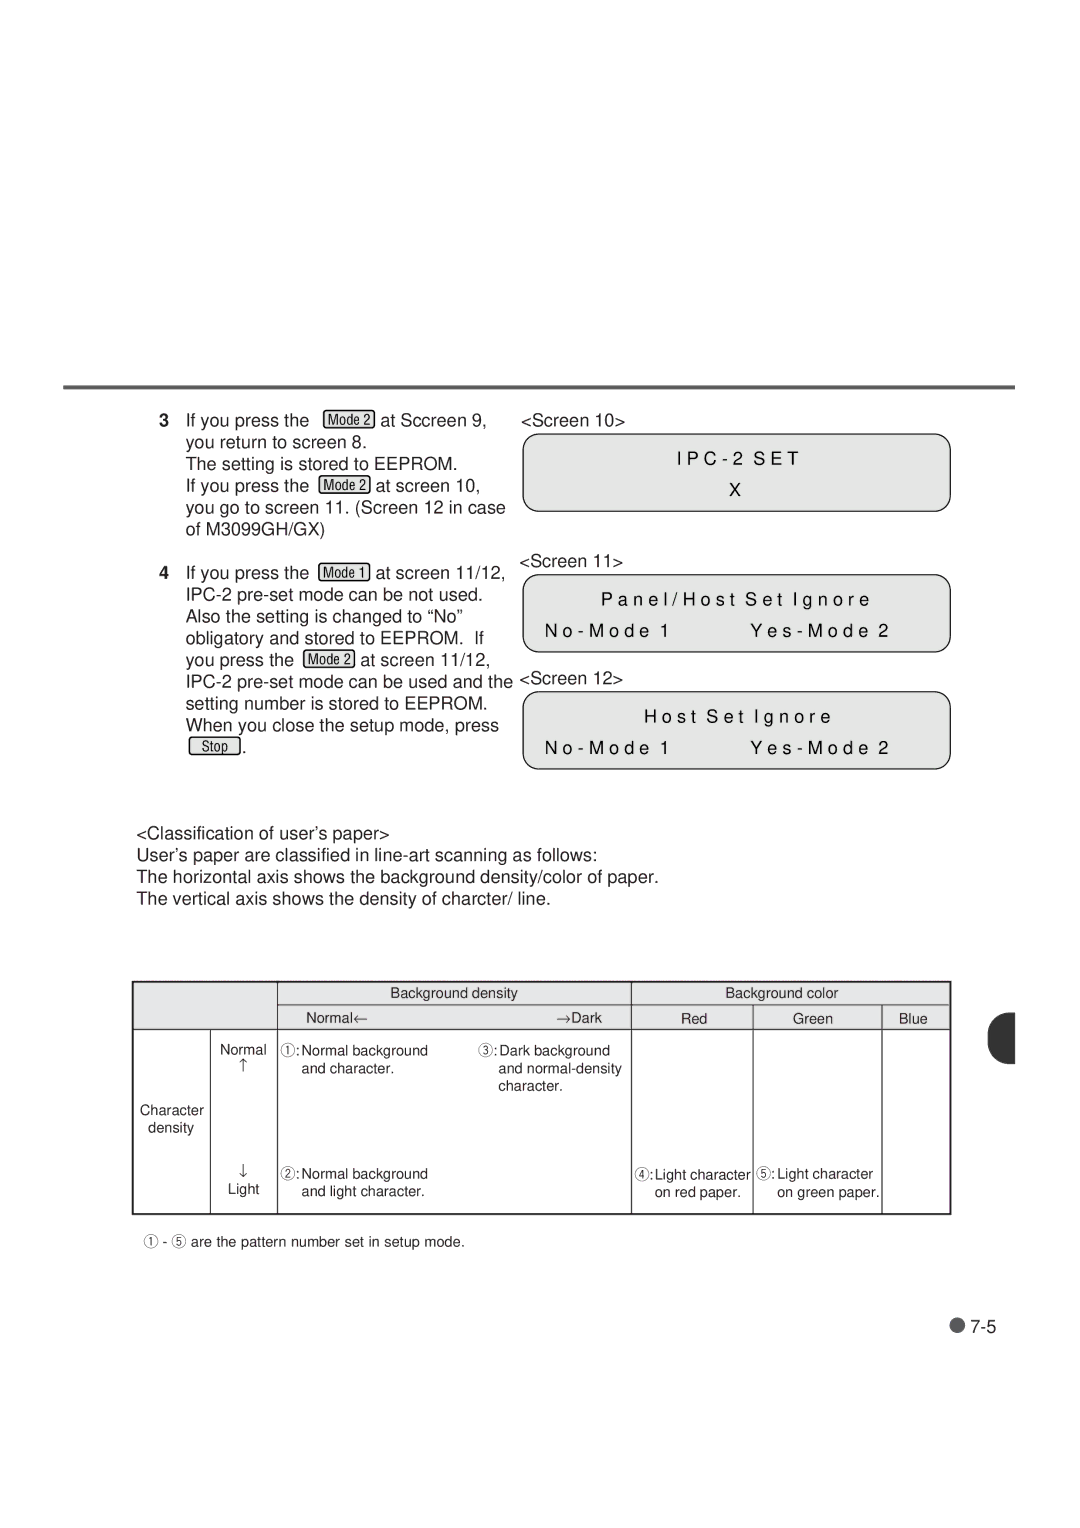
<Classification of user’s paper>
User’s paper are classified in
The horizontal axis shows the background density/color of paper. The vertical axis shows the density of charcter/ line.
|
| Background density | Background color |
| ||
|
| Normal← | →Dark | Red | Green | Blue |
| Normal | q: Normal background | e: Dark background |
|
|
|
| − | and character. | and |
|
|
|
|
|
| character. |
|
|
|
Character |
|
|
|
|
|
|
density |
|
|
|
|
|
|
| ↓ | w: Normal background |
| r:Light character | t: Light character |
|
| Light | and light character. |
| on red paper. | on green paper. |
|
|
|
|
|
|
|
|
q- t are the pattern number set in setup mode.
![]()