Setup
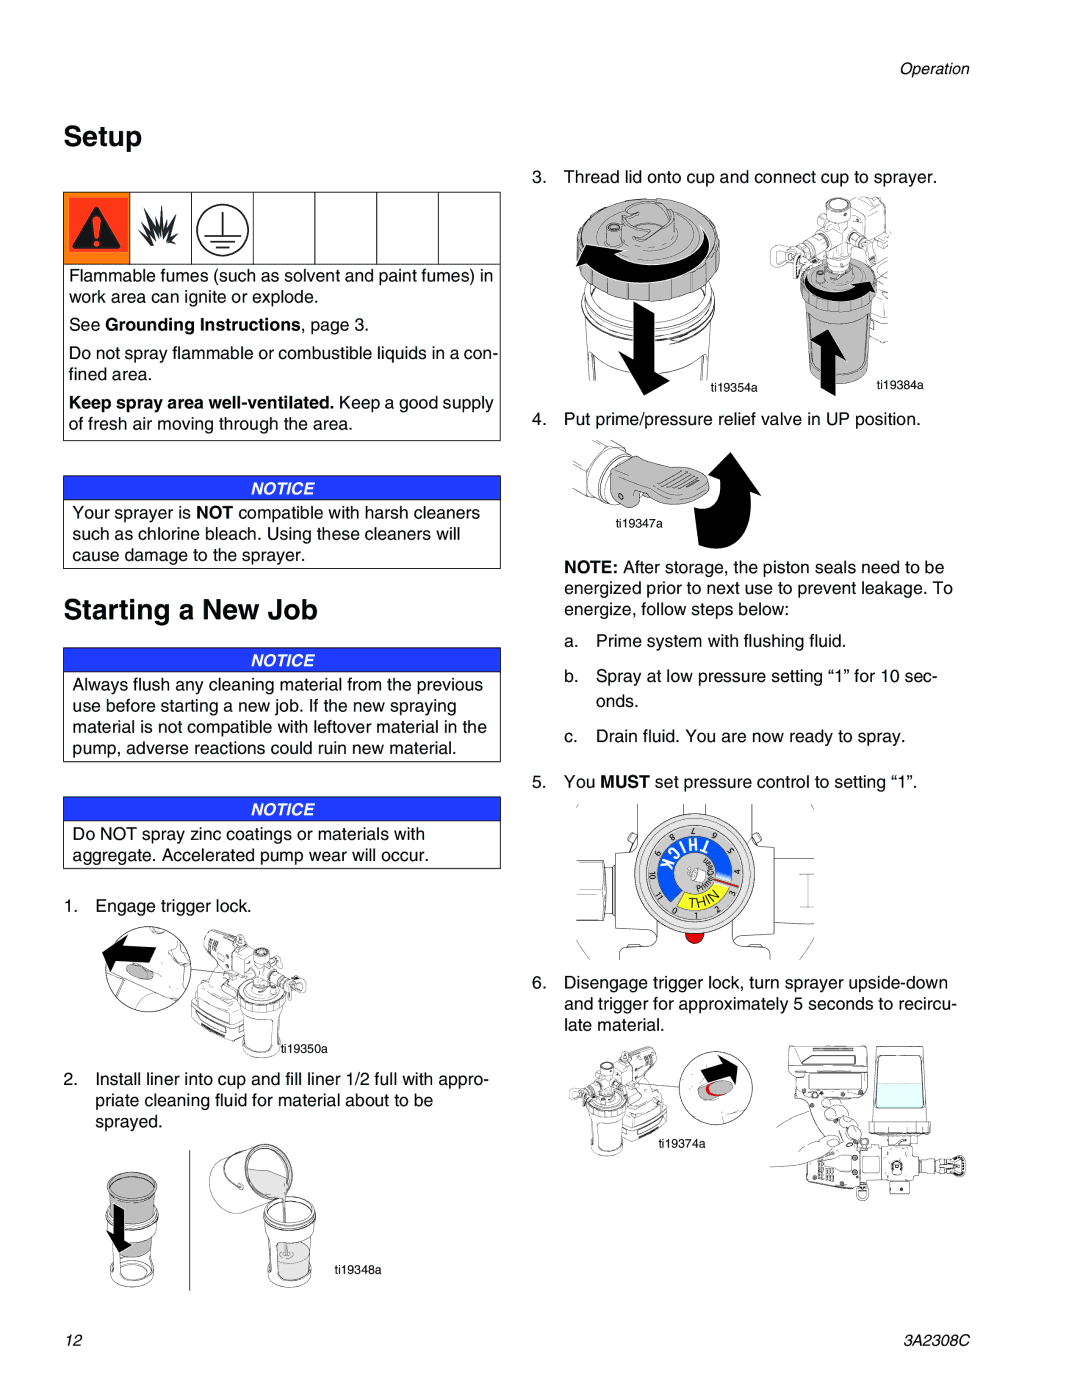
Flammable fumes (such as solvent and paint fumes) in work area can ignite or explode.
See Grounding Instructions, page 3.
Do not spray flammable or combustible liquids in a con- fined area.
Keep spray area
Operation
3. Thread lid onto cup and connect cup to sprayer.
ti19354ati19384a
4. Put prime/pressure relief valve in UP position.
NOTICE
Your sprayer is NOT compatible with harsh cleaners such as chlorine bleach. Using these cleaners will cause damage to the sprayer.
Starting a New Job
NOTICE
Always flush any cleaning material from the previous use before starting a new job. If the new spraying material is not compatible with leftover material in the pump, adverse reactions could ruin new material.
NOTICE
Do NOT spray zinc coatings or materials with aggregate. Accelerated pump wear will occur.
1. Engage trigger lock.
![]() ti19350a
ti19350a
2.Install liner into cup and fill liner 1/2 full with appro- priate cleaning fluid for material about to be sprayed.
ti19348a
ti19347a
NOTE: After storage, the piston seals need to be energized prior to next use to prevent leakage. To energize, follow steps below:
a.Prime system with flushing fluid.
b.Spray at low pressure setting “1” for 10 sec- onds.
c.Drain fluid. You are now ready to spray.
5.You MUST set pressure control to setting “1”.
6.Disengage trigger lock, turn sprayer
ti19374a
12 | 3A2308C |
