Operation
Priming Pump
1.Put prime/pressure relief valve UP to priming posi- tion.
ti19347a
2.Turn pressure control knob to prime/clean position in line with red indicator dot.
ti19357a
3.Disengage trigger lock and trigger sprayer for three seconds, then release trigger.
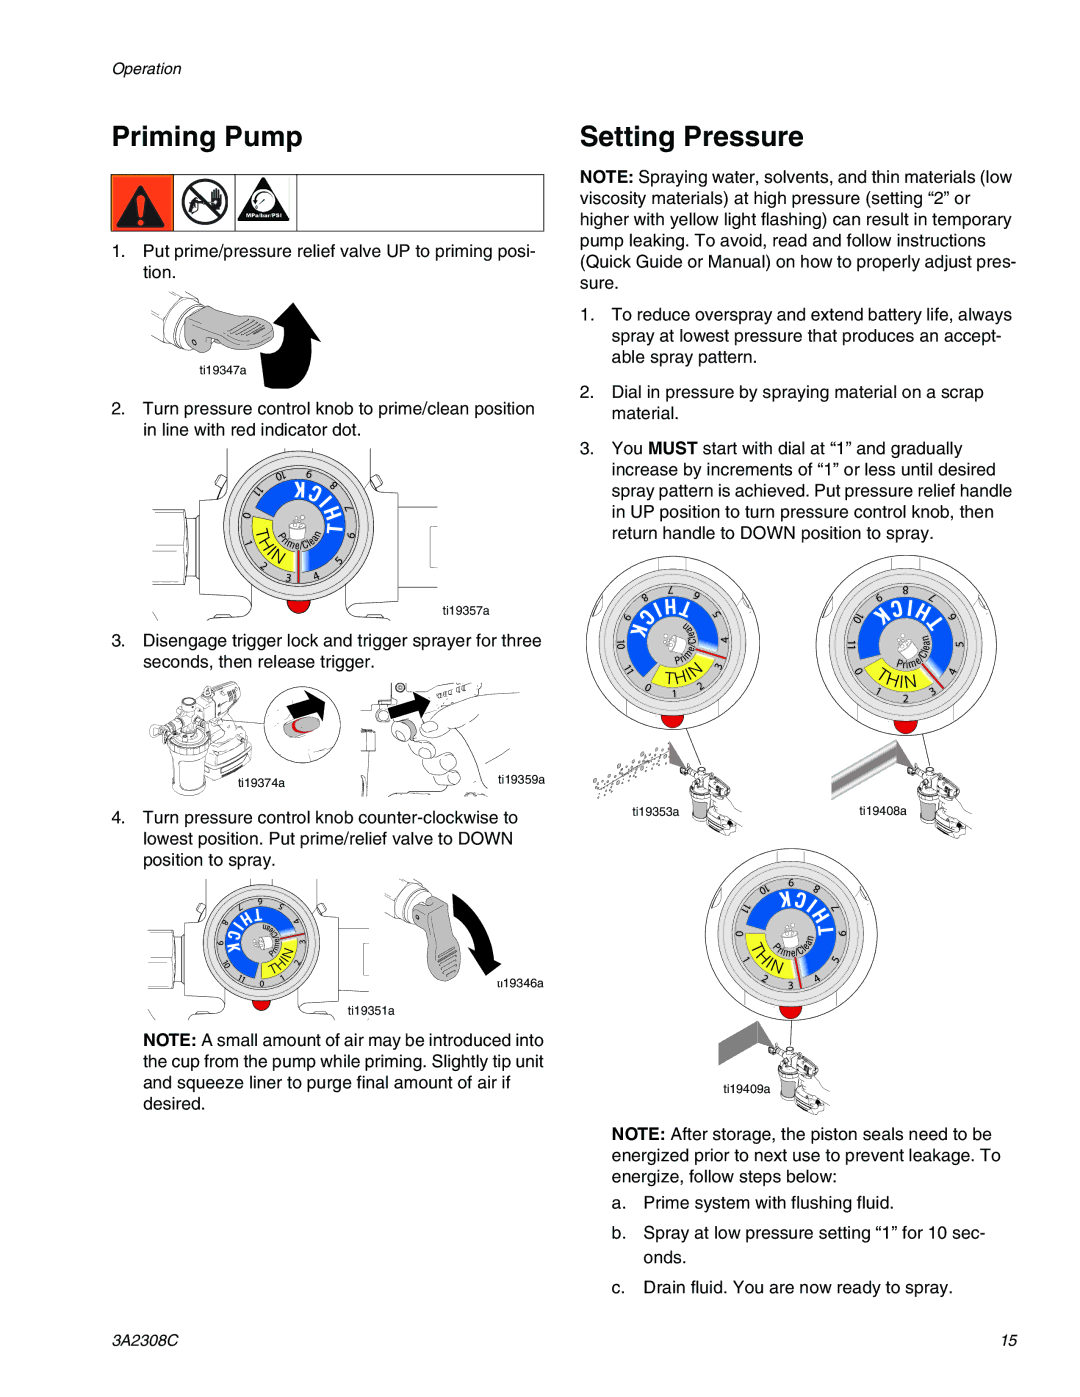
Setting Pressure
NOTE: Spraying water, solvents, and thin materials (low viscosity materials) at high pressure (setting “2” or higher with yellow light flashing) can result in temporary pump leaking. To avoid, read and follow instructions (Quick Guide or Manual) on how to properly adjust pres- sure.
1.To reduce overspray and extend battery life, always spray at lowest pressure that produces an accept- able spray pattern.
2.Dial in pressure by spraying material on a scrap material.
3.You MUST start with dial at “1” and gradually increase by increments of “1” or less until desired spray pattern is achieved. Put pressure relief handle in UP position to turn pressure control knob, then return handle to DOWN position to spray.
ti19374a | ti19359a |
4.Turn pressure control knob
ti19346a
ti19351a
NOTE: A small amount of air may be introduced into the cup from the pump while priming. Slightly tip unit and squeeze liner to purge final amount of air if desired.
ti19353a | ti19408a |
ti19409a
NOTE: After storage, the piston seals need to be energized prior to next use to prevent leakage. To energize, follow steps below:
a.Prime system with flushing fluid.
b.Spray at low pressure setting “1” for 10 sec- onds.
c.Drain fluid. You are now ready to spray.
3A2308C | 15 |