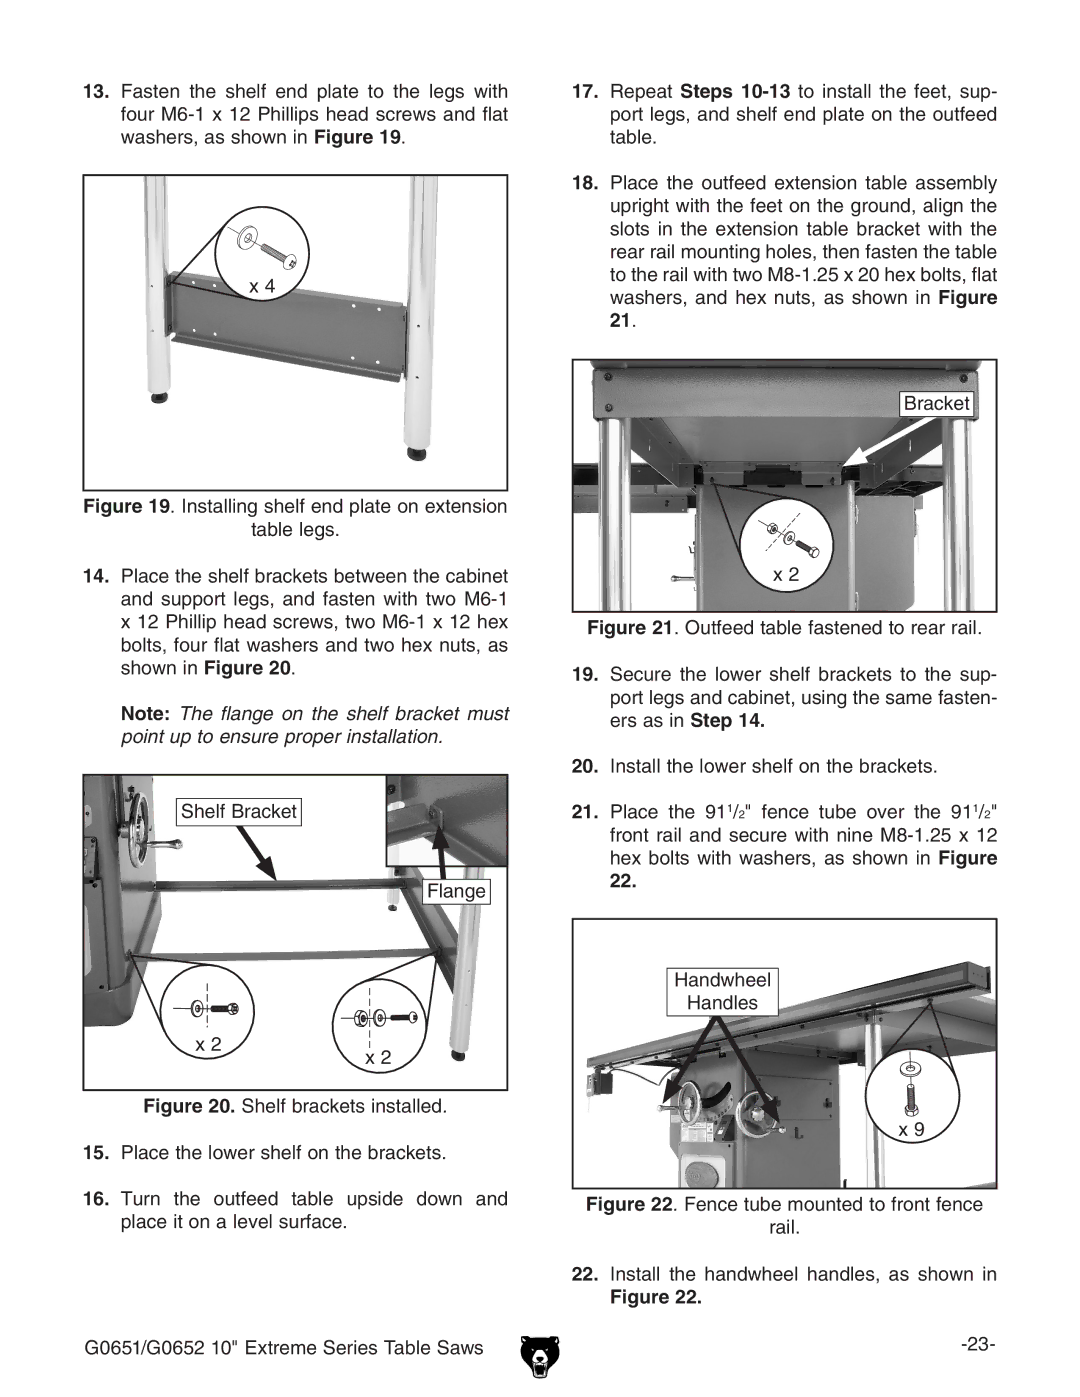
13.Fasten the shelf end plate to the legs with four
x 4
Figure 19. Installing shelf end plate on extension
table legs.
14.Place the shelf brackets between the cabinet and support legs, and fasten with two M6-1 x 12 Phillip head screws, two M6-1 x 12 hex bolts, four flat washers and two hex nuts, as shown in Figure 20.
Note: The flange on the shelf bracket must point up to ensure proper installation.
Shelf Bracket |
|
| Flange |
x 2 | x 2 |
|
Figure 20. Shelf brackets installed.
15.Place the lower shelf on the brackets.
16.Turn the outfeed table upside down and place it on a level surface.
G0651/G0652 10" Extreme Series Table Saws
17.Repeat Steps 10-13 to install the feet, sup- port legs, and shelf end plate on the outfeed table.
18.Place the outfeed extension table assembly upright with the feet on the ground, align the slots in the extension table bracket with the rear rail mounting holes, then fasten the table to the rail with two M8-1.25 x 20 hex bolts, flat washers, and hex nuts, as shown in Figure 21.
Bracket
x 2
Figure 21. Outfeed table fastened to rear rail.
19.Secure the lower shelf brackets to the sup- port legs and cabinet, using the same fasten- ers as in Step 14.
20.Install the lower shelf on the brackets.
21.Place the 911/2" fence tube over the 911/2" front rail and secure with nine M8-1.25 x 12 hex bolts with washers, as shown in Figure 22.
Handwheel
Handles
x 9
Figure 22. Fence tube mounted to front fence
rail.
22.Install the handwheel handles, as shown in
Figure 22.