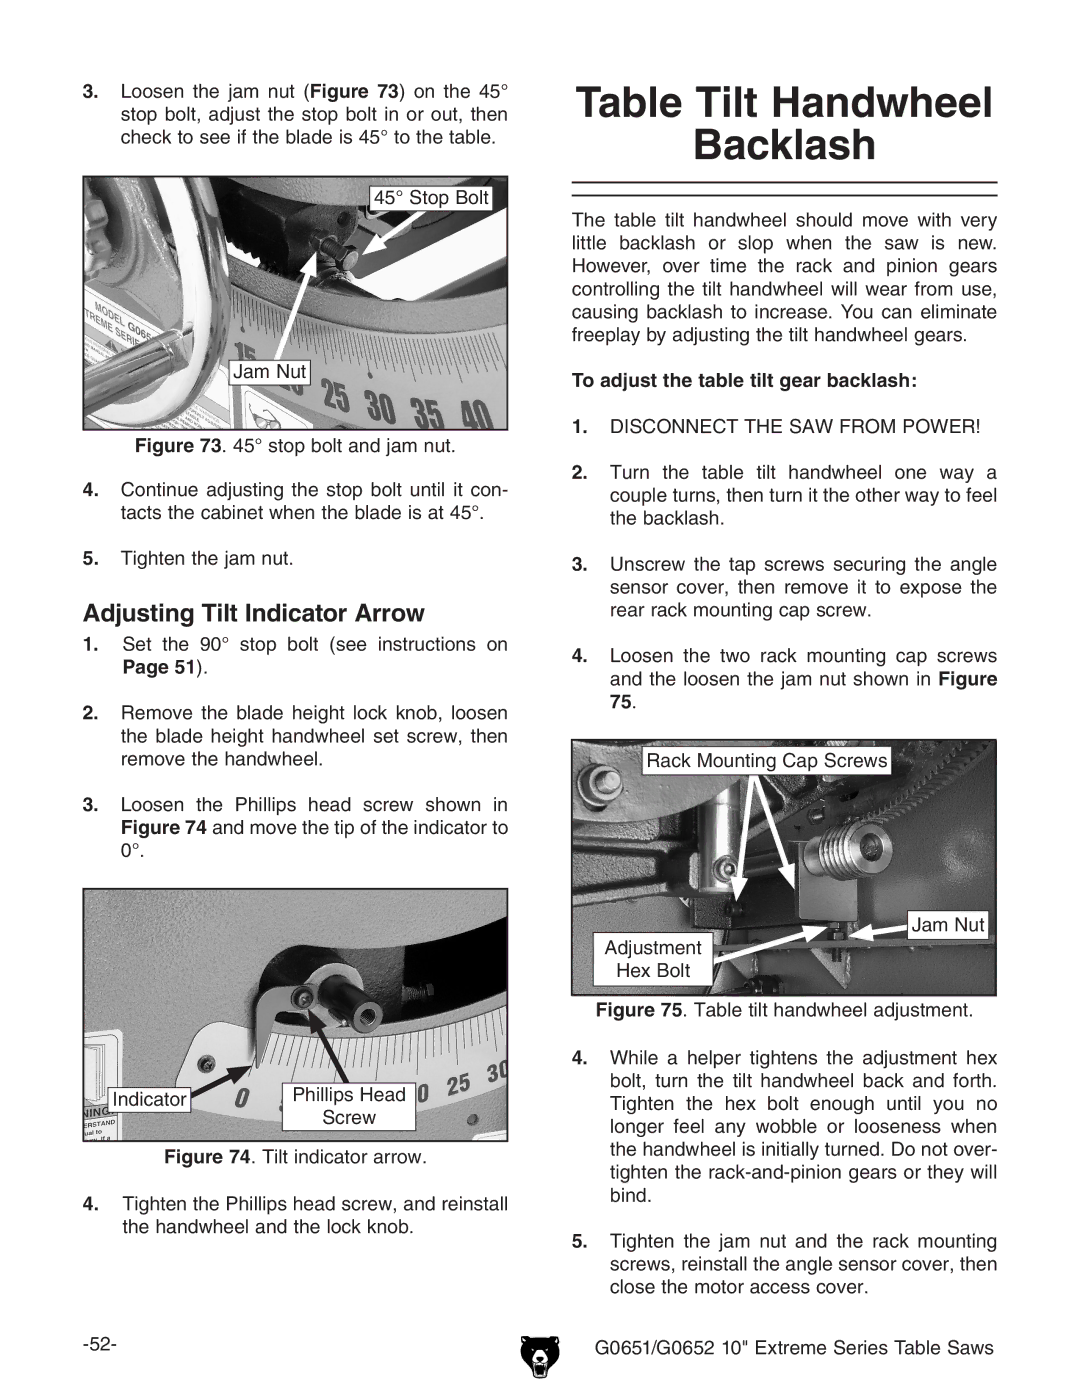
3.Loosen the jam nut (Figure 73) on the 45° stop bolt, adjust the stop bolt in or out, then check to see if the blade is 45° to the table.
45° Stop Bolt
Jam Nut
Figure 73. 45° stop bolt and jam nut.
4.Continue adjusting the stop bolt until it con- tacts the cabinet when the blade is at 45°.
5.Tighten the jam nut.
Adjusting Tilt Indicator Arrow
1.Set the 90° stop bolt (see instructions on
Page 51).
2.Remove the blade height lock knob, loosen the blade height handwheel set screw, then remove the handwheel.
3.Loosen the Phillips head screw shown in Figure 74 and move the tip of the indicator to 0°.
|
|
|
|
|
| Indicator |
| Phillips Head |
|
|
|
| Screw |
|
|
|
|
| |
|
|
|
|
|
Figure 74. Tilt indicator arrow.
4.Tighten the Phillips head screw, and reinstall the handwheel and the lock knob.
Table Tilt Handwheel
Backlash
The table tilt handwheel should move with very little backlash or slop when the saw is new. However, over time the rack and pinion gears controlling the tilt handwheel will wear from use, causing backlash to increase. You can eliminate freeplay by adjusting the tilt handwheel gears.
To adjust the table tilt gear backlash:
1.Disconnect the saw FROM POWER!
2.Turn the table tilt handwheel one way a couple turns, then turn it the other way to feel the backlash.
3.Unscrew the tap screws securing the angle sensor cover, then remove it to expose the rear rack mounting cap screw.
4.Loosen the two rack mounting cap screws and the loosen the jam nut shown in Figure 75.
Rack Mounting Cap Screws |
Jam Nut |
Adjustment |
Hex Bolt |