29510_AVR745_Engelsk 30/10/06 9:31 Side 23
System Configuration
•More adjustment options may be accessed by pressing the Page Left/Right Buttons 8.
When the
NOTE:
System Setup
The AVR 745 features an advanced memory sys- tem that enables you to establish different confi- gurations for component video assignment, digi- tal input, surround mode for each input source.
To ease the speaker setting, the same speaker setting can also be made for all inputs. This flexi- bility enables you to custom tailor the way in which you listen to each source and have the AVR memorize them. This means, for example, that you may associate different surround modes and analog or digital inputs with different sources. Once these settings are made, they will automatically be recalled whenever you select that input.
To simplify initial configuration and operation, the AVR 745 has been preconfigured with input settings that are typical for home theater systems. These settings are detailed in the worksheets in the Appendix. Before adjusting the input settings, it is a good idea to compare your input connections to the defaults so that you may see where changes need to be made.
Before using the unit, you will probably want to change the settings for some inputs so that they are properly configured to reflect the use of digi- tal or analog inputs and the surround mode associated with the input. Remember that since the AVR memorizes the settings for each input individually, you will need to make these adjust- ments for each input used. However, once they are made, further adjustment is only required when system components are changed.
To make this process as quick and as easy as possible, we suggest that you use the
In/Out Setup
The first step in configuring the AVR is to select an input, i.e. to associate an analog or digital input with each input source in use, e.g. CD or DVD. Note that once an input is selected, all set- tings for the Digital Input, Speaker Configuration and Surround Mode will ”attach” themselves to that input and be stored in a
When using the
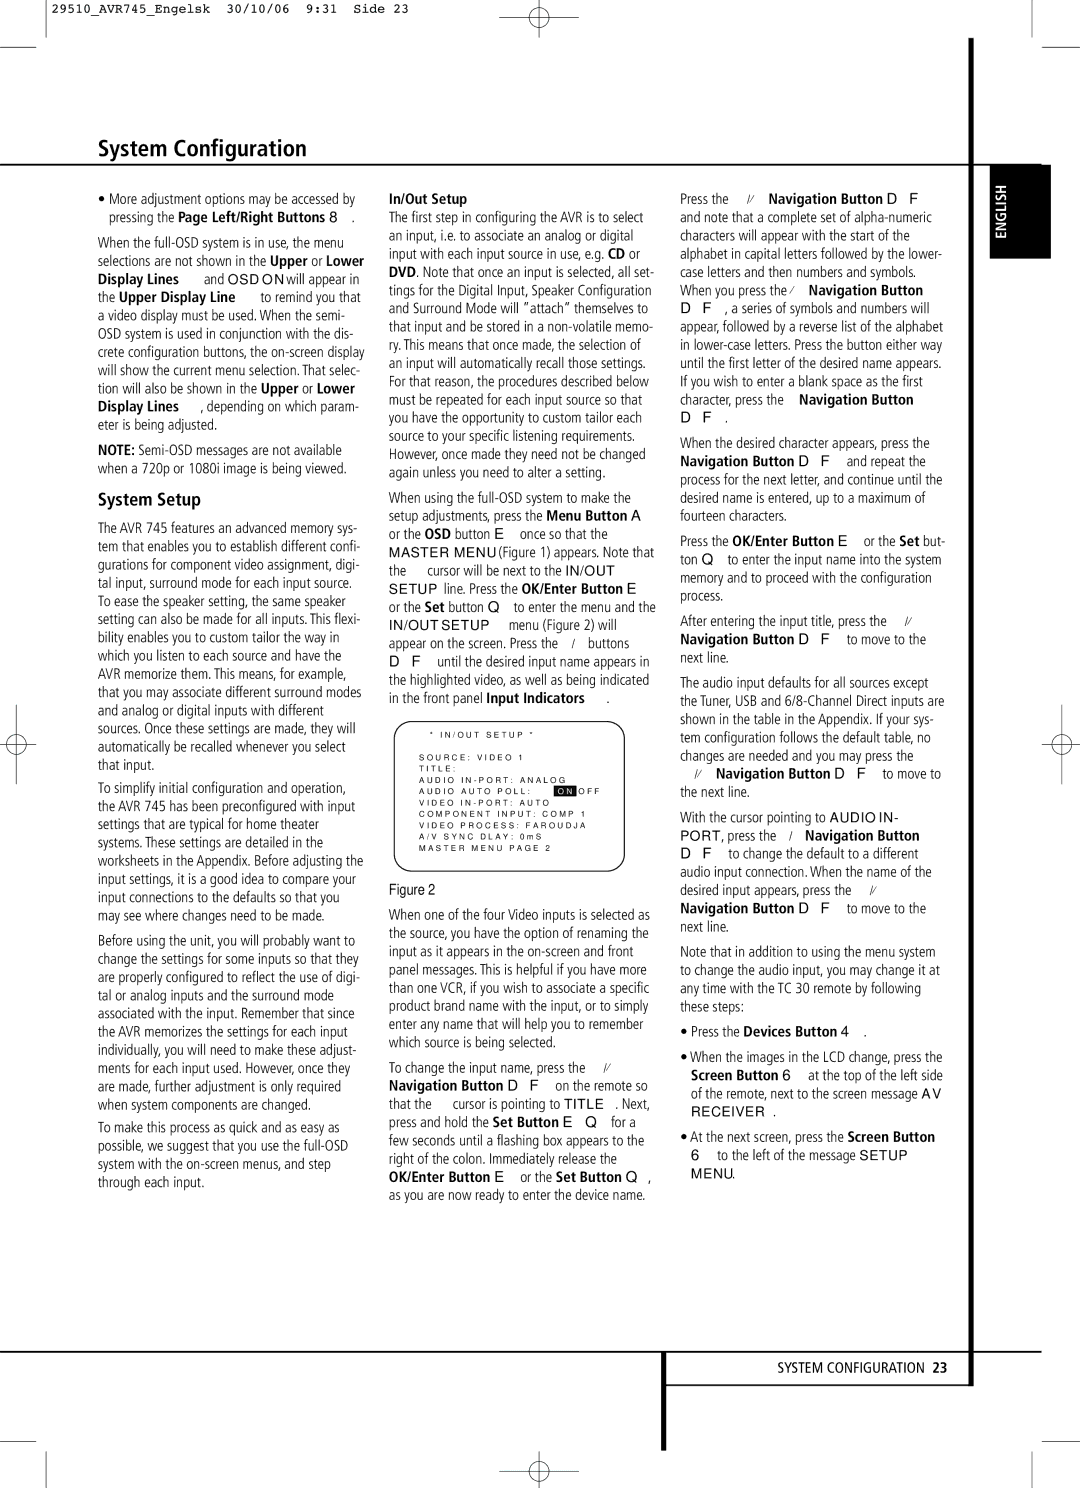
* I N / O U T S E T U P *
→ S O U R C E : V I D E O 1 T I T L E :
A U D I O I N - P O R T : A N A L O G
A U D I O A U T O P O L L : O N O F F
V I D E O I N - P O R T : A U T O
C O M P O N E N T I N P U T : C O M P 1
V I D E O P R O C E S S : F A R O U D J A
A / V S Y N C D L A Y : 0 m S
M A S T E R M E N U P A G E 2
Figure 2
When one of the four Video inputs is selected as the source, you have the option of renaming the input as it appears in the
To change the input name, press the ⁄/¤ Navigation Button DF on the remote so that the ➞ cursor is pointing to TITLE. Next, press and hold the Set Button EQ for a few seconds until a flashing box appears to the right of the colon. Immediately release the OK/Enter Button E or the Set Button Q, as you are now ready to enter the device name.
Press the ⁄/¤ Navigation Button DF and note that a complete set of
DF.
When the desired character appears, press the › Navigation Button DF and repeat the process for the next letter, and continue until the desired name is entered, up to a maximum of fourteen characters.
Press the OK/Enter Button E or the Set but- ton Q to enter the input name into the system memory and to proceed with the configuration process.
After entering the input title, press the ⁄/¤ Navigation Button DF to move to the next line.
The audio input defaults for all sources except the Tuner, USB and
With the cursor pointing to AUDIO IN- PORT, press the ‹ /› Navigation Button DF to change the default to a different audio input connection. When the name of the desired input appears, press the ⁄/¤ Navigation Button DF to move to the next line.
Note that in addition to using the menu system to change the audio input, you may change it at any time with the TC 30 remote by following these steps:
•Press the Devices Button 4.
•When the images in the LCD change, press the Screen Button 6 at the top of the left side of the remote, next to the screen message AV RECEIVER.
•At the next screen, press the Screen Button 6 to the left of the message SETUP MENU.
ENGLISH
SYSTEM CONFIGURATION 23