Unpacking the Product
Remove the machine from its packaging close to the final location of the machine.
Step 1. Remove all outer packaging from the machine. Check there is no damage to the machine before continuing the installation process.
Step 2. Carefully cut through the
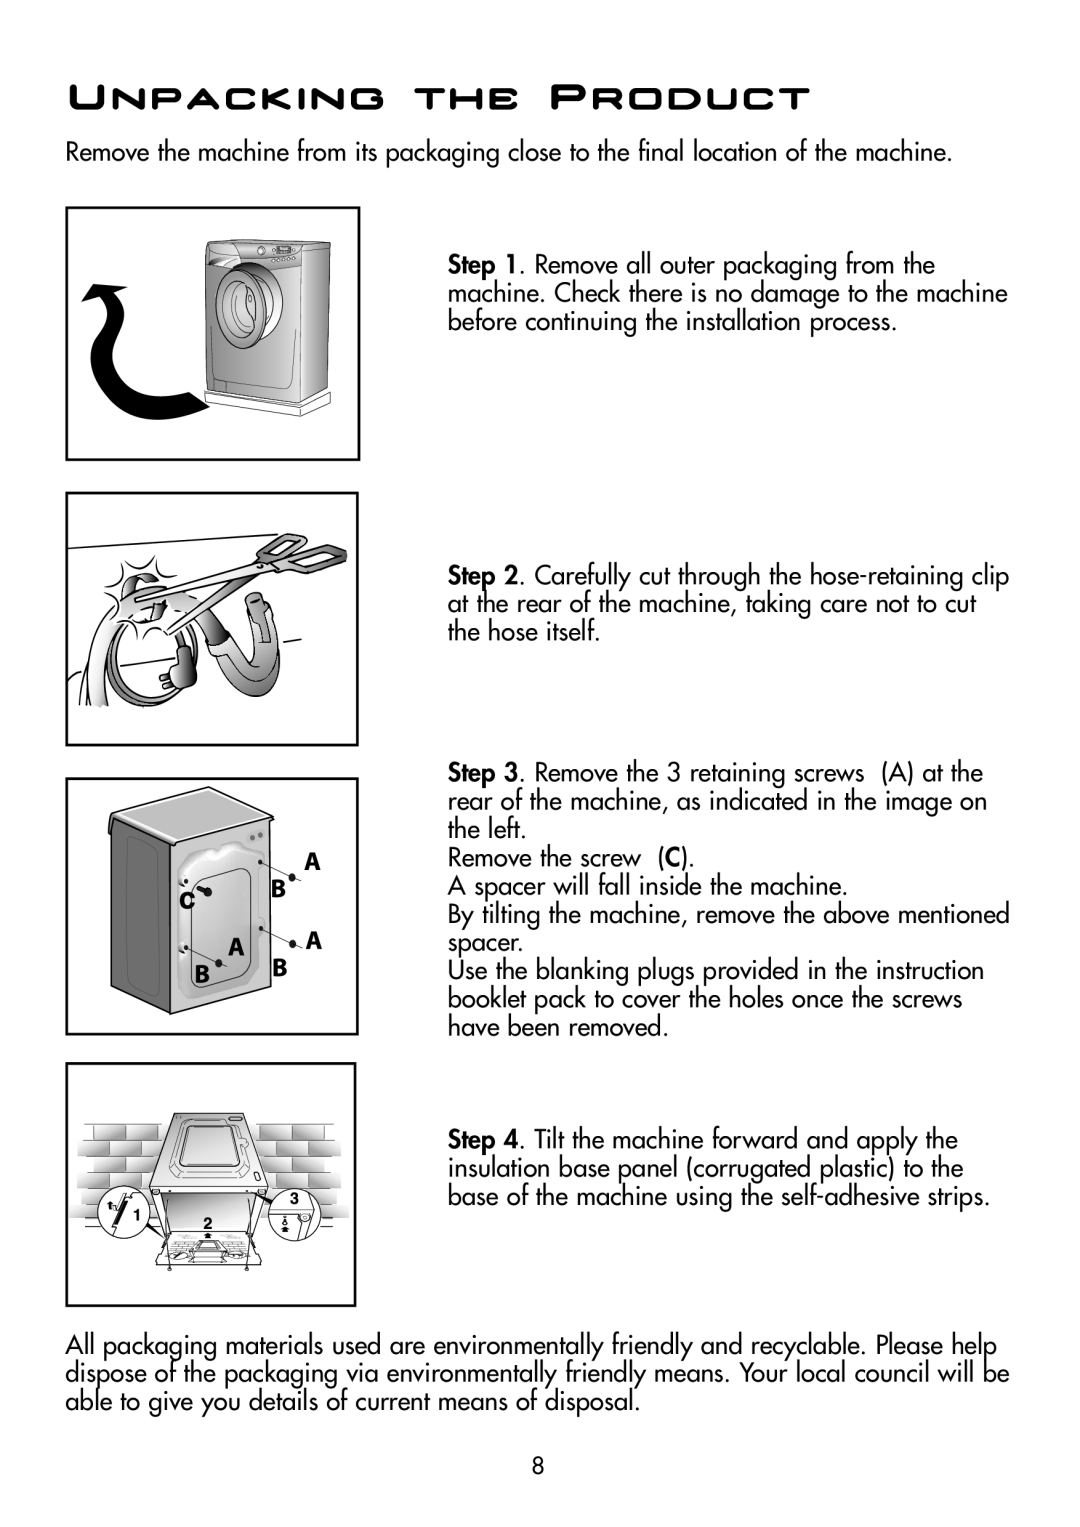
Step 3. Remove the 3 retaining screws (A) at the rear of the machine, as indicated in the image on the left.
Remove the screw (C).
A spacer will fall inside the machine.
By tilting the machine, remove the above mentioned spacer.
Use the blanking plugs provided in the instruction booklet pack to cover the holes once the screws have been removed.
Step 4. Tilt the machine forward and apply the insulation base panel (corrugated plastic) to the base of the machine using the
All packaging materials used are environmentally friendly and recyclable. Please help dispose of the packaging via environmentally friendly means. Your local council will be able to give you details of current means of disposal.
8