Replacing Assemblies
To remove and replace the color display assembly
To remove and replace the color display assembly
HP 16500B
The color display assembly replacement procedure consists of three sections:
Removing the assembly from the mainframe.
Transferring parts to the replacement assembly.
Installing the assembly in the mainframe.
Removing the color display assembly from the mainframe
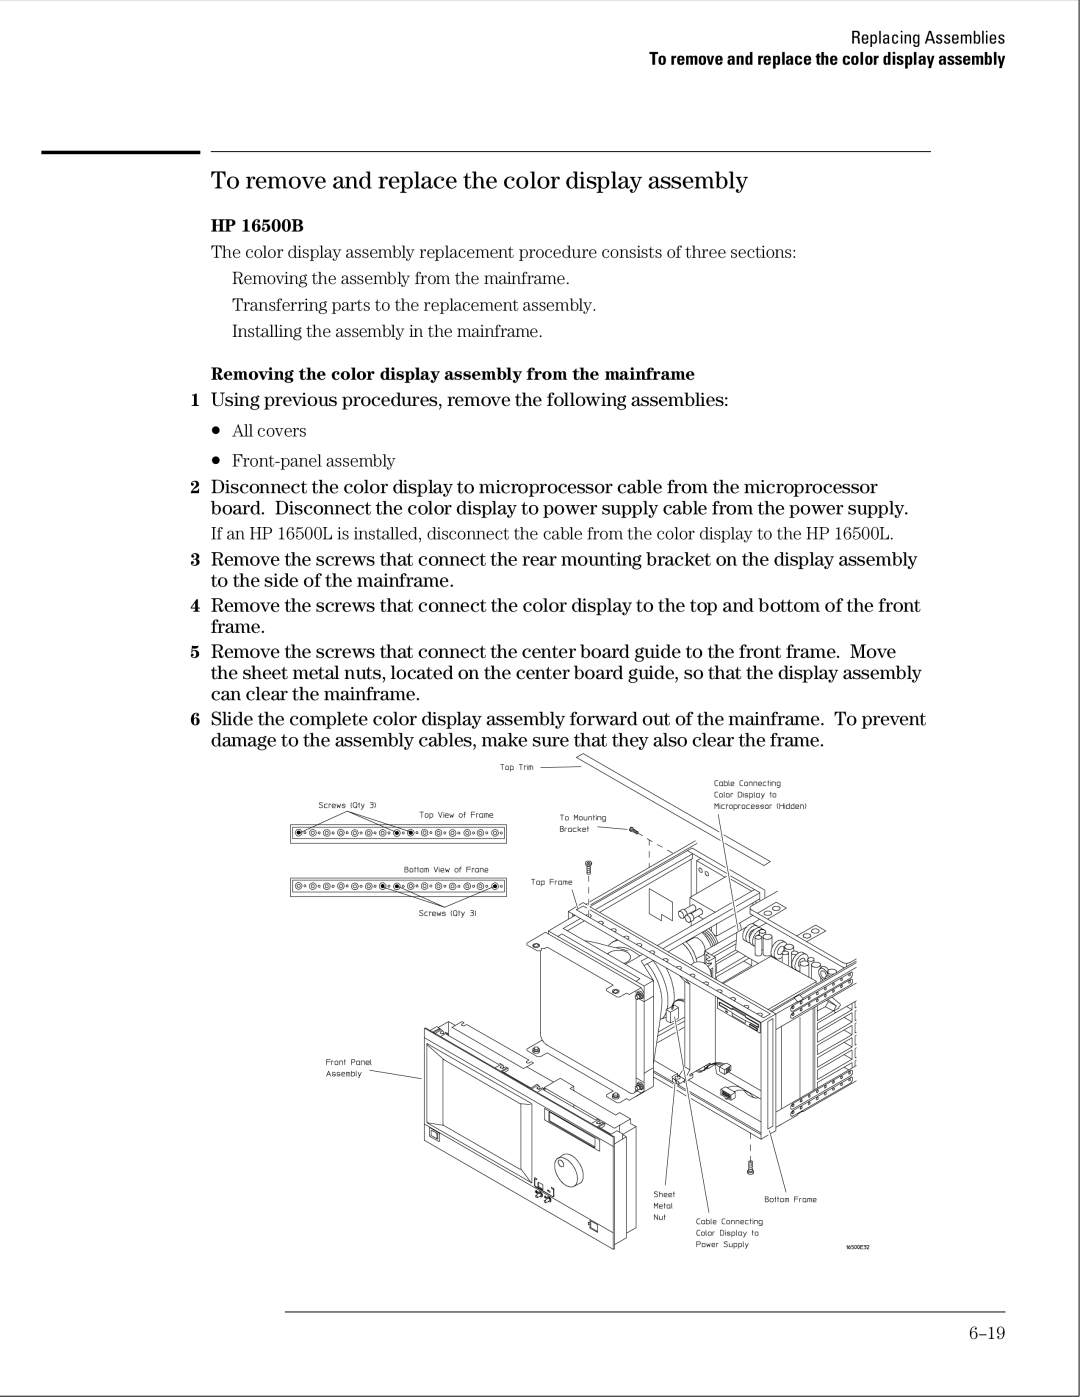
1Using previous procedures, remove the following assemblies:
•All covers
•
2Disconnect the color display to microprocessor cable from the microprocessor board. Disconnect the color display to power supply cable from the power supply.
If an HP 16500L is installed, disconnect the cable from the color display to the HP 16500L.
3Remove the screws that connect the rear mounting bracket on the display assembly to the side of the mainframe.
4Remove the screws that connect the color display to the top and bottom of the front frame.
5Remove the screws that connect the center board guide to the front frame. Move the sheet metal nuts, located on the center board guide, so that the display assembly can clear the mainframe.
6Slide the complete color display assembly forward out of the mainframe. To prevent damage to the assembly cables, make sure that they also clear the frame.