Replacing Assemblies
To remove and replace the color display assembly
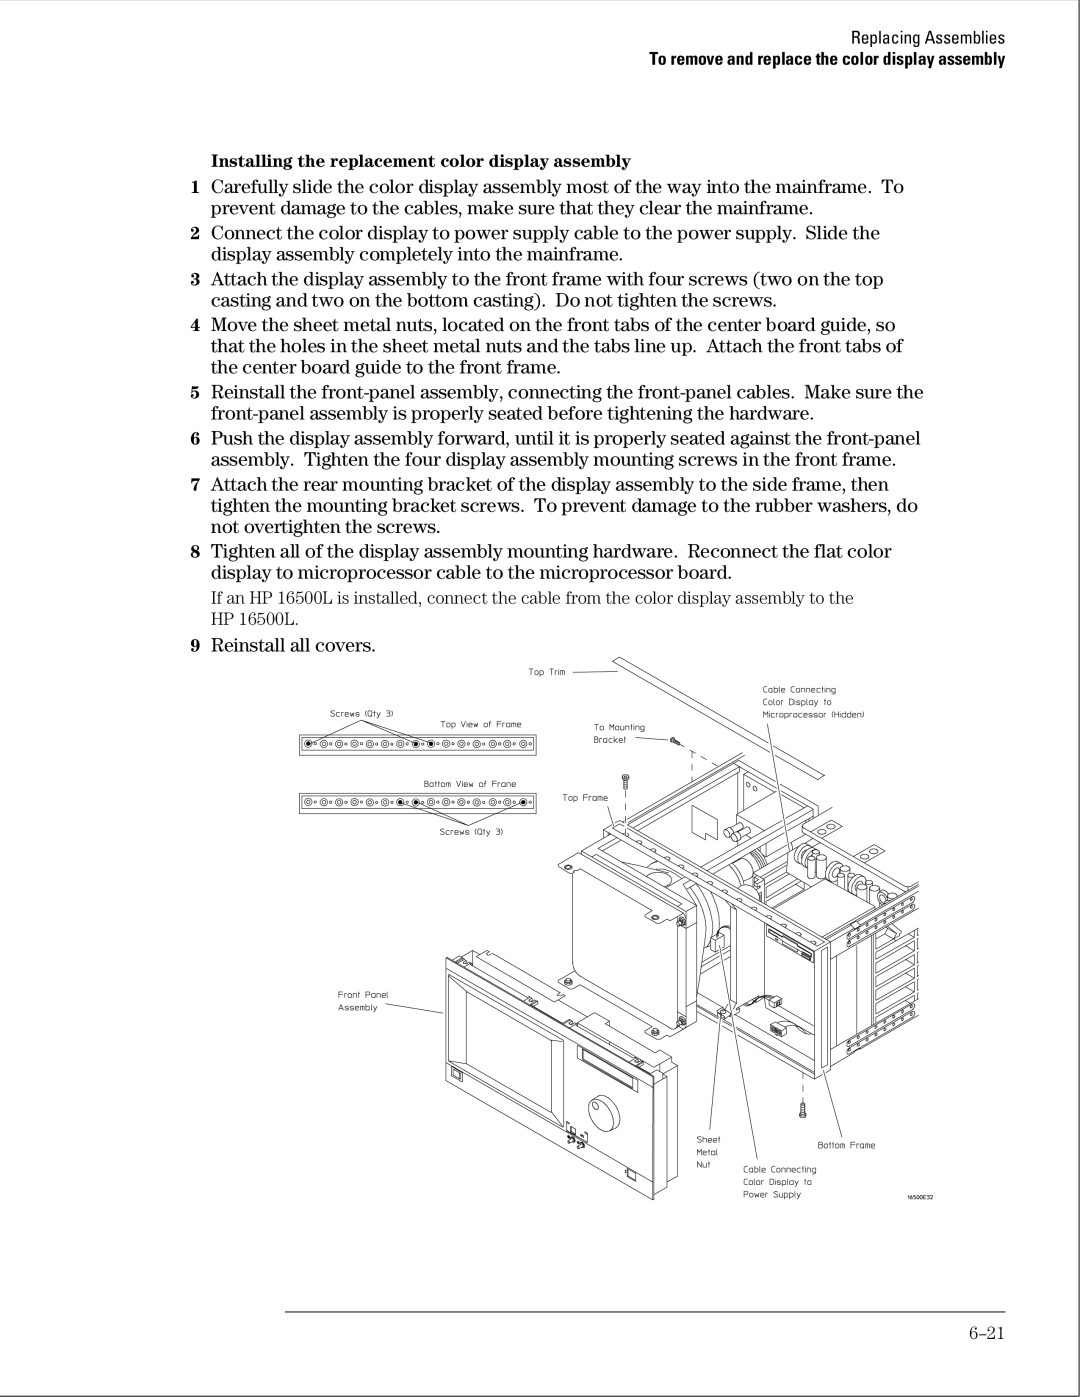
Installing the replacement color display assembly
1Carefully slide the color display assembly most of the way into the mainframe. To prevent damage to the cables, make sure that they clear the mainframe.
2Connect the color display to power supply cable to the power supply. Slide the display assembly completely into the mainframe.
3Attach the display assembly to the front frame with four screws (two on the top casting and two on the bottom casting). Do not tighten the screws.
4Move the sheet metal nuts, located on the front tabs of the center board guide, so that the holes in the sheet metal nuts and the tabs line up. Attach the front tabs of the center board guide to the front frame.
5Reinstall the
6Push the display assembly forward, until it is properly seated against the
7Attach the rear mounting bracket of the display assembly to the side frame, then tighten the mounting bracket screws. To prevent damage to the rubber washers, do not overtighten the screws.
8Tighten all of the display assembly mounting hardware. Reconnect the flat color display to microprocessor cable to the microprocessor board.
If an HP 16500L is installed, connect the cable from the color display assembly to the HP 16500L.