Replacing Assemblies
To remove and replace the color display assembly
Transferring parts to the replacement assembly
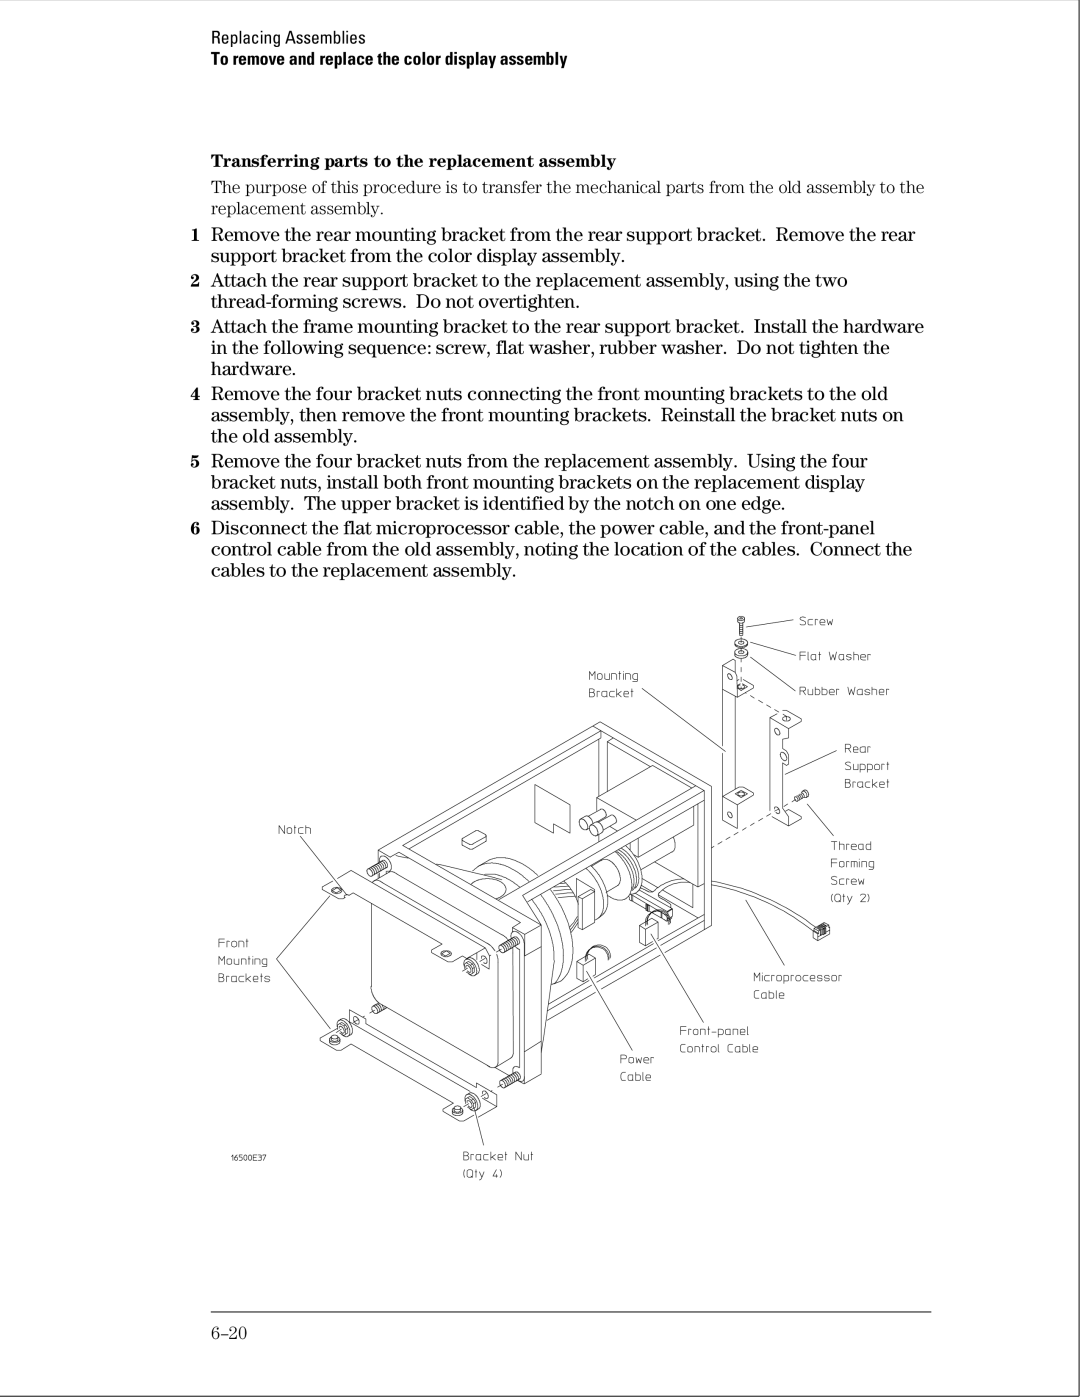
The purpose of this procedure is to transfer the mechanical parts from the old assembly to the replacement assembly.
1Remove the rear mounting bracket from the rear support bracket. Remove the rear support bracket from the color display assembly.
2Attach the rear support bracket to the replacement assembly, using the two
3Attach the frame mounting bracket to the rear support bracket. Install the hardware in the following sequence: screw, flat washer, rubber washer. Do not tighten the hardware.
4Remove the four bracket nuts connecting the front mounting brackets to the old assembly, then remove the front mounting brackets. Reinstall the bracket nuts on the old assembly.
5Remove the four bracket nuts from the replacement assembly. Using the four bracket nuts, install both front mounting brackets on the replacement display assembly. The upper bracket is identified by the notch on one edge.
6Disconnect the flat microprocessor cable, the power cable, and the