Installing the SAN Switch 2/8
7.Attach the rear brackets to the front brackets as follows:
a.Position the right rear bracket (Item 4) inside the right front bracket (Item 8). See Figure 6.
b.Secure the brackets using four
c.Adjust the brackets to the appropriate rack depth and tighten screws to a torque of
8.Repeat Steps 7a through 7c to attach the left rear bracket (Item 2) to the left front bracket (Item 1).
9.Attach the right rear bracket (Item 4) to the right rear rack rail using two
x3/8 inch screws (Item 5) and two retainer nuts (Item 6).
10.Repeat step 9 to attach the left rear bracket (Item 2) to the left rear rack rail.
11.Tighten all screws to a torque of
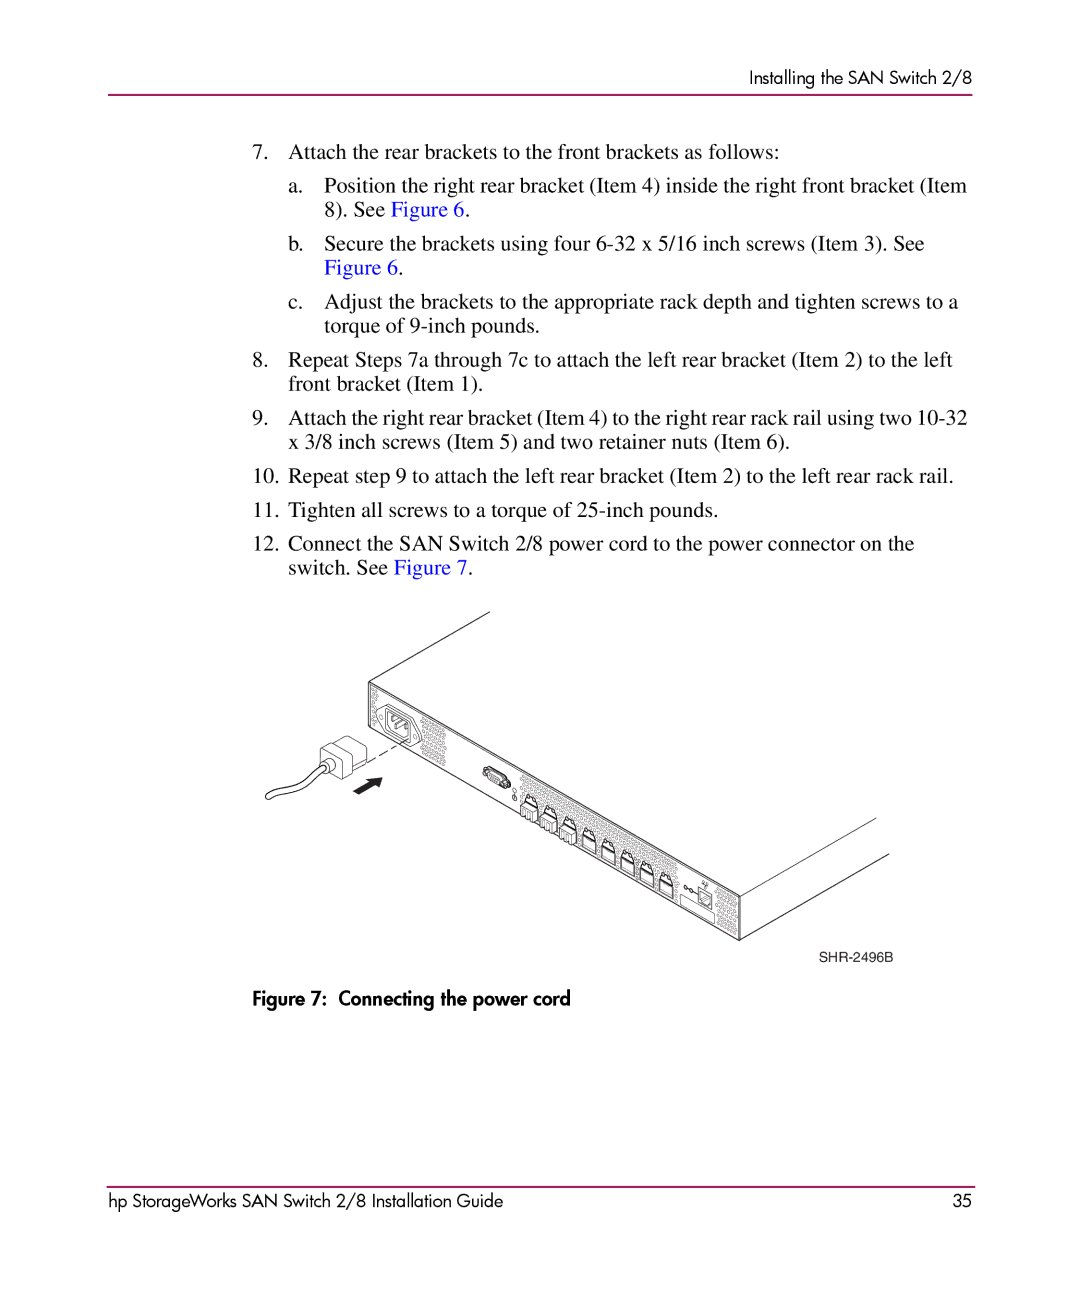
12.Connect the SAN Switch 2/8 power cord to the power connector on the switch. See Figure 7.
Figure 7: Connecting the power cord
hp StorageWorks SAN Switch 2/8 Installation Guide | 35 |
