HP Distributed Cloud Networking 3.0.R2 Installation Guide
Warranty
Table of Contents
HP VRS and VRS-G Software Installation
Documentation feedback Appendix Emulated Ethernet NIC Notes
Audience
About This Guide
HP DCN Overview
HP DCN Overview and Infrastructure
HP Virtualized Services Directory
HP DCN Infrastructure Requirements and Recommendations
HP DCN Installation Overview
Installation Setup
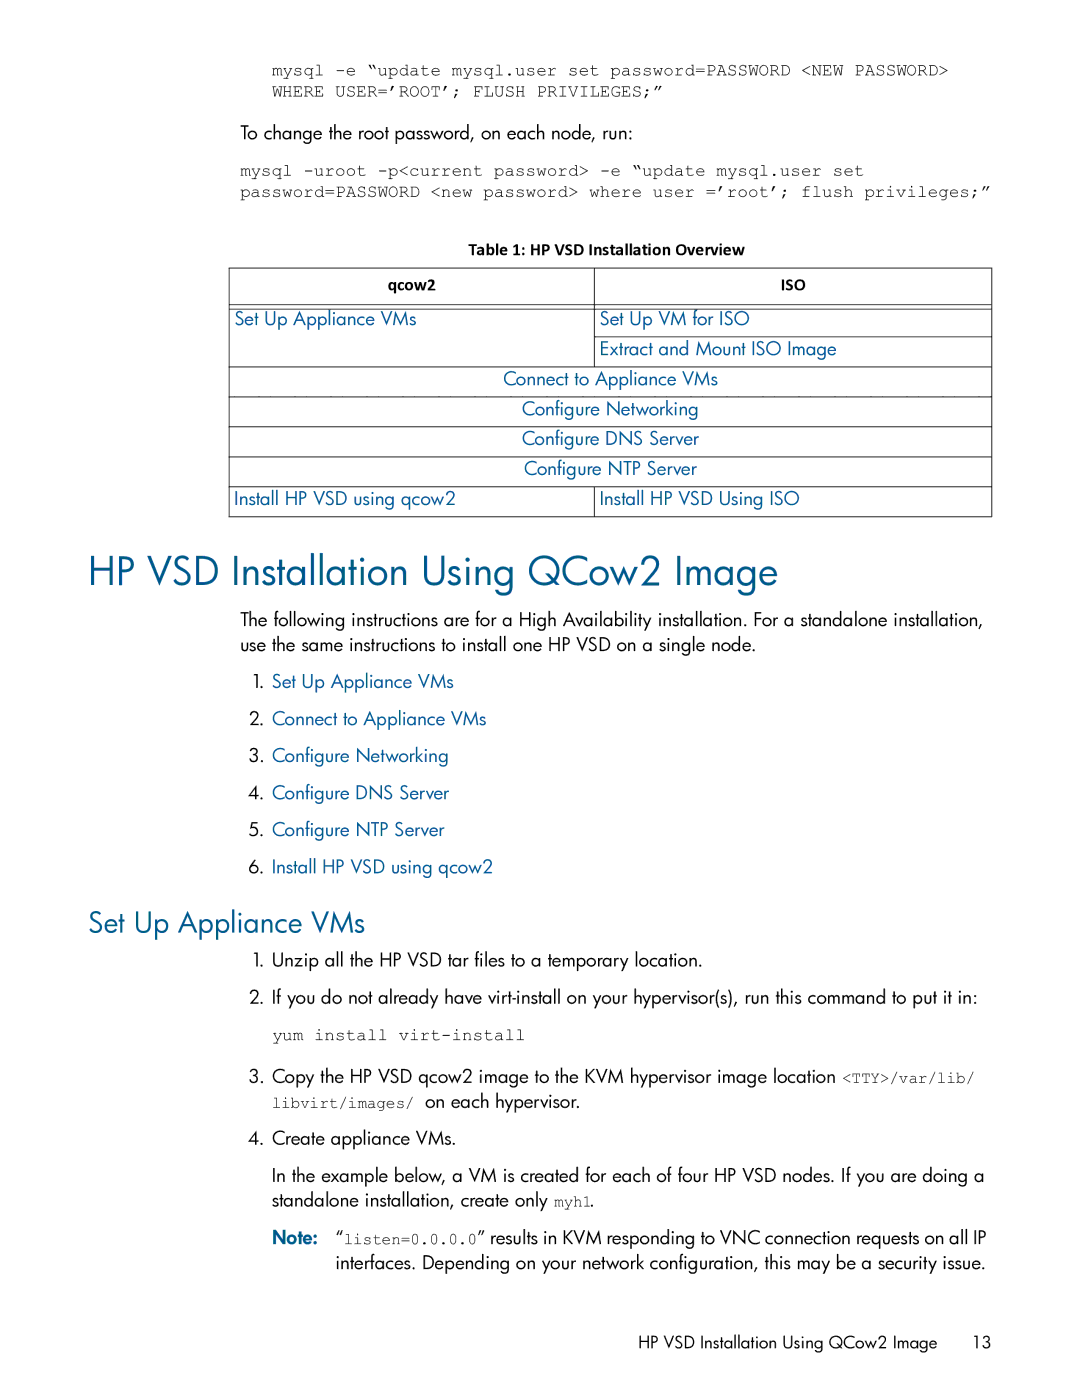
HP VSD Installation Overview
HP DCN Software Installation
Installation Types
HP VSD Hardware and Software Requirements
Reinstalling HP VSD
Installation Methods
Set Up Appliance VMs
HP VSD Installation Using QCow2 Image
To change the root password, on each node, run
Verify the appliance VMs are running
Connect to Appliance VMs
Configure DNS Server
Configure Networking
Ping the gateway in this example, 192.168.100.1. ping
Verify the DNS reverse named file records as follows
Set up forward DNS records as follows
Install HP VSD using qcow2
Configure NTP Server
Set Up VM for ISO
HP VSD Installation Using ISO Disc Image
Install VSD on Node
Install HP VSD Using ISO
Configure Networking, DNS, and NTP
Extract and Mount ISO Image
Xmpp
Import Certificates on the Servers
If you are using an Ldap store, see Using an Ldap Store
Example of Load Balancer Configuration
Ldap Store
HP VSC Installation Notes
HP VSC Software Installation
HP VSC Software Installation Procedure on KVM
For single disk deployment use
Copy HP VSC disks for libvirt access
For legacy two disk deployment use
Emulated Disks Notes
Emulated Ethernet NIC Notes
HP VSC Software Installation Procedure on VMware
Installing HP VSC on Esxi Using OVA
HP VSC Software Installation Procedure on VMware
HP VSC Software Installation
HP VSC Software Installation Procedure on VMware
HP VSC
Update HP VSC configuration and reboot
HP VSC Boot Options File Configuration
HP VSC Basic Configuration
Sistency file .ndx which will preserve system
Dns‐domain dns‐name no dns‐domain
To check connectivity
To enable index persistence, the command is
System-level HP VSC Configuration
HP VSC System and Protocol Configuration
NTP Servers and Time Zone
In-band and Loopback IP Interfaces
HP VSC Software Installation
Post-install Security Tasks
TCP
Tftp
VRS and VRS-G Installation Overview
HP VRS and VRS-G Software Installation
Preparing the Hypervisor
Install dependencies for Rhel
Installing the VRS or VRS-G Software
VRS on Rhel
This section contains
If you have modified /etc/default/openvswitch, restart
Install the VRS package for Rhel
Install dependencies
Reboot
Install the following packages using dpkg
VRS on Ubuntu 12.04 LTS with Ubuntu 12.04 Cloud Packages
Restart the VRS service
Installing the VRS Kernel Module for Mpls over GRE
VRS-G on Rhel or Ubuntu
This section contains the following subsections
Install dependencies for Dkms
Installing VRS Kernel Module On Rhel
Reboot to pick up correct kernel
To verify which kernel is currently running
Installing VRS Kernel Module On Ubuntu
Configuring and Running VRS or VRS-G
To customize, use scripts that you run after bootup
Verify that the VRS processes restart correctly
VMware VRS VM Deployment
Creating the dVSwitch
Introduction
Prerequisites
VSphere vSwitch Configurations
Verifying the Creation of the dVSwitch
VSwitch0
VSwitch1
Information Needed
Deployment of dVRS
Verifying Deployment
Additional Verification
Deployment of dVRS
Clean Install on XenServer
VRS Installation on Citrix XenServer
Install in the following order
Remove stock openvswitch
Ensue, with the following error
Introduction Block
Reboot XenServer
Installation
Verification
Ensure that the xenmon to OVS socket is up
Upgrade Existing dVRS Installation on XenServer
Gives hpManagedNetworks Uuid = HPNetUUID
Verify HPManagedNetwork is created
Ensure that all packages are installed
Root 15072 0.0 0.0 4032 772 hvc0 + 1545
Specifying the Active and Standby HP VSCs
Running and Configuring VRS
Active Contoller
Standby Controller
VRS Installation on Citrix XenServer
Software technical support and software updates
How to contact HP
Support and Other Resources
Gather information before contacting an authorized support
Related information
Related information
Support and Other Resources
Documentation feedback
Appendix Emulated Ethernet NIC Notes
Modify the eth0 configuration
Edit or create the br0 configuration