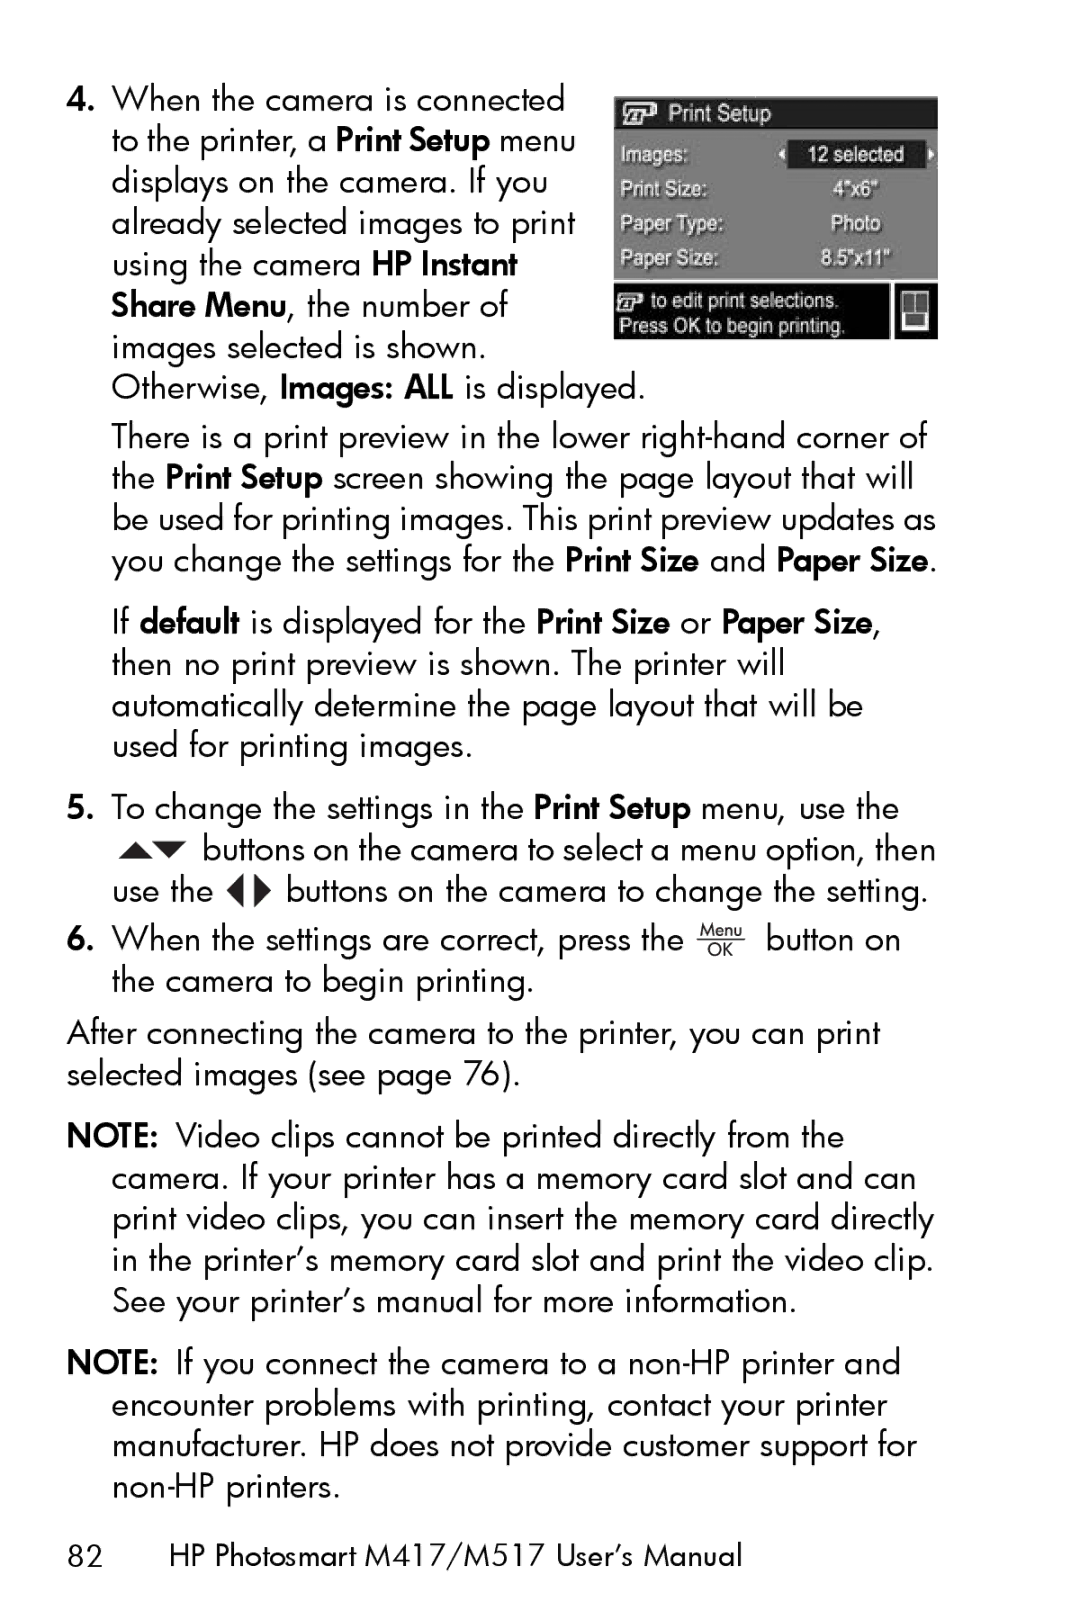
4.When the camera is connected to the printer, a Print Setup menu displays on the camera. If you already selected images to print using the camera HP Instant Share Menu, the number of images selected is shown. Otherwise, Images: ALL is displayed.
There is a print preview in the lower
If default is displayed for the Print Size or Paper Size, then no print preview is shown. The printer will automatically determine the page layout that will be used for printing images.
5.To change the settings in the Print Setup menu, use the
![]() buttons on the camera to select a menu option, then
buttons on the camera to select a menu option, then
use the ![]()
![]() buttons on the camera to change the setting.
buttons on the camera to change the setting.
6.When the settings are correct, press the ![]() button on the camera to begin printing.
button on the camera to begin printing.
After connecting the camera to the printer, you can print selected images (see page 76).
NOTE: Video clips cannot be printed directly from the camera. If your printer has a memory card slot and can print video clips, you can insert the memory card directly in the printer’s memory card slot and print the video clip. See your printer’s manual for more information.
NOTE: If you connect the camera to a