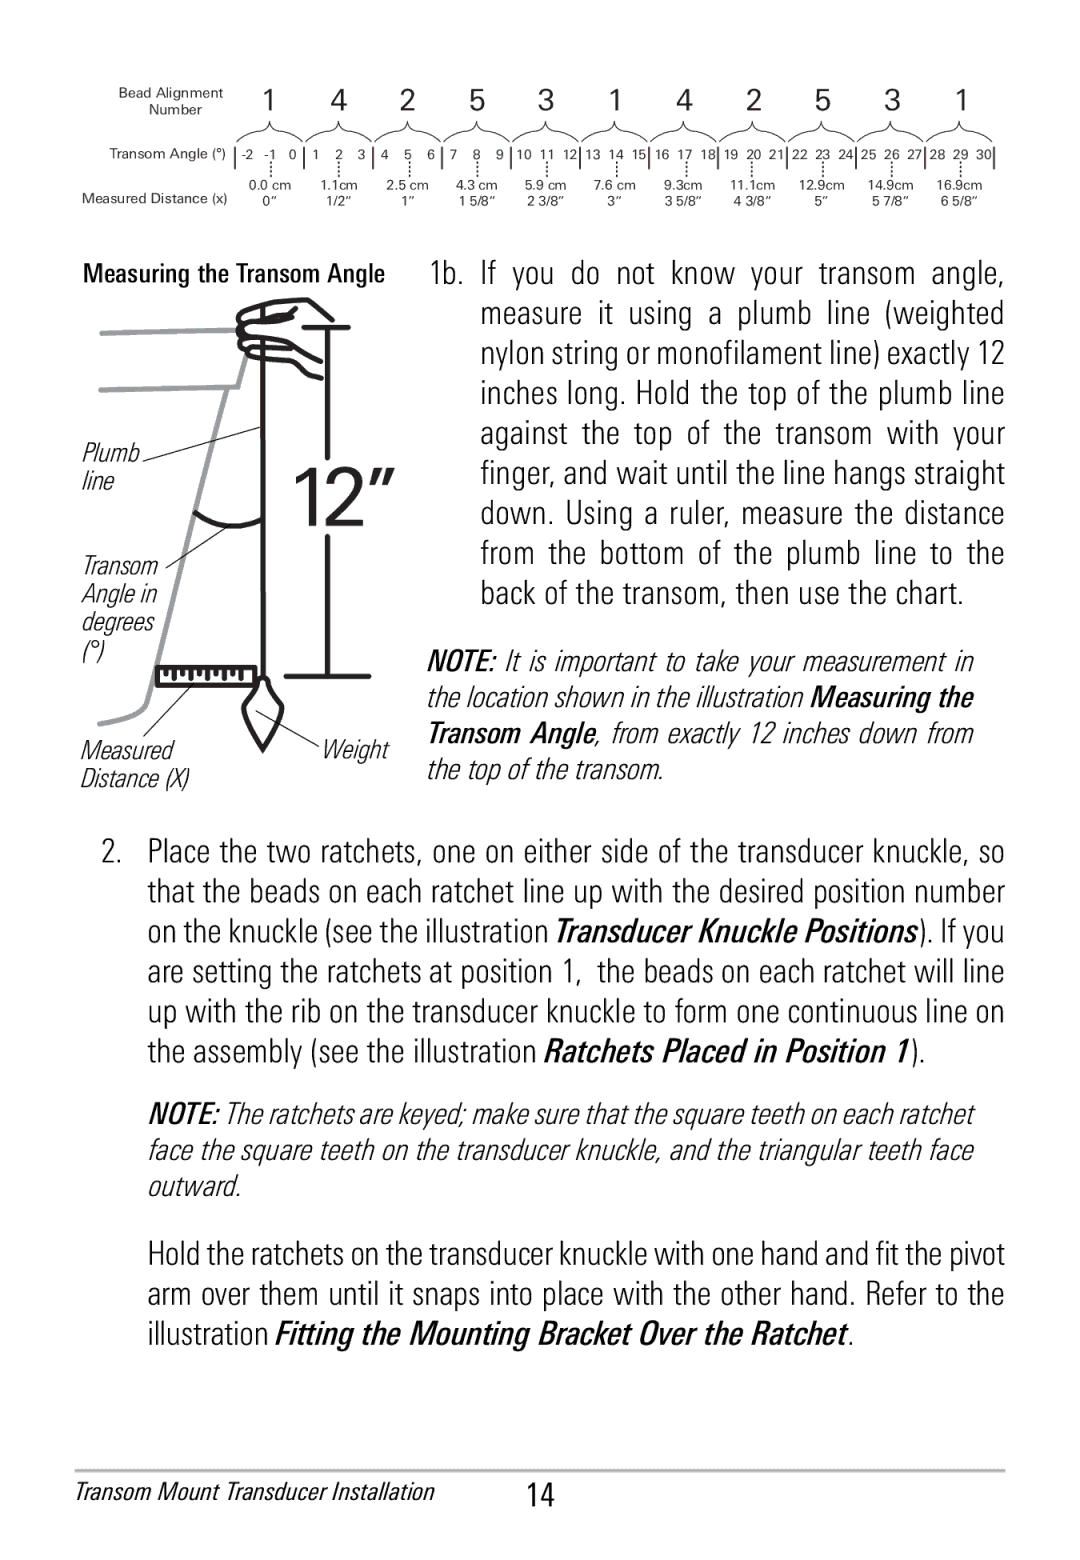
Bead Alignment
Number
Transom Angle (°)
Measured Distance (x)
1 | 4 | 2 | 5 | 3 | 1 | 4 | 2 | 5 | 3 | 1 |
0.0 cm | 1.1cm | 2.5 cm | 4.3 cm | 5.9 cm | 7.6 cm | 9.3cm | 11.1cm | 12.9cm | 14.9cm | 16.9cm |
0“ | 1/2“ | 1“ | 1 5/8“ | 2 3/8“ | 3“ | 3 5/8“ | 4 3/8“ | 5“ | 5 7/8“ | 6 5/8“ |
Measuring the Transom Angle
Plumb![]() line
line
Transom  Angle in degrees
(°)
MeasuredWeight Distance (X)
1b. If you do not know your transom angle, measure it using a plumb line (weighted nylon string or monofilament line) exactly 12 inches long. Hold the top of the plumb line against the top of the transom with your finger, and wait until the line hangs straight down. Using a ruler, measure the distance from the bottom of the plumb line to the back of the transom, then use the chart.
NOTE: It is important to take your measurement in the location shown in the illustration Measuring the Transom Angle, from exactly 12 inches down from the top of the transom.
2.Place the two ratchets, one on either side of the transducer knuckle, so that the beads on each ratchet line up with the desired position number on the knuckle (see the illustration Transducer Knuckle Positions). If you are setting the ratchets at position 1, the beads on each ratchet will line up with the rib on the transducer knuckle to form one continuous line on the assembly (see the illustration Ratchets Placed in Position 1).
NOTE: The ratchets are keyed; make sure that the square teeth on each ratchet face the square teeth on the transducer knuckle, and the triangular teeth face outward.
Hold the ratchets on the transducerknucklewith one hand and fit the pivot arm over them until it snaps into place with the other hand. Refer to the illustration Fitting the Mounting Bracket Over the Ratchet.
Transom Mount Transducer Installation | 14 |