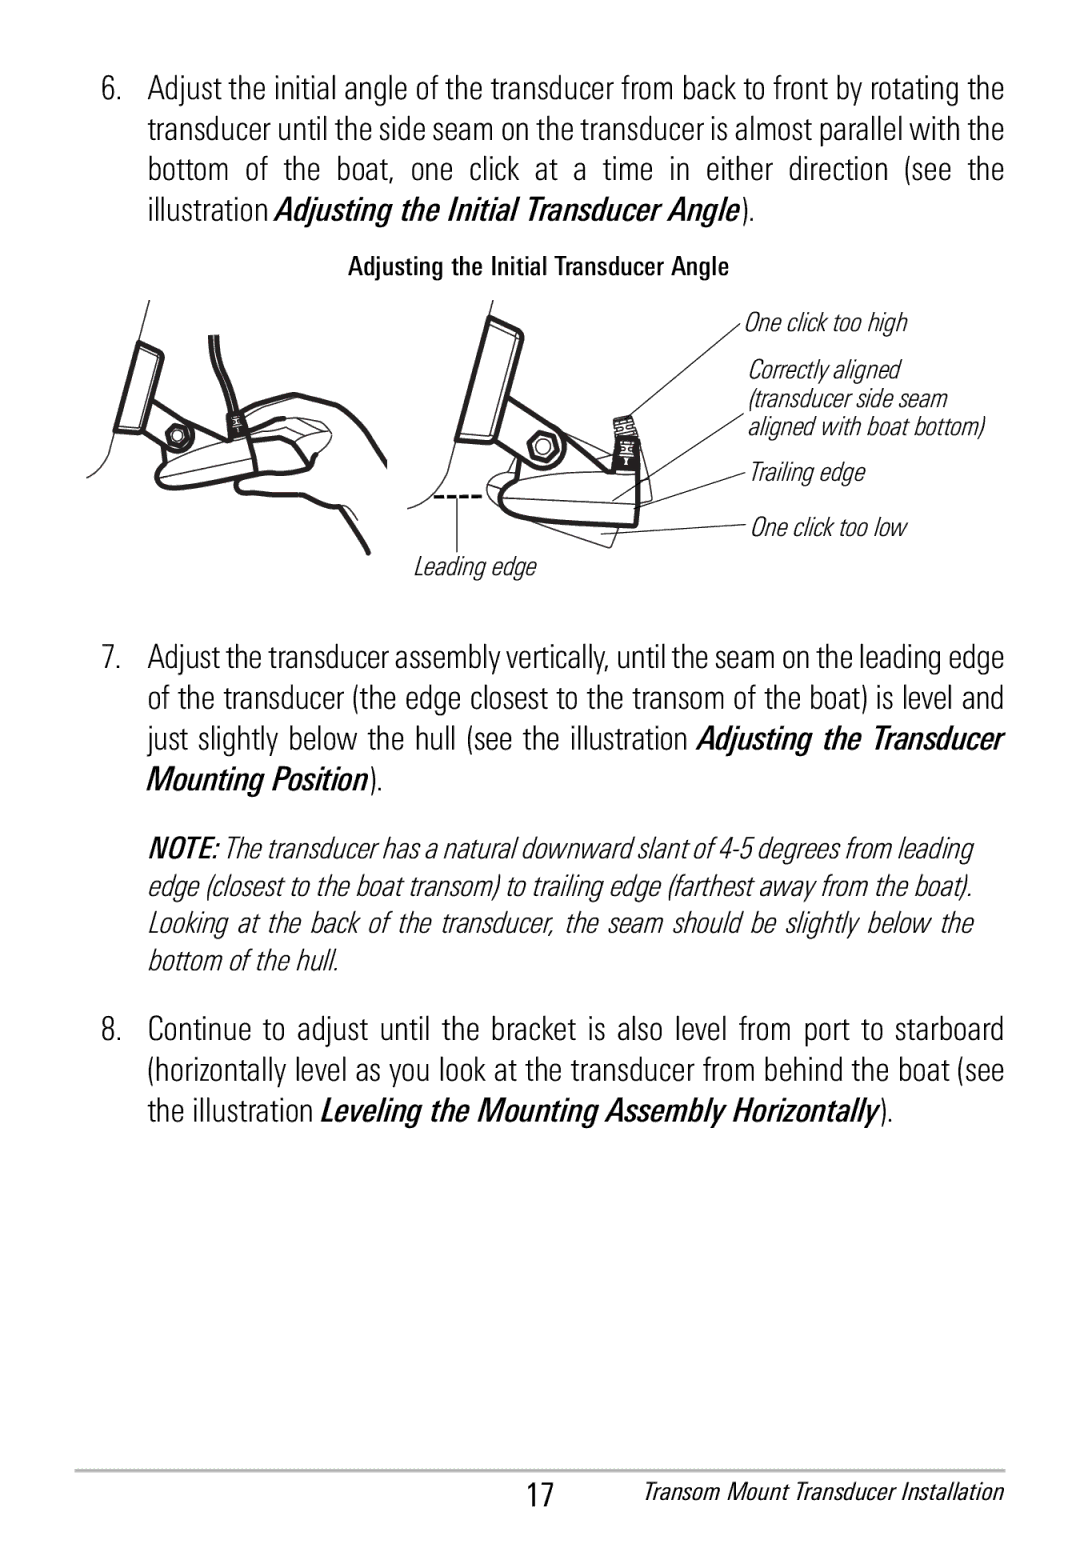
6.Adjust the initial angle of the transducer from back to front by rotatingthe transducer until the side seam on the transduceris almost parallelwith the bottom of the boat, one click at a time in either direction (see the illustration Adjusting the Initial Transducer Angle).
Adjusting the Initial Transducer Angle
One click too high
Correctlyaligned (transducerside seam aligned with boat bottom)
Trailingedge
 One click too low
Leading edge
7.Adjust the transducer assemblyvertically,untilthe seamon the leading edge of the transducer (the edge closestto the transom of the boat) is level and just slightly below the hull (see the illustration Adjusting the Transducer Mounting Position).
NOTE: The transducer has a natural downwardslant of
8.Continue to adjust until the bracket is also level from port to starboard (horizontally level as you look at the transducer from behind the boat (see the illustration Leveling the Mounting Assembly Horizontally).
17Transom Mount Transducer Installation
