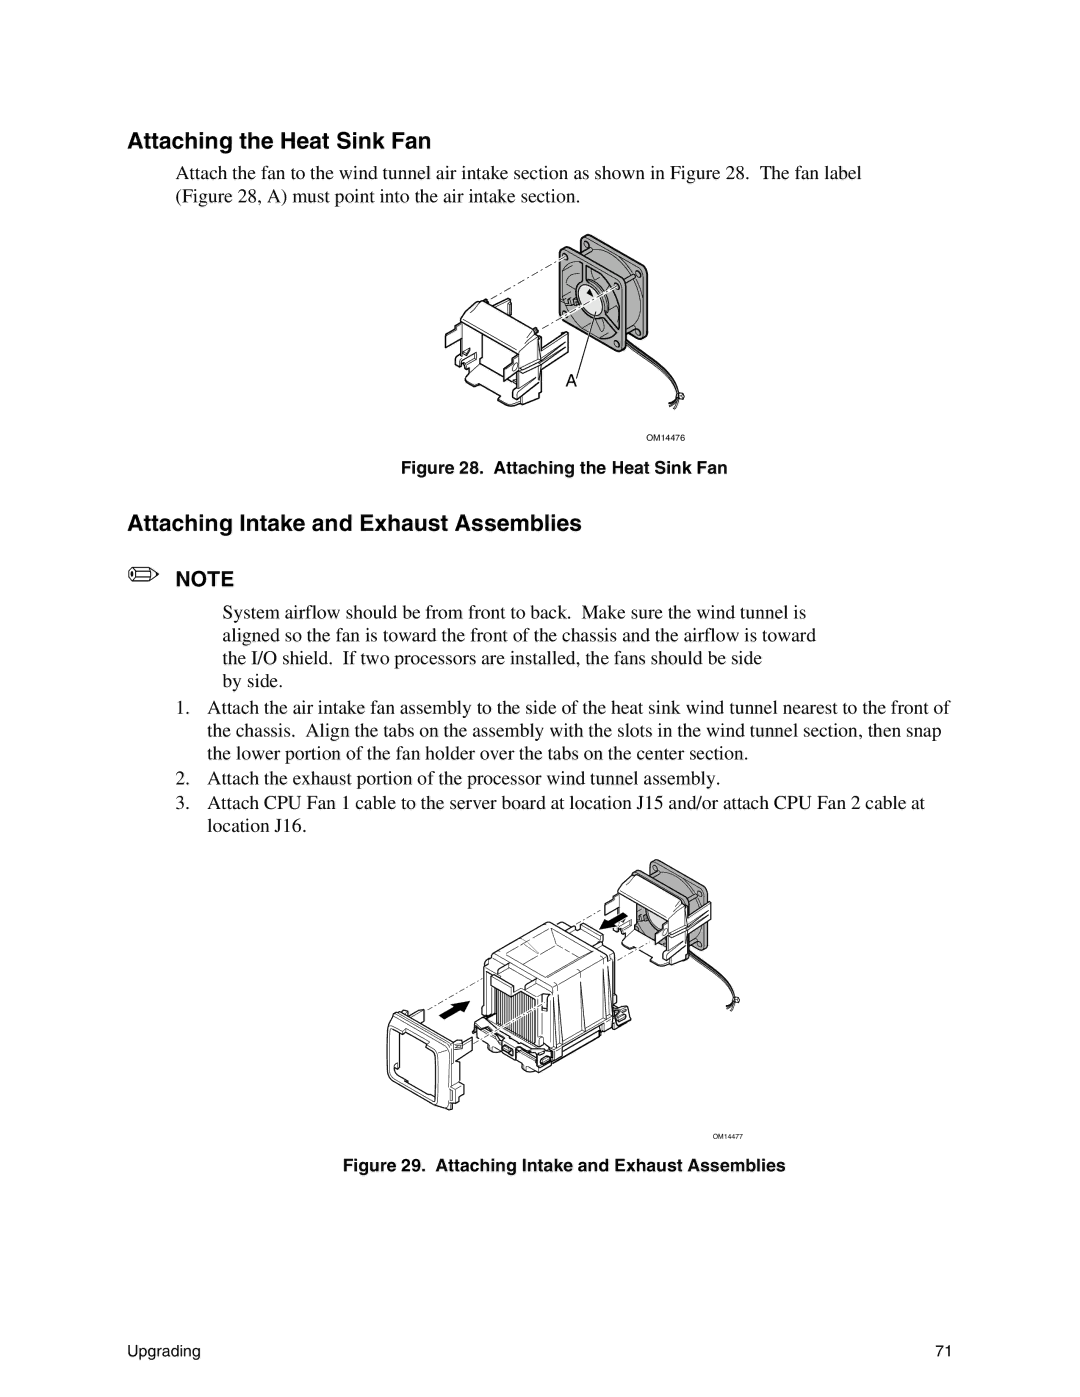
Attaching the Heat Sink Fan
Attach the fan to the wind tunnel air intake section as shown in Figure 28. The fan label (Figure 28, A) must point into the air intake section.
A
OM14476
Figure 28. Attaching the Heat Sink Fan
Attaching Intake and Exhaust Assemblies
✏NOTE
System airflow should be from front to back. Make sure the wind tunnel is aligned so the fan is toward the front of the chassis and the airflow is toward the I/O shield. If two processors are installed, the fans should be side
by side.
1.Attach the air intake fan assembly to the side of the heat sink wind tunnel nearest to the front of the chassis. Align the tabs on the assembly with the slots in the wind tunnel section, then snap the lower portion of the fan holder over the tabs on the center section.
2.Attach the exhaust portion of the processor wind tunnel assembly.
3.Attach CPU Fan 1 cable to the server board at location J15 and/or attach CPU Fan 2 cable at location J16.
OM14477
Figure 29. Attaching Intake and Exhaust Assemblies
Upgrading | 71 |