Establishing the Viewer Connection
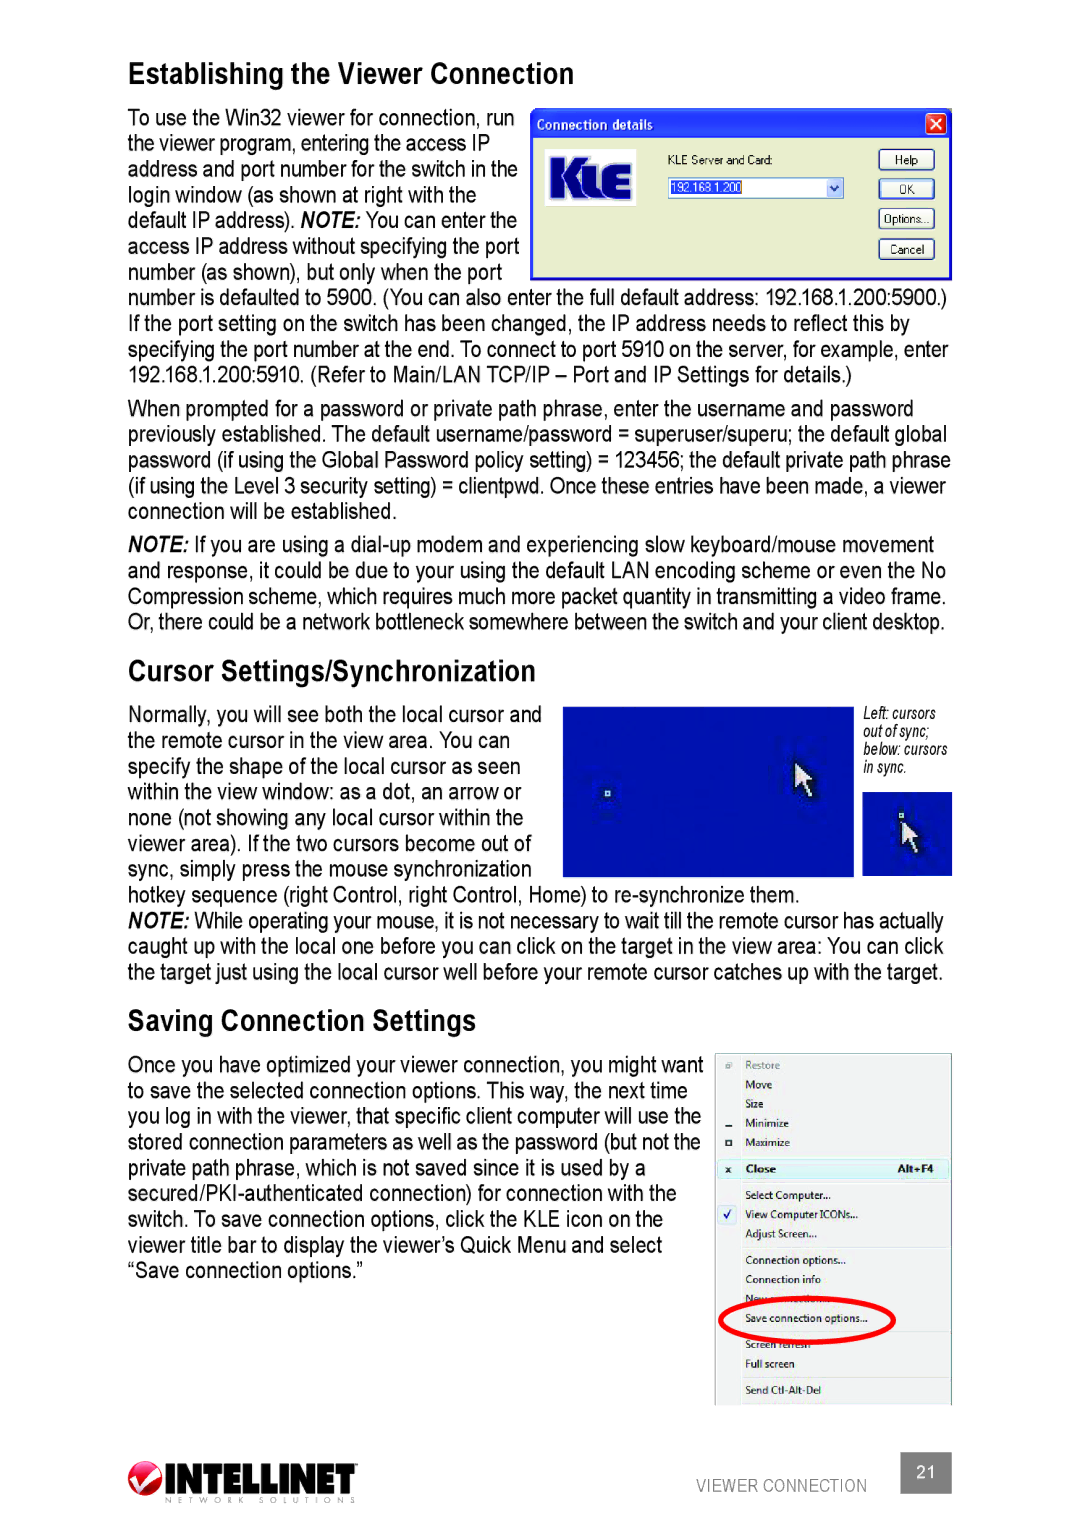
To use the Win32 viewer for connection, run the viewer program, entering the access IP address and port number for the switch in the login window (as shown at right with the default IP address). NOTE: You can enter the access IP address without specifying the port number (as shown), but only when the port
number is defaulted to 5900. (You can also enter the full default address: 192.168.1.200:5900.) If the port setting on the switch has been changed, the IP address needs to reflect this by specifying the port number at the end. To connect to port 5910 on the server, for example, enter 192.168.1.200:5910. (Refer to Main/LAN TCP/IP – Port and IP Settings for details.)
When prompted for a password or private path phrase, enter the username and password previously established. The default username/password = superuser/superu; the default global password (if using the Global Password policy setting) = 123456; the default private path phrase (if using the Level 3 security setting) = clientpwd. Once these entries have been made, a viewer connection will be established.
NOTE: If you are using a
Cursor Settings/Synchronization
Normally, you will see both the local cursor and the remote cursor in the view area. You can specify the shape of the local cursor as seen within the view window: as a dot, an arrow or none (not showing any local cursor within the viewer area). If the two cursors become out of sync, simply press the mouse synchronization
hotkey sequence (right Control, right Control, Home) to
NOTE: While operating your mouse, it is not necessary to wait till the remote cursor has actually
caught up with the local one before you can click on the target in the view area: You can click the target just using the local cursor well before your remote cursor catches up with the target.
Saving Connection Settings
Once you have optimized your viewer connection, you might want to save the selected connection options. This way, the next time you log in with the viewer, that specific client computer will use the stored connection parameters as well as the password (but not the private path phrase, which is not saved since it is used by a
VIEWER CONNECTION | 21 |
|
