power on/off and power cycling tasks via the (cascaded) power control module(s).
Side Panel
Power Adapter Jack
Use only the 9 V DC external power adapter included with the switch (shown connected at right) to avoid nullifying the warranty.
installation
Digital KVM over IP Switch Setup
1.Plug the included power adapter into the Digital KVM over IP Switch and an AC source, then turn on the switch.
2.Set up your local console by connecting a PS/2 keyboard, mouse and monitor to the proper keyboard, mouse and monitor ports on the switch (see Front and Rear Panel above).
3.Connect to one or more computers/servers as described below:
•Single Server Mode (see Page 5 configuration image): To connect to just one server or computer, simply connect the PC/KVM port on the back panel of the Digital KVM over IP Switch to the server/computer using the included
•Multiple Server Mode (see Page 6 configuration image): To connect to multiple servers/ computers, add a conventional KVM switch to the configuration by connecting to the PC/
KVM port or the console port of your Digital KVM over IP Switch using the included
Server Configuration
Mouse Acceleration
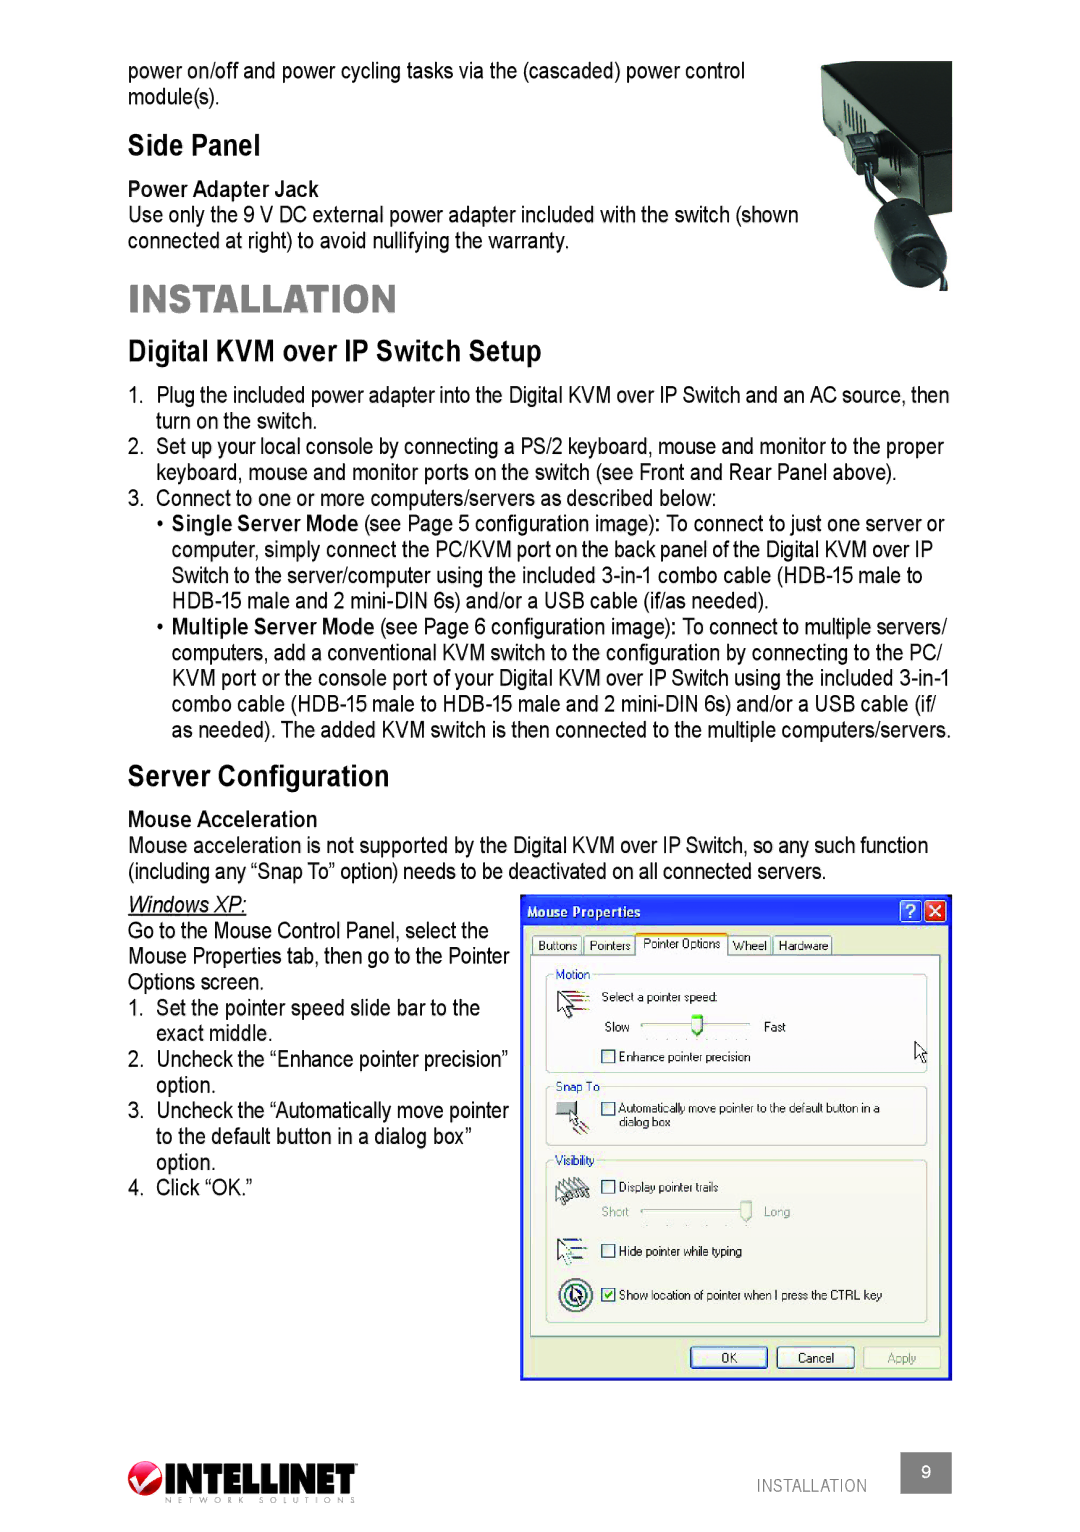
Mouse acceleration is not supported by the Digital KVM over IP Switch, so any such function (including any “Snap To” option) needs to be deactivated on all connected servers.
Windows XP:
Go to the Mouse Control Panel, select the
Mouse Properties tab, then go to the Pointer
Options screen.
1.Set the pointer speed slide bar to the exact middle.
2.Uncheck the “Enhance pointer precision” option.
3.Uncheck the “Automatically move pointer to the default button in a dialog box” option.
4.Click “OK.”
INSTALLATION
