Invacare 1080556 manual ANTI-TIPPER Facing Down, Installing/Adjusting Anti-Tippers

Models: 1080556

1 80
Download 80 pages 57.47 Kb
Page 54
Image 54

WHEEL LOCKS/ ANTI-TIPPERS

PROCEDURE 9

WHEEL LOCKS/ANTI-TIPPERS

2.Press the release buttons IN and install the anti-tippers with the wheels facing DOWN until the locking buttons lock in place as shown in FIGURE 3.

NOTE: Except for low seat-to-floor heights, ALL anti-tippers will install with the wheels facing DOWN.

3. Adjust the anti-tippers. Refer to ADJUSTING ANTI-TIPPERS in this procedure of the manual.

ADJUSTING

1.Depress the release button on the wheeled portion of the anti-tipper and slide it up/down to achieve 1-1/2 to 2-1/4-inch clearance.

WARNING

Anti-tippers MUST be fully engaged and release buttons fully protruding out of same respective adjustment holes BEFORE use. This will avoid a 3-Wheeling situation.

2.Ensure that the release buttons are fully engaged in the adjustment holes and 1-1/2 to 2-1/ 4-inch clearance is maintained.

3.If a 1-1/2 to 2-1/4-inch clearance cannot be obtained, turn the anti-tipper with the wheels facing UP as shown in FIGURE 3.

4.Repeat STEPS 1-3 for opposite side.

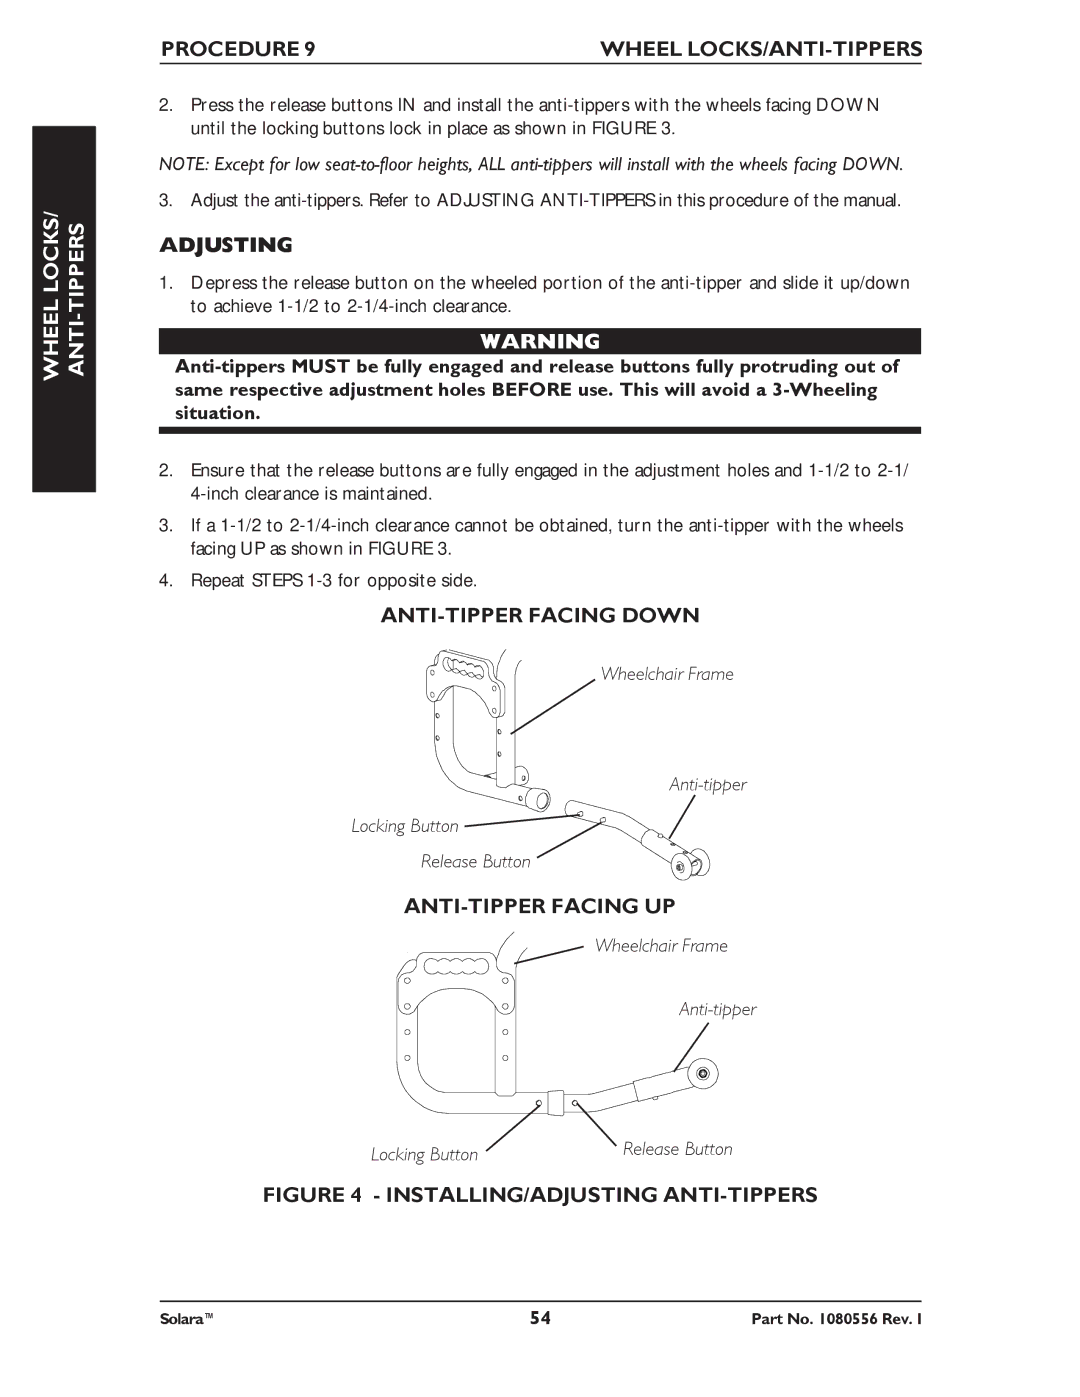
ANTI-TIPPER FACING DOWN

Wheelchair Frame

Anti-tipper

Locking Button

Release Button

ANTI-TIPPER FACING UP

Wheelchair Frame

Anti-tipper

Locking Button

Release Button

FIGURE 4 - INSTALLING/ADJUSTING ANTI-TIPPERS

Solara™

54

Part No. 1080556 Rev. I

Page 54
Image 54
Invacare 1080556 manual ANTI-TIPPER Facing Down, Installing/Adjusting Anti-Tippers